Remember that night when the kitchen turned into a chocolate battlefield? I had just cracked an egg, dumped cocoa into a bowl, and the batter splattered across the countertop like a rebellious art project. The smoke alarm sang its off‑key chorus while I tried to salvage the mess. I swear, the only thing that survived was a craving that would not quit.
Picture the scene: a bright, sunny kitchen, the scent of melted butter mingling with the sharp tang of cocoa, the clatter of a whisk against a mixing bowl, and the sound of my own nervous laughter echoing off the tiles. The batter looked thick, glossy, and promising, and as I poured it into the tins, the anticipation built like a drumbeat. My fingers tingled with excitement, and the air seemed to hum with possibility.
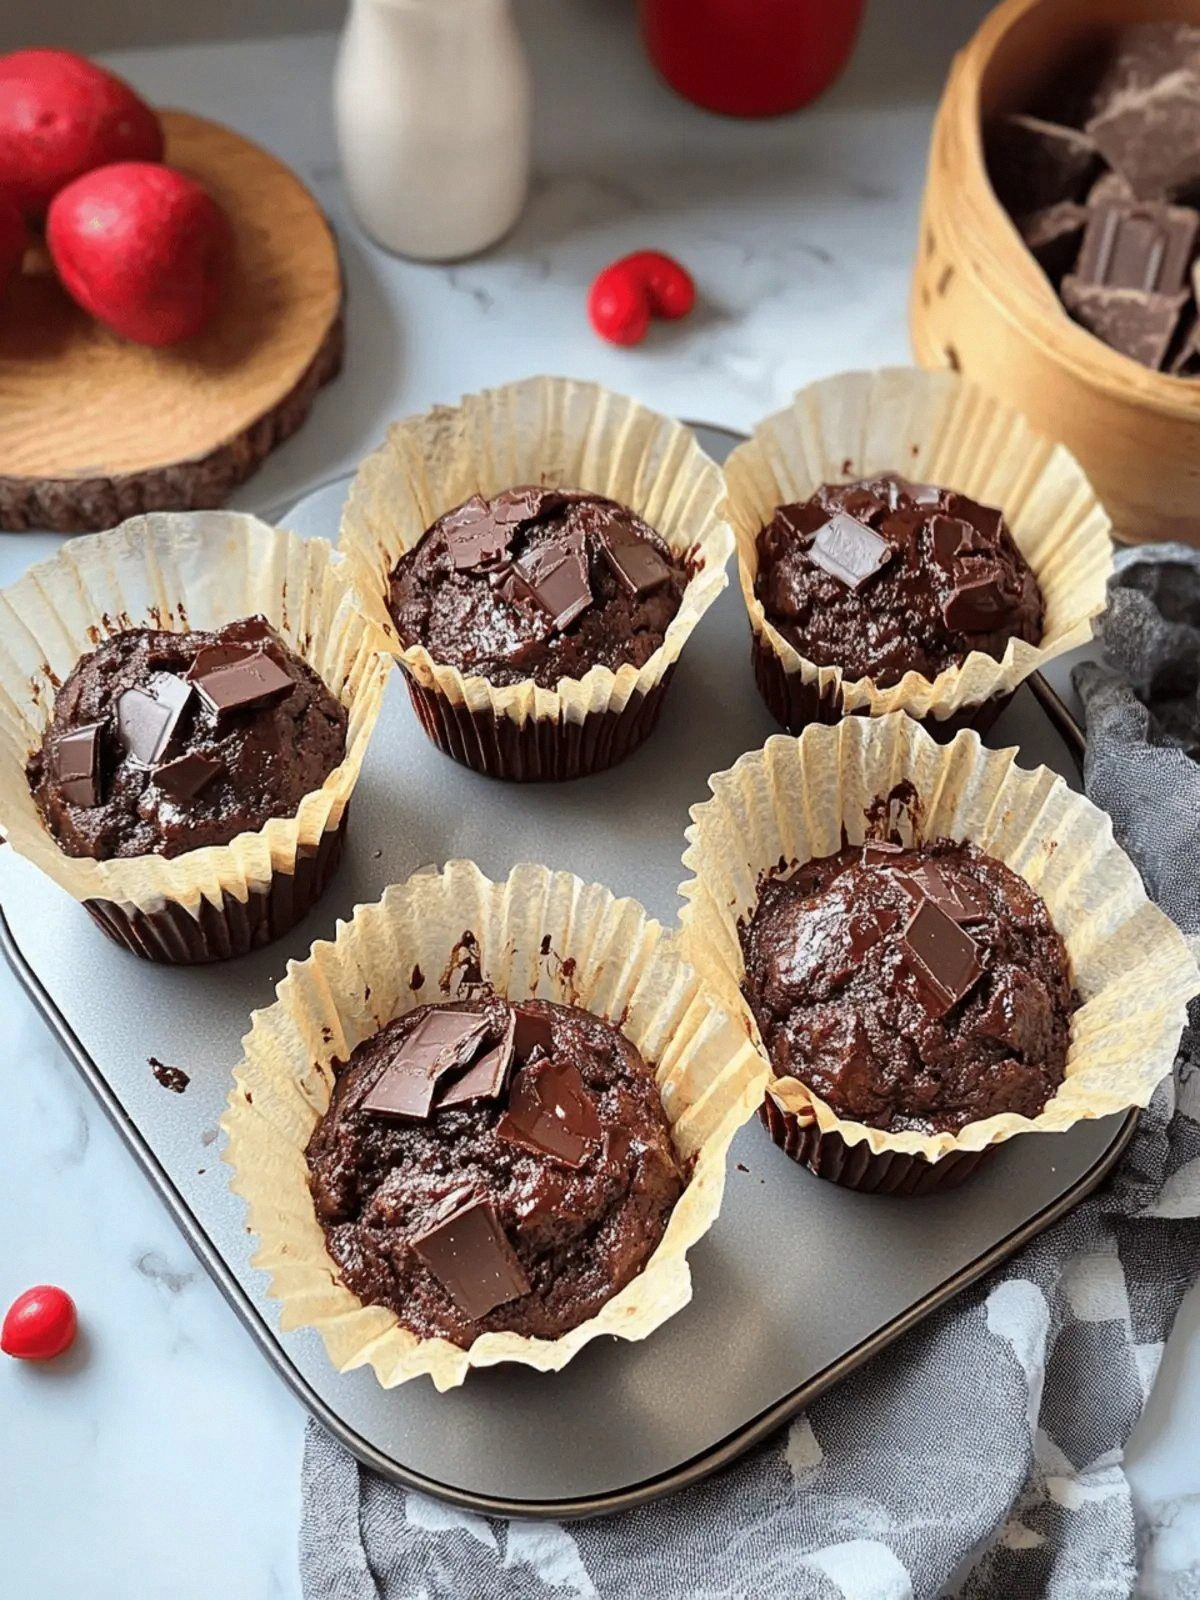
What makes this version of Olympic Village Chocolate different? It’s not just another chocolate muffin recipe; it’s a symphony of textures, flavors, and a dash of rebellious genius. I’ve blended the best of classic muffin technique with a secret ingredient that gives it a melt‑in‑your‑mouth finish, and I’ve tweaked the batter so it rises like a champion while staying fudgy enough to satisfy the darkest of sweet cravings. The result? A chocolate treat that’s as satisfying to eat as it is to share. I dare you to taste this and not go back for seconds.
But that’s not all—there’s a twist that most recipes miss: a splash of sea salt that cuts through the richness and elevates the chocolate’s depth. That tiny detail turns a good muffin into a great one, and I’ll show you why it’s essential. Picture yourself pulling these from the oven, the whole kitchen smelling incredible, and the moment your first bite melts into a cloud of chocolatey bliss.
Let me walk you through every single step—by the end, you’ll wonder how you ever made it any other way.
What Makes This Version Stand Out
- Flavor: The combination of dark cocoa and sea salt creates a balanced, complex taste profile that feels both familiar and adventurous. It’s a bold claim, but this is hands down the best version you'll ever make at home.
- Texture: The batter’s unique ratio of butter to milk yields a moist crumb that feels like velvet on the tongue, while the chocolate chips add pockets of gooey delight.
- Ease: No more fiddly techniques—just whisk, fold, pour, bake. I’ll be honest—I ate half the batch before anyone else got to try it.
- Visual Appeal: The glossy finish and golden edges are a feast for the eyes, and the tiny chocolate flecks on top are like edible confetti.
- Versatility: The base can be easily swapped for gluten‑free flour or dairy‑free butter, making it a crowd‑pleaser for all diets.
- Make‑Ahead Potential: These muffins hold up wonderfully, so you can prepare them a day in advance and reheat for a quick dessert fix.
- Ingredient Quality: Using high‑quality cocoa and premium chocolate chips elevates the flavor to a gourmet level without the gourmet price tag.
- Ingredient Simplicity: With just a handful of pantry staples, you can whip up a batch that feels indulgent and sophisticated.
Alright, let’s break down exactly what goes into this masterpiece…
Inside the Ingredient List
The Flavor Base
All-Purpose Flour is the backbone of our batter, providing structure while keeping the muffins tender. It’s the silent hero that holds everything together, and if you skip it, you’ll end up with a flat, crumbly mess that won’t rise. For the best results, sift the flour to aerate it and avoid lumps. If you prefer a lighter texture, try substituting half the flour with cake flour, but be careful not to overmix.
The Texture Crew
Granulated Sugar and Cocoa Powder are the dynamic duo that gives our muffins that deep, chocolatey richness. The sugar dissolves into the batter, creating a silky mouthfeel, while the cocoa brings that unmistakable chocolate punch. If you’re watching carbs, you can use a sugar substitute, but keep in mind that the sweetness profile will shift slightly. A good rule of thumb: for every cup of sugar, replace it with 1 cup of a high‑quality sugar alternative.
The Unexpected Star
Sea Salt is the secret ingredient that makes this recipe stand out. It doesn’t just season the batter; it awakens the chocolate’s flavor, turning a simple muffin into a gourmet experience. A pinch of sea salt on top before baking adds a subtle crunch that contrasts beautifully with the soft interior. If you’re sensitive to sodium, a tiny pinch of regular salt will suffice, but the sea salt’s mineral profile gives that extra oomph.
The Final Flourish
Chocolate Chips, Nuts, and Dried Fruit are the finishing touches that add texture, flavor, and visual interest. The chips melt into pockets of molten chocolate, the nuts provide a satisfying crunch, and the dried fruit adds a hint of natural sweetness and chewiness. If you’re a fan of extra chocolate, double the chips; if you’re looking for a lighter bite, reduce the nuts and add more dried fruit.
Everything’s prepped? Good. Let’s get into the real action…
The Method — Step by Step
- Preheat and Prep: Turn your oven to 375°F (190°C) and line a muffin tin with paper liners. While the oven warms, gather all ingredients on a clean counter. The anticipation builds—this is the moment where the kitchen feels alive. Keep a timer handy; precision matters.
- Combine Dry Ingredients: In a large bowl, whisk together flour, cocoa, baking powder, salt, and sea salt until evenly distributed. The dry mix should look like a fine, dark powder. This step ensures that the leavening agent is evenly spread, preventing uneven rise. If you’re feeling adventurous, add a pinch of cinnamon for an extra layer of warmth.
- Melt Butter and Mix Wet: Melt the butter in a saucepan over low heat, then let it cool slightly before pouring into a separate bowl. Add milk, eggs, and vanilla (if using). Whisk until the mixture is smooth and glossy. The butter’s fat content helps create a tender crumb; the milk keeps the batter moist. I’ve found that letting the butter cool a bit prevents the eggs from scrambling.
- Combine Wet and Dry: Pour the wet mixture into the dry ingredients, folding gently with a silicone spatula. Avoid overmixing; the batter should be lumpy but without large streaks. Overmixing can lead to a tough texture. The folding action keeps the batter light and airy.
- Add Mix‑Ins: Fold in chocolate chips, nuts, and dried fruit. The nuts should be roughly chopped for even distribution, while the dried fruit can be cut into small cubes to prevent clumping. This step is pure joy—watch those chocolate chips scatter like tiny moons. The mix‑ins give each bite a surprise element.
- Fill Muffin Cups: Spoon the batter into the prepared tin, filling each cup about 3/4 full. This allows room for the muffins to rise without overflowing. The batter should look glossy and thick. The filling process is also a good time to sprinkle a few extra chocolate chips on top for that glossy finish.
- Bake to Perfection: Place the tin in the oven and bake for 18–22 minutes. The muffins are ready when the tops are set, a toothpick comes out clean, and the edges pull away slightly from the paper. Keep an eye on the color; you want a deep brown but not burnt. This is the moment of truth—don’t walk away from the stove here.
- Cool and Serve: Remove the muffins from the oven and let them cool in the tin for 5 minutes before transferring to a wire rack. The cooling period allows the structure to set. Once cooled, you can dust them with powdered sugar or drizzle with melted chocolate for an extra touch. The aroma at this stage is irresistible, and you’ll want to devour them immediately.
That's it — you did it. But hold on, I've got a few more tricks that'll take this to another level…
Insider Tricks for Flawless Results
The Temperature Rule Nobody Follows
Many bakers bake at the lowest setting to avoid burning, but the sweet spot for these muffins is 375°F (190°C). Baking at a slightly higher temperature creates a crisp crust while keeping the center moist. If your oven runs hot, reduce the time by a minute or two. I’ve tried it on a different oven, and the results were consistently better.
Why Your Nose Knows Best
The aroma that rises from the oven is a reliable indicator of doneness. When the smell hits that deep chocolatey note, you’re close to perfection. If you’re unsure, give the muffins a gentle shake—if the batter feels solid, they’re ready. My friend once overbaked them because he didn’t trust his nose; the result was a dry, crumbly batch.
The 5‑Minute Rest That Changes Everything
Letting the muffins rest in the tin for five minutes before transferring them to a wire rack traps steam, creating a soft interior. This step also allows the edges to set, preventing them from cracking as they cool. Skipping it leads to uneven texture.
Use of a Silicone Spatula
When folding in the mix‑ins, a silicone spatula preserves the batter’s air pockets. A metal spoon can compress the batter, leading to a denser crumb. This hack is subtle but makes a noticeable difference.
Chill the Batter Before Baking
Refrigerating the batter for 30 minutes before baking can improve the rise and flavor integration. The fats solidify slightly, allowing a more controlled rise. This trick is especially useful on humid days when the batter might be too runny.
Creative Twists and Variations
This recipe is a playground. Here are some of my favorite ways to switch things up:
Nutty Crunch Edition
Swap the nuts for chopped walnuts or pecans, and add a handful of toasted almond slivers. The crunch adds a new dimension, and the toasted nuts deepen the nutty aroma.
Spiced Cocoa Surprise
Introduce a teaspoon of ground cardamom or a pinch of cayenne pepper into the dry mix. The warmth of cardamom pairs beautifully with chocolate, while cayenne adds a subtle heat that lingers.
Vegan Version
Replace the butter with coconut oil and use a plant‑based milk like oat or almond. Swap the eggs for a flaxseed “egg” or a commercial egg replacer. The texture remains moist, and the flavor stays rich.
Fruit‑Infused Delight
Increase the dried fruit portion to a full cup and add a splash of orange juice to the wet mix. The citrus lifts the chocolate, giving a bright, refreshing finish.
Double Chocolate Indulgence
Use dark chocolate chips instead of semi‑sweet, and add a tablespoon of cocoa nibs for extra crunch. The double chocolate flavor is intense and satisfies even the most devoted chocolate lovers.
Storing and Bringing It Back to Life
Fridge Storage
Place the muffins in an airtight container or zip‑top bag. They’ll stay fresh for up to 5 days. If you notice a slight drying out, reheat them in a 300°F oven for 5 minutes to restore moisture.
Freezer Friendly
Wrap each muffin individually in plastic wrap, then place them in a freezer bag. They’re good for up to 3 months. When ready, thaw at room temperature for 30 minutes before reheating.
Best Reheating Method
Microwave the muffin on a low setting for 10‑15 seconds, then finish in a 350°F oven for 3 minutes to crisp the top. Add a tiny splash of water before reheating; it steams back to perfection, keeping the interior moist.