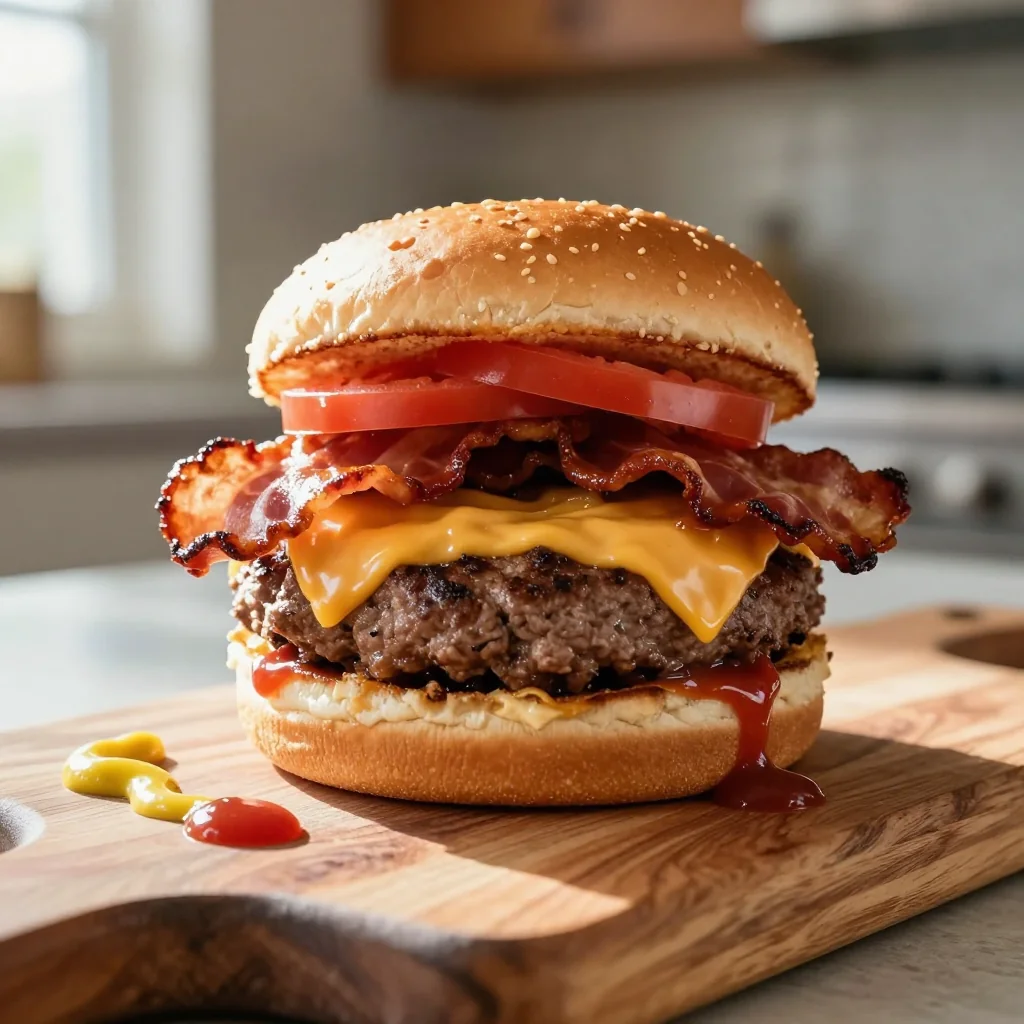
Juicy beef patties layered with melted cheese and crispy bacon, served on toasted buns for the ultimate comfort bite.
There’s a particular magic that happens when the sizzle of a beef patty meets the smoky aroma of bacon and the gooey pull of melted cheese. I still remember the first time I tasted a burger like this on a rainy afternoon in a small roadside diner; the combination of textures and flavors felt like a warm hug for my taste buds. The memory sparked a curiosity that led me to perfect my own version at home, tweaking each component until it sang in harmony.
This classic American staple has its roots in the early 20th‑century diners of the Midwest, where busy workers needed a quick, hearty meal that could fuel a long day. Over the decades, the burger evolved, embracing regional twists and premium ingredients. Today, a well‑crafted beef burger with cheese and bacon stands as a celebration of indulgence and simplicity.
In this guide, I’ll walk you through every step—from selecting the right cut of meat to achieving the perfect melt on your cheese, and mastering the art of layering crispy bacon without overwhelming the burger. You’ll learn the science behind a juicy patty, the secrets of a buttery toasted bun, and how to balance flavors so each bite is unforgettable.
Grab your apron, preheat the grill, and let’s embark on a culinary adventure that will make your kitchen smell like a gourmet burger joint.
🌟 Why This Recipe Will Captivate You
From the first bite to the last, this burger delivers a symphony of flavors and textures that keep you coming back for more.
- ✨ Perfect Juiciness: The blend of ground chuck and short rib ensures a tender, moist patty that stays succulent even after grilling.
- ✨ Layered Flavor: Crispy bacon adds a smoky crunch, while aged cheddar melts into a creamy blanket that ties everything together.
- ✨ Textural Contrast: The toasted brioche bun offers a buttery softness that contrasts beautifully with the crisp lettuce and fresh tomato.
- ✨ Simple Yet Gourmet: With just a handful of high‑quality ingredients, you achieve a restaurant‑level burger without complex techniques.
- ✨ Customizable: The recipe is built on a solid foundation, allowing you to swap cheeses, add sauces, or incorporate extra toppings.
- ✨ Crowd‑Pleaser: Whether it’s a family dinner or a backyard barbecue, this burger satisfies meat lovers and picky eaters alike.
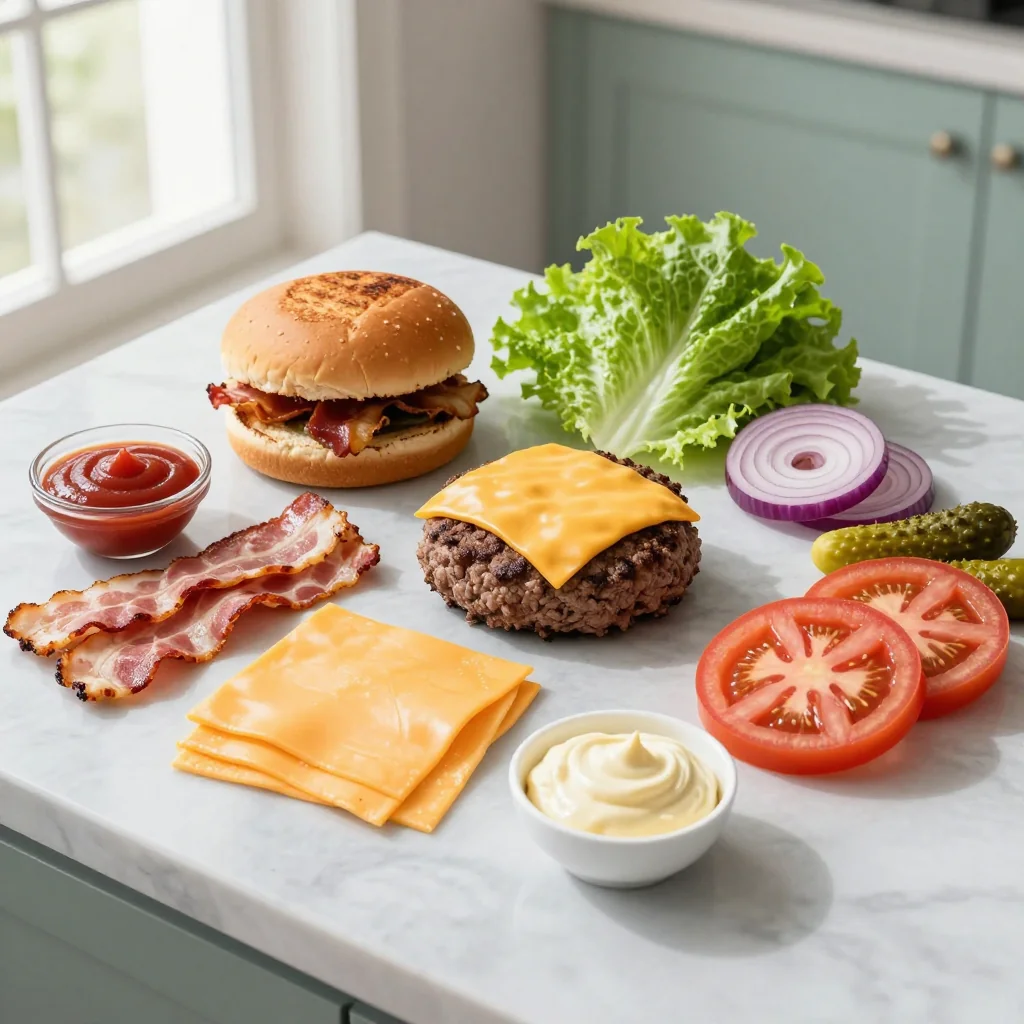
🥗 Ingredients
📝 Complete Ingredient List
For the Patties:
For the Toppings & Assembly:
🔍 Focus on Key Ingredients
Ground Beef (80/20)
The 80/20 ratio provides enough fat to keep the patty juicy while still delivering a robust beef flavor. When forming the patties, handle the meat gently; over‑mixing can cause a dense texture.
Thick‑Cut Bacon
Choosing thick‑cut bacon ensures each bite has a satisfying crunch and smoky depth. Render it slowly over medium heat so the fat melts away, leaving a crisp, caramelized slice that won’t soggify the bun.
Aged Cheddar
Aged cheddar offers a sharp, tangy bite that melts beautifully over the hot patty. Its firm texture prevents it from becoming overly runny, providing that perfect cheese pull.
🔄 Quick Substitutions
| If you don’t have... | Use instead... |
|---|---|
| Ground short rib | Ground chuck |
| Thick‑cut bacon | Regular bacon (cook a little longer) |
| Aged cheddar | Sharp cheddar or Gruyère |
👨🍳 Step‑by‑Step Instructions
Follow these detailed steps to create a burger that’s juicy, flavorful, and perfectly balanced. Take your time with each phase, and you’ll be rewarded with a mouth‑watering masterpiece.
📋 Phase 1: Preparation & Mise en Place
Gather and prep all components before you fire up the grill.
Prepare the Beef Mixture
In a large bowl, combine the ground beef and ground short rib. Add Worcestershire sauce, sea salt, and black pepper. Gently fold the seasonings into the meat using your hands; avoid over‑working to keep the texture light. Once mixed, divide the mixture into four equal portions and shape each into a 1‑inch thick patty, making a small indentation in the center to prevent bulging during cooking.
Slice and Toast the Buns
Slice the brioche buns horizontally. Lightly butter the cut sides and place them on a hot skillet for 30 seconds, or until golden brown. This step adds a buttery crunch that prevents the bun from becoming soggy from the burger juices.
🔥 Phase 2: Cooking & Assembly
Cook the components to perfection and start building the burger.
Cook the Bacon
Lay the bacon strips in a cold skillet and turn the heat to medium‑low. Cook slowly, turning occasionally, until the fat renders and the bacon turns deep golden‑brown, about 8‑10 minutes. Transfer to a paper‑towel‑lined plate to drain excess grease.
Grill the Patties
Preheat a grill or cast‑iron skillet to high heat. Place the patties on the grill, indentation side up, and cook for 3‑4 minutes. Flip once, then add a slice of cheddar on top of each patty. Cover the grill or skillet for another 2‑3 minutes, allowing the cheese to melt fully. The internal temperature should reach 160°F (71°C) for safe consumption.
Assemble the Burger
On the bottom half of each toasted bun, layer lettuce, a tomato slice, and red onion. Place the cheesy patty on top, followed by two strips of crispy bacon. Add pickles, a drizzle of ketchup and mustard, then cap with the top bun. Press gently to meld flavors.
✨ Phase 3: Finishing Touches & Serving
Final checks and plating for a stunning presentation.
Check Doneness
Insert a meat thermometer into the center of each patty. Ensure it reads at least 160°F (71°C). If you prefer a slightly pink center, aim for 145°F (63°C) but be aware of food safety guidelines.
Plate the Burger
Place each assembled burger on a large plate. Add a side of crisp fries or a light salad to balance the richness. Garnish with a sprig of fresh parsley for a pop of color.
Serve Immediately
Serve the burgers hot, while the cheese is still oozing and the bacon remains crisp. Encourage guests to bite in, enjoying the layers of flavor in each mouthful.
💡 Expert Tips & Tricks
🛒 Choosing the Right Ingredients
When shopping, look for grass‑fed beef with a bright red color and fine marbling. The fat is essential for juiciness. For bacon, select slabs that are thick and have a good meat‑to‑fat ratio; avoid overly cured varieties that can be too salty. Aged cheddar should have a deep orange hue and a firm snap when broken, indicating proper aging.
🔪 Preparation Techniques
Keep all meat components chilled until the moment of cooking; cold fat renders more evenly. Form patties just before cooking to prevent the meat from warming up. Press the patty gently with your thumb to create a shallow dimple; this prevents the center from puffing up.
🌡️ Mastering the Cooking Process
Preheat your grill or skillet to a high temperature (around 450°F/230°C). A hot surface creates a flavorful crust while sealing in juices. Avoid pressing the patty with a spatula, as this forces out the precious juices. Let the patty rest for 2‑3 minutes after cooking; this redistributes the juices throughout the meat.
🍽️ Presentation & Service
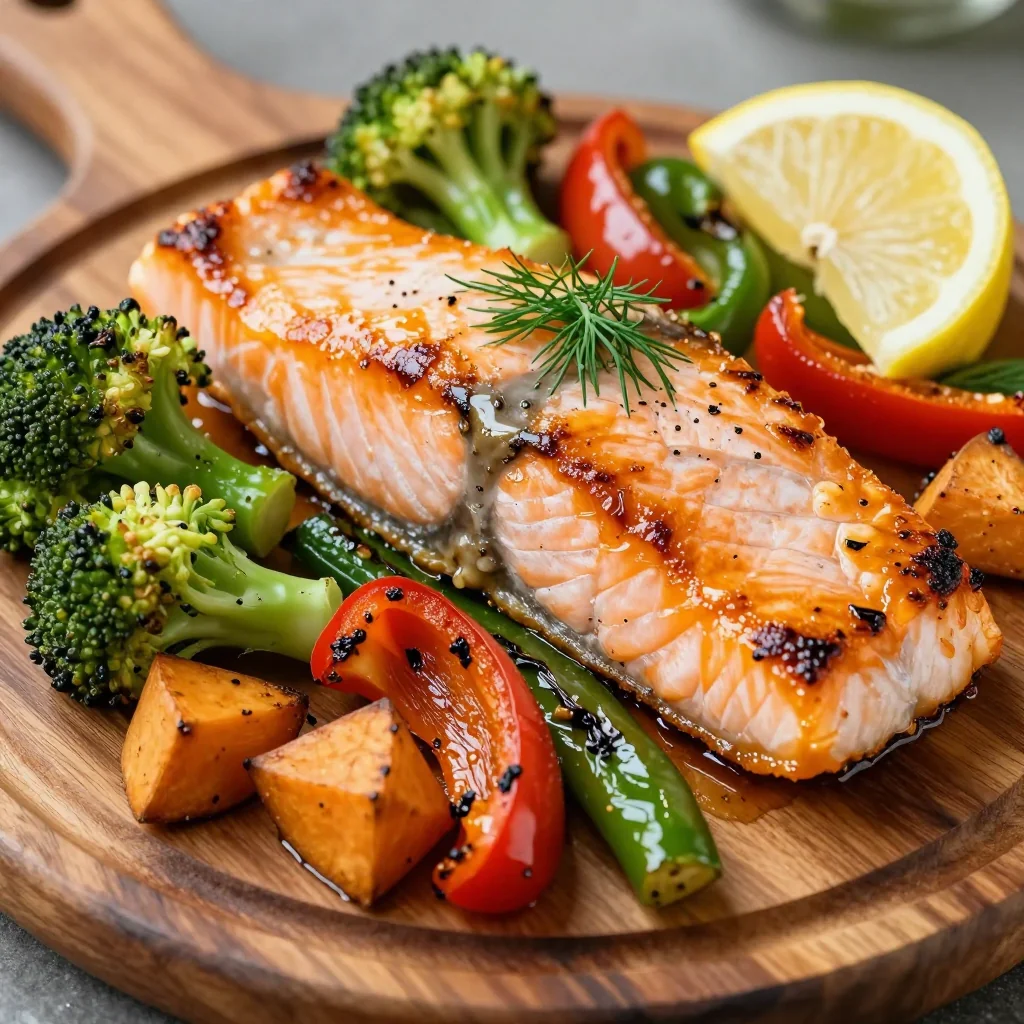
Arrange the burger on a wide, white plate to showcase the layers. Use a small ramekin for extra ketchup or aioli on the side. For a visual boost, add a thin slice of avocado or a drizzle of chipotle mayo for color contrast. Serve with a side of sweet potato fries for a complementary sweet‑savory balance.
🏆 Pro Secrets
Elevate your burger from great to unforgettable with these professional techniques.
- 🎯 Salt the Meat Early: Sprinkle a light layer of kosher salt on the ground beef 30 minutes before shaping. The salt draws out moisture, which then re‑absorbs, resulting in a more tender patty.
- 🎯 Use a Two‑Stage Grill: Start with high heat for searing, then move the patties to a cooler zone to finish cooking evenly without burning the exterior.
- 🎯 Butter the Buns Lightly: Melt a small amount of clarified butter and brush it onto the buns. This prevents the buns from soaking up the burger juices and adds a subtle nutty flavor.
- 🎯 Add a Touch of Umami: Mix a teaspoon of soy sauce or a dash of fish sauce into the meat mixture for a depth of flavor that enhances the beef’s natural richness.
- 🎯 Rest the Bacon: After cooking, let the bacon rest on a wire rack for a minute. This allows excess fat to drip away, keeping the bacon crisp without excess grease.
- 🎯 Finish with a Flip of Fresh Herbs: Sprinkle finely chopped chives or parsley over the assembled burger just before serving; the fresh herb aroma lifts the entire dish.
“A great burger is a balance of texture, temperature, and flavor—master these and you’ve mastered comfort food.” — Gordon Ramsay
🔄 Variations & Adaptations
The beauty of this burger lies in its flexibility. Feel free to experiment with proteins, cheeses, and seasonings to suit your palate or dietary needs.
🥬 Vegetarian / Vegan Version
Swap the beef patty for a plant‑based blend made from black beans, quinoa, and smoked paprika. Use vegan cheddar and tempeh bacon. The same assembly method applies, delivering a hearty, animal‑free alternative.
- Replace ground beef with 400 g of cooked black beans, mashed.
- Replace bacon with 8 slices of smoked tempeh, marinated and pan‑fried.
🌶️ Flavor Variations
Explore different flavor profiles by adjusting the cheese, sauces, or spices.
Spicy Version
Add a slice of pepper jack cheese, a dash of chipotle hot sauce, and a sprinkle of crushed red pepper flakes for a fiery kick.
Mediterranean Version
Swap cheddar for feta, add a drizzle of tzatziki, and include roasted red peppers and arugula for a bright, herbaceous twist.
Asian‑Inspired Version
Use a blend of soy‑marinated beef, top with a slaw of cabbage, carrots, and a sesame‑ginger dressing, and finish with a slice of melted provolone.
⚠️ Dietary Adaptations
Gluten‑Free
Use gluten‑free buns or lettuce wraps in place of brioche. Ensure any sauces are certified gluten‑free.
Lactose‑Free
Replace cheddar with a lactose‑free cheese alternative or a slice of dairy‑free provolone.
Low‑Calorie
Use lean ground turkey instead of beef, turkey bacon, and a reduced‑fat cheese. Serve on a whole‑grain or lettuce bun to cut calories while maintaining volume.
👶 Kid‑Friendly Version
Reduce the amount of bacon and use a milder cheese like mild cheddar. Serve with a side of sweet potato wedges and a small dip of ketchup to keep flavors simple and appealing for young palates.
📦 Storage & Reheating
🧊 Storage
Refrigerator:
- Duration: 3 days
- Container: Airtight plastic container
- Tip: Place a paper towel at the bottom to absorb excess moisture.
Freezer:
- Duration: 2 months
- Method: Wrap each assembled burger tightly in parchment, then place in a freezer‑safe bag.
- Defrosting: Transfer to the refrigerator overnight before reheating.
💡 For optimal flavor, reheat within a week of freezing and avoid thawing at room temperature.
♨️ Reheating
🔥 Oven (Recommended):
- Preheat to 180°C (350°F).
- Cover the burger loosely with aluminum foil.
- Heat for 8‑10 minutes.
- Remove foil and continue for 2‑3 minutes to crisp the bun.
⚡ Microwave (Quick):
- Place the burger on a microwave‑safe plate.
- Cover with a microwave‑safe lid.
- Heat on medium power for 1 minute, then check.
- Heat in 30‑second increments until hot.
🍳 Skillet:
Heat a non‑stick skillet over medium heat, add a splash of water, cover, and warm for 4‑5 minutes, flipping halfway. This method revives the crispness of the bacon.
🍷 Perfect Pairings
🥗 Side Dishes
- Classic French Fries: Crispy, salted potatoes provide a satisfying crunch that mirrors the bacon.
- Coleslaw: A tangy cabbage slaw cuts through the richness and adds a refreshing bite.
- Grilled Corn on the Cob: Sweet, smoky corn complements the burger’s savory profile.
🍷 Wine & Drink Pairings
- Cabernet Sauvignon: Its bold tannins and dark fruit notes balance the beef and bacon.
- IPA Beer: The hop bitterness contrasts nicely with the cheese’s richness.
- Non‑Alcoholic: A sparkling apple cider offers acidity and fizz without overwhelming the palate.
🍰 Completing the Meal
Start with a light mixed greens salad dressed with lemon vinaigrette, then finish with a mini chocolate mousse or a warm apple crumble for a sweet, comforting end.
❓ Frequently Asked Questions
Q: Can I use a different type of cheese?
A: Absolutely! While aged cheddar provides a sharp, melt‑friendly profile, you can substitute it with Swiss, provolone, or even a pepper jack for extra heat. Just ensure the cheese slices are thin enough to melt quickly over the hot patty.
Q: How do I prevent the burger from shrinking?
A: Over‑mixing the meat and forming overly compact patties can cause shrinkage. Keep the mixture gentle, make a small indentation in the center, and cook on high heat for a quick sear that locks in juices.
Q: What if I don’t have a grill?
A: A heavy cast‑iron skillet works perfectly. Preheat it until it’s smoking hot, then sear the patties on each side for 3‑4 minutes. Finish with a lid to melt the cheese.
Q: Can I make the burger ahead of time?
A: Yes. Prepare the patties and store them uncovered in the fridge for up to 24 hours. This dry‑aging process intensifies flavor. Cook them when ready, and assemble just before serving.
Q: How can I make the burger less greasy?
A: Use a leaner beef blend (e.g., 85/15) and render the bacon on low heat, draining excess fat onto paper towels. Pat the cooked patties with a paper towel before assembling.
Q: Is there a way to add a smoky flavor without bacon?
A: Incorporate a teaspoon of smoked paprika or a few drops of liquid smoke into the meat mixture. This will give a subtle smokiness that mimics bacon’s depth.
🎉 Let’s Get Cooking!
This Beef Burger with Cheese and Bacon combines classic comfort with gourmet flair. By selecting premium ingredients, mastering the cooking technique, and paying attention to each layer, you’ll create a burger that’s juicy, flavorful, and unforgettable. Remember, the key lies in balance—juicy meat, melty cheese, crisp bacon, and a toasted bun—all coming together in perfect harmony.
Give this recipe a try, share your results, and feel free to ask any questions in the comments. Your feedback helps us refine the recipe and inspire other home cooks.
Have you tried this recipe?
Leave a comment and rating below! Share your photos on Instagram with #BurgerFiesta for a chance to be featured.
Beef Burgers with Cheese and Bacon
Juicy beef patties topped with melted cheddar and crispy bacon, served on buttery brioche buns.
📝 Ingredients
Patties
Toppings & Assembly
👨🍳 Instructions
- 1
Combine ground beef, short rib, Worcestershire, salt, and pepper; shape into four patties with a thumb indentation.
- 2
Butter and toast brioche buns until golden.
- 3
Cook bacon low and slow until crisp; drain on paper towels.
- 4
Grill patties 3‑4 min per side; add cheddar on the last minute and cover to melt.
- 5
Assemble: bun bottom → lettuce → tomato → onion → patty with cheese → bacon → pickles/ketchup/mustard → bun top.
- 6
Serve immediately with fries or salad.
- 7
Enjoy the juicy, cheesy, smoky goodness!
- 8
Store leftovers according to the storage guide.
- 9
Reheat using the recommended methods for best texture.
- 10
Share your creation on social media and let us know how it turned out.
🥗 Nutritional Information (per serving)
*Values are approximate and may vary based on ingredient brands.
📚 You Might Also Like
Classic Cheeseburger
Spicy Jalapeño Bacon Burger
Mushroom Swiss Burger


💬 Comments & Reviews
Leave a Comment
No comments yet. Be the first to share your thoughts!