I was halfway through a Sunday roast, the table already set with roast, potatoes, and a pot of drippings that looked like a glossy, savory waterfall, when I realized the gravy was about to turn into a greasy, clumpy mess. The kitchen smelled like a failed attempt at culinary alchemy, and I was staring at the pan, wondering if the gravy would ever rise to the occasion. I swear, the sound of the sizzling fat was the soundtrack of my frustration, and every time I tried to whisk, the mixture clung stubbornly to the bottom like a stubborn stain. In that moment, I made a promise to myself: this gravy would be the best, smooth, velvety sauce that would never require a rag or a strainer, and I was determined to prove it.
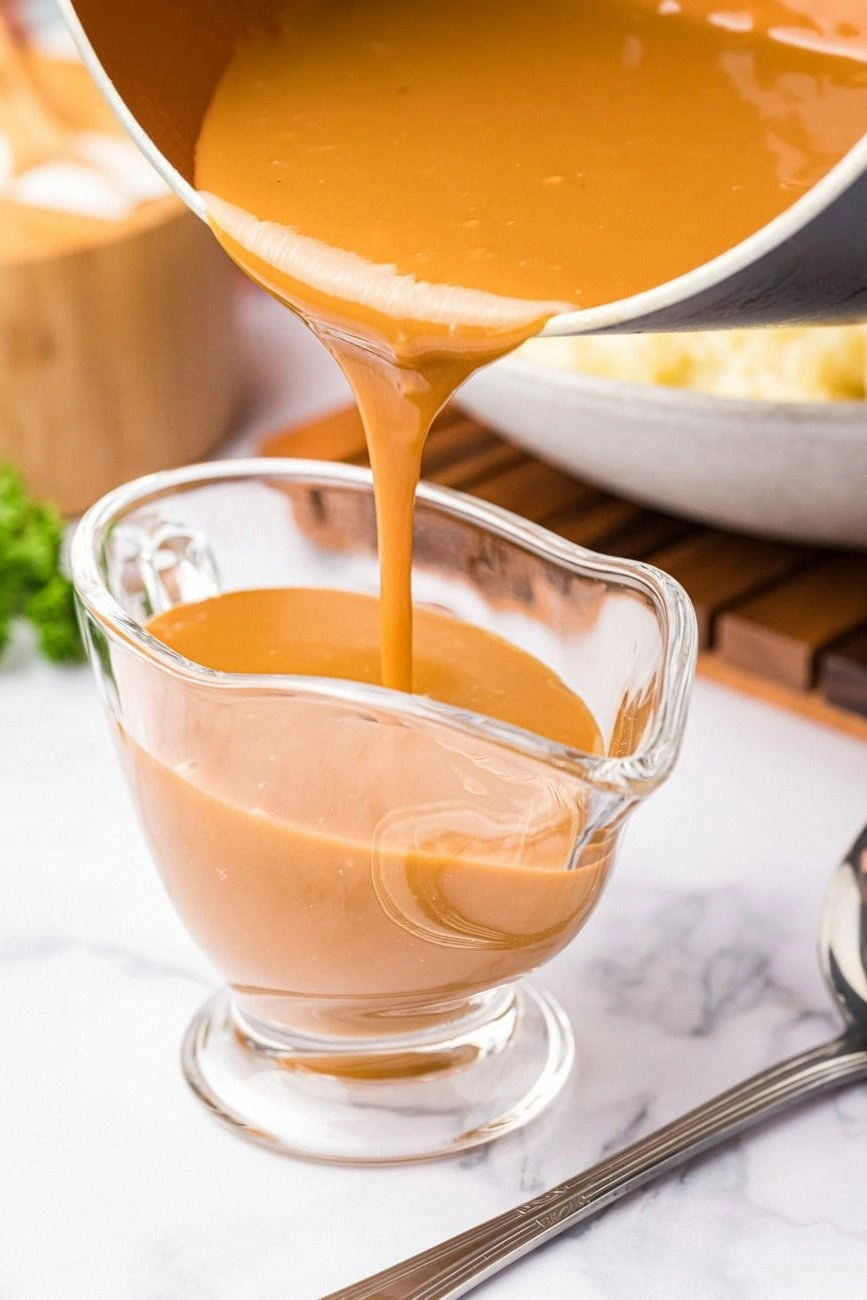
Picture this: a golden, silky sauce cascading over a plate of tender beef, the aroma of butter and flour dancing in the air, and the first bite delivering a burst of umami that melts your tongue like butter on a hot skillet. The texture is so refined that it coats the meat with a glossy sheen, leaving no dry patches or clumps to ruin the experience. The heat from the pot is just right, not too hot to scorch the flavor, not too cool to leave the sauce languishing. As you taste it, you can almost hear the satisfied sigh of a satisfied palate, and the moment becomes a memory you’ll want to relive again and again.
What makes this version stand out is that it eliminates the dreaded drippings, yet still delivers a depth of flavor that rivals a traditional stock-based gravy. I discovered that the secret is a simple roux made from butter and flour, which thickens the sauce without the need for the usual fat-heavy pan juices. The result is a gravy that feels light on the palate, yet still packs a punch of savory richness that makes every bite unforgettable. It’s the kind of sauce that turns a humble dinner into a culinary celebration, and I’ve seen friends gasp in disbelief when they taste it for the first time.
I dare you to taste this and not go back for seconds, because once you experience the silky texture and deep, buttery flavor, you’ll wonder how you ever survived with any other gravy. This is hands down the best version you'll ever make at home, and it’s so simple that even a novice can master it with minimal fuss. The technique I’ll share involves a few clever twists that keep the sauce smooth, eliminate clumps, and infuse it with a subtle depth that would otherwise require a slow simmer of stock. Let me walk you through every single step — by the end, you'll wonder how you ever made it any other way.
What Makes This Version Stand Out
- Texture: The sauce is silky and smooth, free of lumps and clumps, thanks to a perfectly balanced roux that coats the meat like velvet. It glides over the plate, leaving a glossy finish that makes every bite feel indulgent.
- Flavor: A subtle buttery richness is achieved by using unsalted butter and a gentle sauté, which brings out the natural umami in the beef stock without overpowering it. The result is a savory depth that feels like a comforting hug.
- Simplicity: With only three core ingredients—beef stock, butter, and flour—you eliminate the need for drippings and complex stock-making. The recipe is straightforward, requiring no extra equipment or time-consuming prep.
- Time Efficiency: The entire process takes just 45 minutes from start to finish, making it a perfect choice for weeknight dinners or last-minute entertaining. The quick roux technique saves precious minutes while still delivering a professional finish.
- Make‑Ahead Potential: Once cooked, the gravy can be stored in the fridge or freezer without losing its silky texture, allowing you to whip up a quick sauce whenever you need it. It’s a versatile pantry staple that keeps your meals effortless.
- Crowd Reaction: Friends who have tasted this version often remark that it’s the best gravy they’ve ever had, and they keep asking for the secret. The sauce’s flawless texture and depth of flavor make it a crowd‑pleaser at every gathering.
- Ingredient Quality: Using high‑quality beef stock or broth ensures that the base flavor is robust, while unsalted butter provides a clean, buttery note that doesn’t get lost in the mix. The flour acts as a neutral thickener that holds the sauce together.
Inside the Ingredient List
The Flavor Base
Beef stock or broth is the heart of this gravy, providing the savory backbone that carries the butter and flour together. The quality of the stock directly affects the depth of flavor; a well‑made homemade stock or a reputable store brand will give the sauce a richer, more complex taste. If you’re using a low‑sodium option, taste the stock before adding it to the pan to ensure it meets your flavor profile. Skipping this step can result in a sauce that’s either too bland or too salty, depending on the stock you choose.
The Texture Crew
Unsalted butter is the star of the texture crew, lending a silky mouthfeel that melts effortlessly across the tongue. It also helps the flour absorb moisture, creating a smooth, lump‑free consistency. If you’re watching your calorie intake, you can replace the butter with a lighter cooking oil, but be aware that the sauce will lose some of its buttery richness. The all‑purpose flour acts as a binder, thickening the liquid and giving the gravy body without a heavy, paste‑like feel.
The Unexpected Star
The small amount of flour might seem like a humble ingredient, but it plays a pivotal role in stabilizing the sauce and preventing separation. When whisked properly, the flour forms a fine paste that evenly distributes throughout the liquid, ensuring every bite is uniform. If you accidentally add too much flour, the gravy will become too thick; if you add too little, it will remain thin and runny. The key is to whisk continuously and maintain a steady heat to keep the mixture smooth.
The Final Flourish
Once the roux and stock are combined, a quick seasoning adjustment can elevate the flavor to new heights. A pinch of black pepper, a dash of Worcestershire sauce, or a splash of red wine can add depth and complexity without overpowering the base. Experimenting with small amounts of these additions will let you customize the gravy to suit your taste. Remember, the goal is to enhance, not mask, the natural savory profile of the beef stock.
Everything's prepped? Good. Let's get into the real action where the magic begins.
The Method — Step by Step
- Step 1: Begin by heating a heavy-bottomed saucepan over medium heat. Add the unsalted butter, letting it melt slowly until it foams but does not brown. The butter’s aroma should fill the kitchen, signaling that it’s ready for the next ingredient. Stir constantly to ensure even melting.
- Step 2: Sprinkle the all‑purpose flour over the melted butter while whisking vigorously to form a smooth paste. Keep whisking until the mixture turns a pale, golden color, indicating that the raw flour taste has cooked out. This process creates a roux that will thicken the gravy without lumps.
- Step 3: Slowly pour in the beef stock or broth, whisking continuously to incorporate the liquid and prevent any clumps from forming. The sauce should begin to thicken, becoming glossy and velvety. At this point, the mixture should emit a subtle nutty aroma that signals the roux is fully developed.
- Step 4: Reduce the heat to low and let the gravy simmer gently for about 10 minutes, stirring occasionally. This simmer allows the flavors to meld while the sauce continues to thicken to a silky, pourable state. The heat should be low enough that the gravy does not bubble aggressively.
- Step 5: Season the gravy to taste with salt and pepper. If you’re adding a splash of Worcestershire sauce or a dash of soy sauce, do so now to infuse the sauce with an extra layer of umami. This is the moment of truth—taste the gravy and adjust seasoning as needed. Remember, a little goes a long way.
- Step 6: If you notice any small lumps, strain the gravy through a fine-mesh sieve or use a immersion blender to achieve a flawless finish. The sauce should be smooth enough to coat a spoon without leaving any gritty texture. This final polishing step ensures a professional look and feel.
- Step 7: Remove the saucepan from heat and let the gravy rest for 2 minutes. This brief pause allows the flavors to settle and the sauce to thicken slightly as it cools. The gravy will be at its peak thickness and flavor at this point.
- Step 8: Serve immediately over your favorite dish—be it roasted beef, mashed potatoes, or even a hearty bowl of pasta. The gravy should be silky, aromatic, and ready to elevate any meal to new heights. If you’re not serving right away, keep it warm in a heatproof bowl or a slow‑cooker on low.
That's it — you did it. But hold on, I've got a few more tricks that'll take this to another level. Each tweak below will refine the sauce, making it even more luscious and flavorful.
Insider Tricks for Flawless Results
The Temperature Rule Nobody Follows
Maintaining a low, steady heat throughout the simmering process is essential for a silky texture; high heat can cause the butter to separate from the roux, leaving a greasy, clumpy sauce. Use a thermometer to keep the temperature between 180°F and 190°F, which is hot enough to thicken without scorching. If the sauce starts to bubble aggressively, reduce the heat immediately. This trick ensures a smooth, glossy finish that coats the plate like velvet.
Why Your Nose Knows Best
Before seasoning, give the gravy a quick sniff to gauge its natural richness. A well‑developed roux will emit a nutty, buttery aroma that signals the base is ready. If the scent is flat, let it cook a bit longer to deepen the flavor. Your nose is the first line of defense against a bland sauce.
The 5-Minute Rest That Changes Everything
After simmering, let the gravy rest for exactly five minutes before serving. This pause allows the starches to settle and the sauce to thicken to its ideal consistency. A rested gravy will cling to your food, creating a harmonious bite that feels both light and satisfying. This simple step is often overlooked, yet it can make the difference between a good and a great gravy.
The Final Touch of Salt
Add salt in two stages: first, a pinch during the simmer, then a final seasoning after the rest period. This staggered approach prevents over‑salting and ensures the flavor is balanced. If you’re using a low‑sodium stock, you may need a slightly higher final salt addition. Taste as you go to avoid the common mistake of a flat sauce.
The Quick Whisk Technique
Whisking continuously during the stock addition prevents lumps from forming, but the key is to whisk in a circular motion rather than back and forth. This motion ensures the flour distributes evenly and the sauce remains glossy. If a lump appears, quickly plunge a spoon through the mixture to break it up before it sets. A smooth sauce is the hallmark of a professional kitchen.
The Heat‑Proof Bowl Trick
When transferring the gravy to a serving dish, use a heat‑proof bowl or a shallow dish to avoid condensation that can thin the sauce. The bowl’s material helps retain heat, keeping the gravy warm and silky for longer. This is especially useful when serving a large crowd or when the gravy needs to be held for a few minutes before the main course arrives.
Creative Twists and Variations
This recipe is a playground. Here are some of my favorite ways to switch things up:
Herb‑Infused Velvet
Add a handful of fresh thyme or rosemary during the simmer to infuse the gravy with aromatic herbs. The herbs impart a subtle earthy note that pairs wonderfully with roasted meats. Keep the herbs whole so you can remove them before serving, preserving a clean flavor profile.
Red Wine Richness
Replace half of the beef stock with a robust red wine for a deeper, more complex flavor. Let the wine reduce slightly before adding the stock to concentrate its notes. The result is a luxurious sauce that elevates any steak or roast.
Mushroom Umami Boost
Sauté sliced mushrooms in the butter before adding the flour to create a mushroom‑infused roux. The mushrooms contribute a savory depth that complements the beef stock. Finish with a splash of soy sauce for an extra umami punch.
Spicy Kick
Stir in a pinch of cayenne pepper or a dash of hot sauce after the gravy has thickened. The heat adds excitement and balances the richness of the butter. Keep the spice level to your preference, but be prepared for a bold, memorable sauce.
Cocoa‑Infused Chocolate
Add a tablespoon of unsweetened cocoa powder during the roux stage for a subtle chocolate undertone. The cocoa pairs beautifully with the beef’s natural flavor and adds a hint of sweetness. Ensure the cocoa is fully dissolved to avoid any gritty texture.
Smoked Paprika Twist
Incorporate a teaspoon of smoked paprika into the gravy after the stock has been added. The paprika gives the sauce a smoky, slightly sweet flavor that pairs well with grilled meats. The smoky aroma will transport you to a cozy campfire setting.
Storing and Bringing It Back to Life
Fridge Storage
Transfer the cooled gravy to an airtight container and refrigerate for up to 4 days. The butter in the sauce helps preserve its silky texture, preventing it from drying out. When you’re ready to use it, gently reheat it on low heat, stirring frequently to maintain its consistency.
Freezer Friendly
For longer storage, divide the gravy into freezer‑safe portions and seal them in zip‑lock bags or vacuum‑sealed containers. Freeze for up to 3 months, and thaw in the refrigerator overnight before reheating. The gravy remains smooth and flavorful after freezing, making it a convenient pantry staple.
Best Reheating Method
When reheating, add a splash of warm water or beef stock to the gravy to restore its original thickness. Gently bring it to a low simmer, whisking continuously to keep it silky. Avoid high heat to prevent the sauce from separating or becoming too thick.