
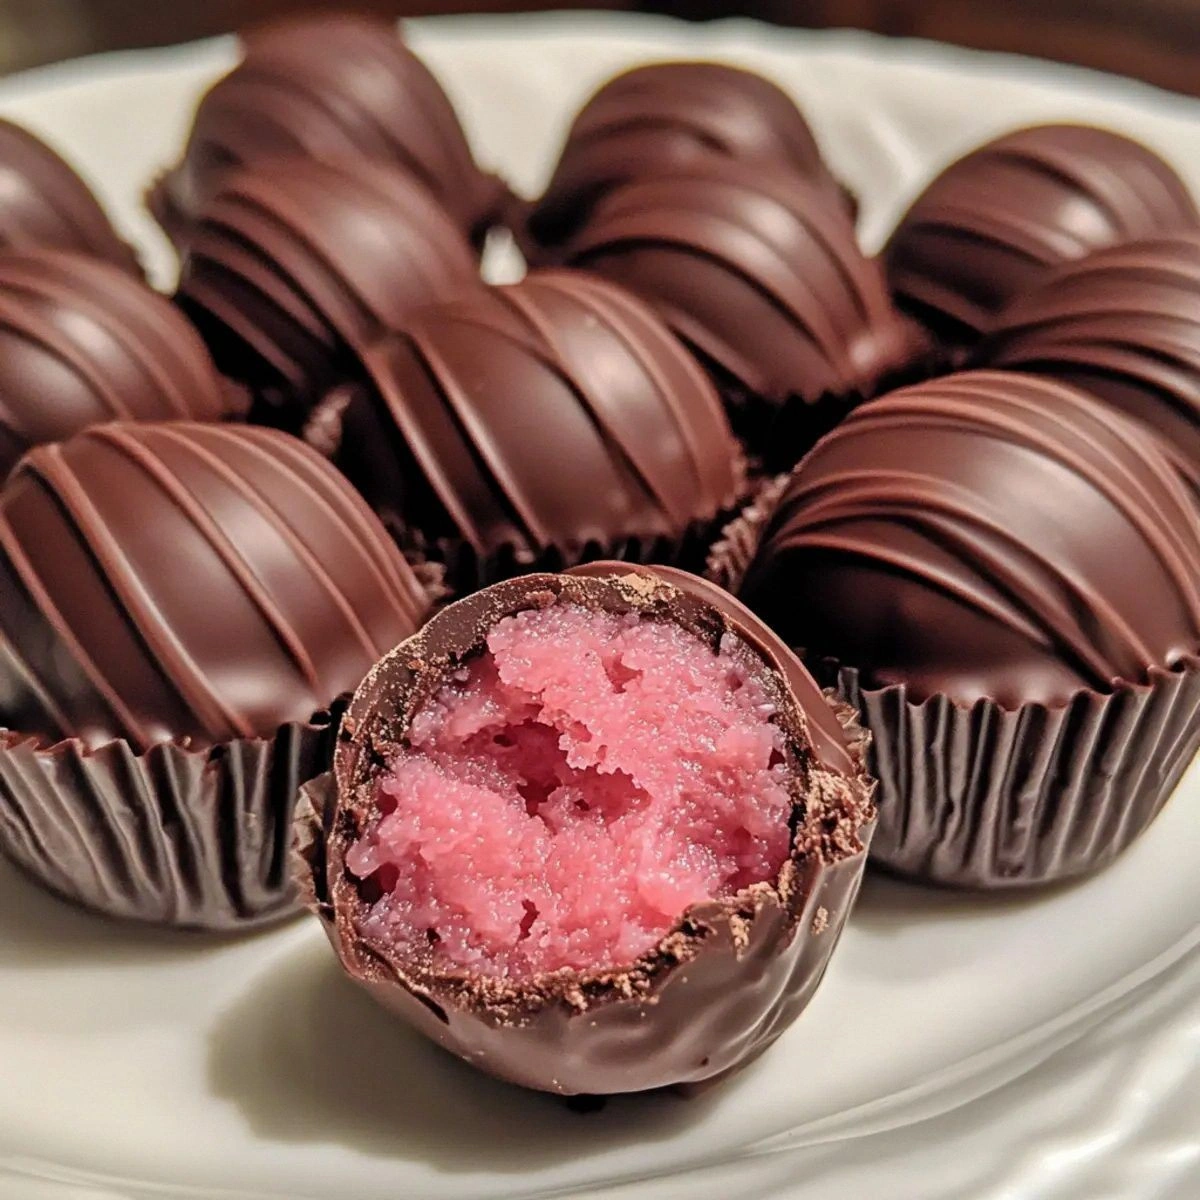
Indulge in silky, glossy chocolate fudge studded with crunchy walnuts—a timeless treat for any occasion.

There’s a particular kind of magic that happens when the scent of melted chocolate fills your kitchen, and the crunch of toasted walnuts adds a surprise texture beneath the glossy surface. I first discovered this enchantment during a chilly winter evening in my grandmother’s kitchen, where a simple bowl of homemade fudge turned a modest gathering into an unforgettable celebration.
Chocolate fudge, with its roots in old‑world confectionery, has traveled across continents, morphing into countless regional variations. Adding walnuts not only introduces a nutty depth but also pays homage to the classic pairing that has delighted sweet‑tooth lovers for generations.
In this article, you’ll learn how to achieve that perfect glossy sheen, why the timing of each step matters, and how to customize the recipe for dietary preferences without sacrificing flavor. By the end, you’ll be equipped to create a batch that looks as good as it tastes—perfect for holidays, potlucks, or a quiet night in.
Let’s dive in and turn a few pantry staples into a masterpiece that will have everyone reaching for seconds.
🌟 Why This Recipe Will Captivate You
From the moment the chocolate melts to the final snap of a walnut‑laden piece, every bite offers a harmonious blend of silk and crunch.
- ✨ Irresistible Texture: The contrast between the smooth, buttery fudge and the toasted walnuts creates a multi‑sensory experience that keeps you coming back for more.
- ✨ Simple Ingredient List: Only seven core ingredients are required, making it easy to stock and quick to assemble.
- ✨ Versatile Serving Options: Cut into bars, cubes, or even roll into truffles—this fudge adapts to any presentation style you desire.
- ✨ Shelf‑Stable Delight: Properly stored, the fudge stays fresh for weeks, allowing you to enjoy a treat whenever the mood strikes.
- ✨ Crowd‑Pleaser: Its rich chocolate flavor paired with the familiar crunch of walnuts makes it a hit at parties, office gatherings, and family celebrations.
- ✨ Fun to Customize: Swap walnuts for pecans, almonds, or even dried fruit; add a pinch of sea salt for a salted‑caramel twist.
🥗 Ingredients
📝 Complete Ingredient List
For the Fudge Base:
For the Walnut Topping:

🔍 Focus on Key Ingredients
Dark Chocolate
Choosing chocolate with at least 70% cacao ensures a deep, slightly bitter flavor that balances the sweetness of the condensed milk. Look for chocolate that lists cocoa butter as the first ingredient for a smooth melt. The higher cocoa content also contributes to a firmer set once cooled.
Sweetened Condensed Milk
This pantry staple provides the creamy, caramel‑like richness that defines fudge. Its high sugar concentration prevents crystallization, giving the final product that coveted glossy finish. If you prefer a less sweet version, you can substitute half the amount with evaporated milk and add a bit more sugar.
Walnuts
Walnuts add a buttery crunch and a subtle earthiness that complements the chocolate. Toast them lightly to enhance their flavor and reduce any bitterness. For a nuttier profile, use toasted pecans or almonds instead.
🔄 Quick Substitutions
| If you don’t have... | Use instead... |
|---|---|
| Dark chocolate (70%+) | Bittersweet chocolate (60‑65%) |
| Unsalted butter | Salted butter (reduce added salt) |
| Walnuts | Toasted pecans or almonds |
👨🍳 Step‑by‑Step Instructions
Follow these detailed steps to achieve a perfect, glossy fudge that holds its shape and delights the palate.
📋 Phase 1: Preparation and Mise en Place
Gather and measure all ingredients before you begin. This ensures a smooth workflow and prevents over‑cooking.
Prepare the Baking Pan
Line an 8‑inch square baking pan with parchment paper, allowing the edges to overhang for easy removal. Lightly spray the parchment with non‑stick cooking spray or brush with a thin layer of butter to prevent sticking. This preparation step is crucial for a clean release of the fudge once set.
Toast the Walnuts
Place the chopped walnuts in a dry skillet over medium heat. Stir constantly for 3‑4 minutes until they turn golden and emit a nutty aroma. Transfer them to a plate, then sprinkle with light brown sugar and cinnamon; toss to coat evenly. This step adds a caramelized crust that will contrast beautifully with the smooth fudge.
🔥 Phase 2: Cooking the Fudge
Gentle heat and constant stirring are essential to achieve that signature glossy texture.
Melt Chocolate and Butter
In a heavy‑bottomed saucepan, combine the dark chocolate pieces and unsalted butter. Set the pan over low heat, stirring continuously with a silicone spatula. As the mixture begins to melt, break up any remaining chocolate chunks, ensuring a uniform, glossy melt. The temperature should stay below 45 °C (113 °F) to prevent scorching.
Incorporate Condensed Milk and Sugar
Gradually whisk in the sweetened condensed milk, followed by the brown sugar. Continue stirring until the sugar dissolves completely and the mixture thickens, about 5‑7 minutes. The mixture should coat the back of a spoon and appear slightly glossy but not yet set.
Add Flavorings
Remove the pan from heat and stir in the vanilla extract and a pinch of sea salt. The salt heightens the chocolate flavor and balances the sweetness. Give the mixture one final whisk to ensure everything is fully incorporated.
✨ Phase 3: Finishing and Serving
The final steps set the fudge and add the crunchy walnut topping.
Transfer to Pan and Sprinkle Topping
Pour the hot fudge into the prepared pan, spreading it evenly with a spatula. Sprinkle the caramelized walnut mixture across the surface, gently pressing it down so the nuts adhere to the fudge.
Cool and Set
Allow the fudge to cool at room temperature for 15 minutes, then transfer the pan to the refrigerator. Let it set for at least 2 hours, or until firm enough to cut cleanly.
Cut and Serve
Using the parchment overhang, lift the fudge onto a cutting board. Slice into 1‑inch squares with a sharp knife. For extra shine, drizzle a thin stream of melted chocolate over the top before serving.
💡 Expert Tips and Tricks
🛒 Choosing the Right Ingredients
Opt for chocolate that lists cocoa butter as the first ingredient; this ensures a smooth melt and a firm set. When selecting walnuts, choose raw, unshelled nuts and give them a quick toast to unlock their buttery flavor. If you’re using pre‑roasted nuts, reduce the toasting time to avoid over‑drying.
🔪 Preparation Techniques
Measure all ingredients before you start heating. This “mise en place” mindset prevents the fudge from overheating while you scramble for a missing component. Use a silicone spatula for scraping the sides of the pan; metal tools can introduce unwanted heat and cause the chocolate to seize.
🌡️ Mastering the Cooking Process
The key to glossy fudge is low, steady heat. Keep the saucepan on low flame and stir constantly. If you have a candy thermometer, aim for 115 °C (239 °F) when the mixture reaches the soft‑ball stage; this guarantees a firm yet melt‑in‑your‑mouth texture.
🍽️ Presentation and Service
For a polished look, line the pan with parchment that overhangs on all sides, allowing you to lift the fudge cleanly. Dust the final squares with a light sprinkling of powdered sugar or cocoa powder for an elegant finish. Pair each piece with a dollop of whipped cream or a scoop of vanilla ice cream for an indulgent dessert.
🏆 Pro Tips
Elevate your fudge from great to restaurant‑level with these professional insights.
- 🎯 Control Crystallization: Adding a small amount of corn syrup (about 1 tsp) to the fudge mixture can inhibit sugar crystals, ensuring a smoother texture and a shinier finish.
- 🎯 Use a Double Boiler: For the most even melt, place your saucepan over a pot of simmering water. This indirect heat prevents scorching and gives you precise temperature control.
- 🎯 Temper the Chocolate: If you want a snap‑like firmness, temper the dark chocolate before mixing it with the butter. This technique also adds extra gloss.
- 🎯 Incorporate Air: Whisk the mixture vigorously for 30 seconds after adding the condensed milk. Introducing tiny air bubbles creates a lighter mouthfeel without compromising density.
- 🎯 Finish with Sea Salt Flakes: Sprinkle flaky sea salt just before the fudge sets. The crystals provide a burst of flavor that balances the sweetness.
- 🎯 Store in an Airtight Container: Wrap the fudge tightly in parchment and then place it in a sealed container. This prevents it from absorbing refrigerator odors and keeps it moist.
“Chocolate is a perfect food, as wholesome as it is delicious, and it is the ultimate comfort.” — Jacques Torres
🔄 Variations and Adaptations
Feel free to experiment with flavors, textures, and dietary needs while keeping the core essence of this fudge intact.
🥬 Vegan Version
Replace the butter with an equal amount of coconut oil and use a dairy‑free condensed milk alternative (such as soy‑based sweetened condensed milk). Ensure the chocolate is dairy‑free, often labeled “vegan dark chocolate.” The result is a creamy, plant‑based fudge that still delivers that classic glossy sheen.
- Vegan butter or coconut oil – 100 g
- Dairy‑free condensed milk – 395 g
🌶️ Flavor Variations
Play with additional spices or extracts to create unique taste profiles.
Spicy Chili Fudge:
Add ½ tsp of finely ground cayenne pepper and a drizzle of chili‑infused chocolate on top before setting. The heat pairs wonderfully with the richness of the chocolate.
Mediterranean Olive‑Infused Fudge:
Stir in 1 tsp finely chopped Kalamata olives and a pinch of rosemary. The salty, herbaceous notes complement the sweet base in an unexpected way.
Asian Matcha Fudge:
Blend 1 tsp high‑grade matcha powder into the fudge mixture for a subtle earthy flavor and a beautiful green hue.
⚠️ Dietary Adaptations
Gluten‑Free:
This recipe is naturally gluten‑free. Ensure any added toppings or accompaniments, such as cookie crumbs, are certified gluten‑free.
Lactose‑Free:
Swap butter for lactose‑free margarine and use dairy‑free condensed milk. Choose chocolate labeled “dairy‑free.”
Low‑Calorie:
Reduce the sugar by 25 % and replace half of the chocolate with unsweetened cocoa powder mixed with a touch of extra condensed milk to maintain moisture.
👶 Kid‑Friendly Version
For younger palates, use milk chocolate instead of dark chocolate and omit the sea salt. Add a handful of mini marshmallows to the topping for a fun, gooey surprise.
📦 Storage and Reheating
🧊 Conservation
In the Refrigerator:
- Duration: 2 weeks
- Recommended container: Airtight glass or plastic container lined with parchment.
- Tip: Place a paper towel on top to absorb any condensation.
In the Freezer:
- Duration: 3 months
- Method: Wrap the parchment‑lined slab tightly in aluminum foil, then place in a freezer bag.
- Defrosting: Transfer to the refrigerator overnight before cutting.
💡 For best texture, avoid repeated freeze‑thaw cycles; they can cause sugar crystals to form.
♨️ Reheating
🔥 Oven (Recommended):
- Preheat to 150 °C (300 °F).
- Cover the fudge slab with aluminum foil.
- Heat for 10‑12 minutes.
- Remove foil and warm for an additional 3‑4 minutes to restore gloss.
⚡ Microwave (Quick):
- Place a single piece on a microwave‑safe plate.
- Cover with a microwave‑safe lid.
- Heat on medium power for 30‑45 seconds.
- Check and stir if necessary; repeat in 10‑second bursts.
🍳 Stovetop (Optional):
Place a piece in a small pan over low heat, cover, and warm for 2‑3 minutes, turning gently to avoid burning.
🍷 Perfect Pairings
🥗 Accompaniments
- Fresh Berries: A handful of raspberries or strawberries adds a bright, acidic contrast to the richness.
- Whipped Cream: Lightly sweetened cream provides a silky counterpoint.
- Salted Caramel Sauce: Drizzle a thin line for an extra layer of caramel‑salty depth.
🍷 Wine & Beverage Pairings
- Ruby Port: Its deep fruit notes echo the chocolate while its acidity cuts through the sweetness.
- Malbec: The wine’s bold tannins balance the fudge’s richness.
- Non‑Alcoholic: Sparkling pomegranate juice offers a refreshing, tart complement.
🍰 Completing the Meal
Begin with a light citrus salad to awaken the palate, follow with the fudge as a dessert, and finish with a cup of freshly brewed espresso. The bitterness of coffee highlights the chocolate’s depth, creating a satisfying end to the dining experience.
❓ Frequently Asked Questions
Q: Can I use milk chocolate instead of dark chocolate?
A: Absolutely. Milk chocolate will produce a sweeter, softer fudge. To maintain a firm set, you may want to increase the amount of condensed milk by 10 % or add a teaspoon of corn syrup.
Q: Why does my fudge turn grainy?
A: Graininess usually results from overheating or rapid cooling, which encourages sugar crystals to form. Keep the heat low, stir constantly, and let the fudge cool gradually at room temperature before refrigerating.
Q: How can I make the fudge less sweet?
A: Reduce the brown sugar by half and substitute half of the sweetened condensed milk with unsweetened evaporated milk. You can also add a pinch more sea salt to balance the sweetness.
Q: What’s the best way to cut the fudge without it crumbling?
A: Chill the slab until firm (at least 2 hours). Use a hot, dry knife—dip the blade in hot water, wipe dry, and slice. The heat helps the knife glide cleanly through the fudge.
Q: Can I add other nuts or dried fruits?
A: Yes! Pecans, almonds, or toasted hazelnuts work wonderfully. Dried cherries or apricots add a chewy contrast. Just ensure any additions are roughly the same size for even distribution.
Q: Is it possible to prepare this recipe ahead of time?
A: Definitely. The fudge can be made up to a week in advance and stored in the refrigerator. If you plan to freeze it, wrap tightly and thaw in the fridge before serving.
🎉 Let’s Get Cooking!
This Chocolate Fudge with Walnuts brings together the timeless allure of rich chocolate and the satisfying crunch of toasted walnuts. Whether you’re preparing a holiday treat, a party favor, or simply a comforting snack, the recipe’s balance of simplicity and elegance ensures success every time. Remember the key steps: low heat, constant stirring, and a proper cooling period, and you’ll be rewarded with a glossy, melt‑in‑your‑mouth fudge that dazzles both the eyes and the taste buds.
Now it’s your turn—grab your ingredients, follow the steps, and share your beautiful creations. If you have questions, tweaks, or photos, drop a comment below. Your feedback helps the community grow, and we love seeing how you make this recipe your own.
Have you tried this recipe?
Leave a comment and rating below! Share your photos on Instagram with #FudgeFiesta to be featured on our page.
📚 You Might Also Like
Salted Caramel Brownies
Dark Chocolate Ganache Tart
Walnut Praline Ice Cream
Chocolate Hazelnut Spread
Chocolate Fudge with Walnuts
Silky dark chocolate fudge studded with toasted walnuts – a timeless indulgence.
📝 Ingredients
Fudge Base
Walnut Topping
👨🍳 Instructions
- 1 Line an 8‑inch square pan with parchment and lightly grease.
- 2 Toast walnuts in a dry skillet, then coat with light brown sugar and cinnamon.
- 3 Melt dark chocolate and butter over low heat, stirring constantly.
- 4 Stir in condensed milk and brown sugar; cook until thickened.
- 5 Add vanilla and sea salt; remove from heat.
- 6 Pour mixture into pan, sprinkle walnut topping, and press gently.
- 7 Cool at room temperature 15 min, then refrigerate 2 hours.
- 8 Lift fudge using parchment overhang, slice into squares.
- 9 Optional: drizzle extra melted chocolate for shine.
- 10 Serve chilled or at room temperature; enjoy!
🥗 Nutritional Information (per serving)
Calories
Protein
Carbs
Fat
Fiber
Sodium
*Nutritional values are estimates based on standard ingredient data.


💬 Comments and Reviews
Leave a Comment
Comments will appear here once readers share their thoughts.