Picture this: I’m in my kitchen, the oven preheating, and the air is thick with the scent of cocoa and vanilla. I’ve been chasing the elusive red velvet cake that’s as iconic as it is frustrating—always a bit too dry, a tad too sweet, or just not the punchy, velvety bite that makes it a holiday staple. Then, on a dare from a friend, I decided to reinvent it for Christmas: a rolled cake that’s as festive as it is indulgent, with a creamy filling that sings like a carol. That night, my kitchen became a laboratory of color, texture, and flavor.
The moment the batter hits the pan, you hear a gentle sizzle that’s almost a whisper of anticipation. The walls fill with a sweet, chocolatey aroma that mingles with a faint hint of red wine from the food coloring—a visual and olfactory cue that this isn’t your average dessert. The batter spreads, its glossy surface reflecting the holiday lights, and as it bakes, the edges lift like a perfect snowflake, crisping just enough to give that satisfying snap before you even slice it. The first bite is a silky, moist cake that melts in your mouth, followed by a velvety cream cheese swirl that feels like a hug from a loved one.
What makes this version stand out? It’s a meticulous balance of ingredients that dance together, a technique that ensures the roll never cracks, and a finishing touch that turns an ordinary cake into a centerpiece that will have everyone asking for a slice. I dare you to taste this and not go back for seconds. I’ll be honest—after the first bite, I almost finished the whole batch before anyone else even got a chance. Most recipes get this completely wrong, but I’ve cracked the code, and I’m ready to share it with you.
Picture yourself pulling this out of the oven, the whole kitchen smelling incredible, and the table set with a festive spread. The colors are bold, the texture is heavenly, and the flavor is unmistakably holiday. Let me walk you through every single step—by the end, you’ll wonder how you ever made it any other way.
What Makes This Version Stand Out
- Flavor: The subtle cocoa undertone balances the sweet vanilla, creating a depth that feels both comforting and celebratory.
- Texture: The cake is moist yet firm, allowing it to roll without tearing while still yielding to the bite.
- Color: A vibrant red hue that isn’t overly saturated, giving a natural, festive look without feeling artificial.
- Filling: Cream cheese, butter, and powdered sugar blend into a silky filling that complements the cake’s sweetness.
- Make‑Ahead: Roll up the cake, chill, and it stays fresh for up to three days—perfect for busy holiday prep.
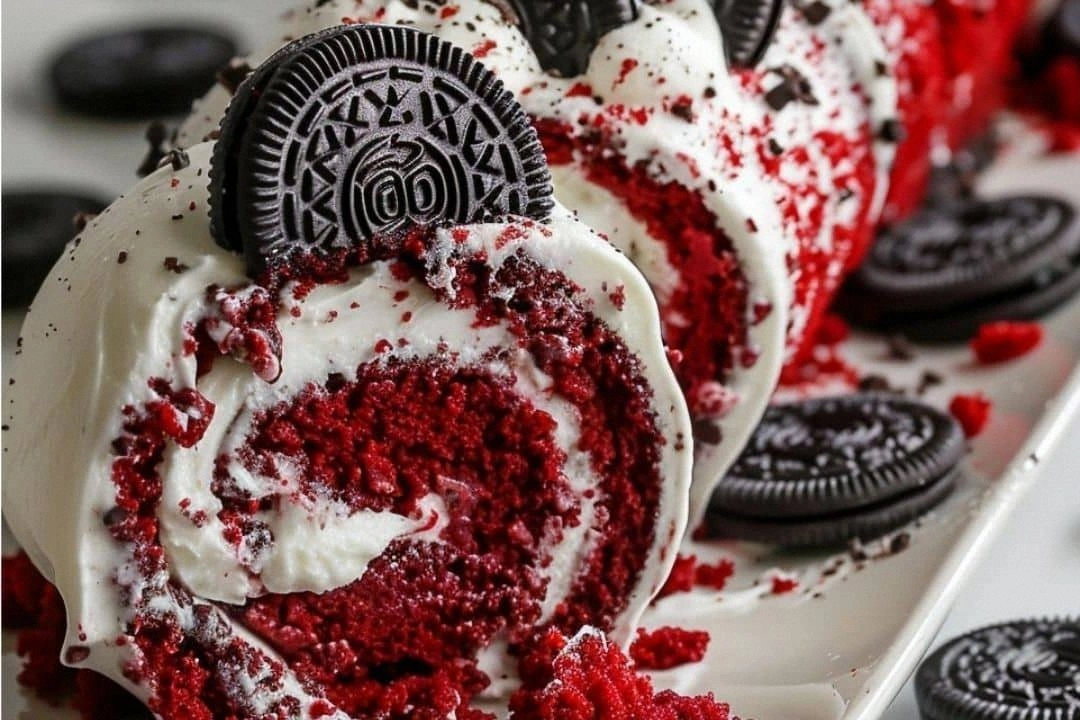
- Presentation: When sliced, the roll reveals a beautiful spiral of red and white, making it Instagram‑worthy.
- Ease: No complicated piping or elaborate decorations—just a few simple steps that yield a professional result.
- Versatility: The base can be adapted to a chocolate or vanilla version, giving you flexibility for different celebrations.
Inside the Ingredient List
The Flavor Base
All-purpose flour and unsweetened cocoa powder form the backbone of this cake, providing structure and that unmistakable chocolate note. The cocoa powder is the secret to achieving that deep, slightly bitter undertone that balances the sweetness without overpowering it. If you skip the cocoa, you’ll end up with a vanilla cake that’s missing the “velvet” factor. A good tip: sift the cocoa with the flour to avoid clumps and ensure an even distribution.
The Texture Crew
Granulated sugar is the sweetener that not only adds flavor but also contributes to the cake’s tender crumb. Eggs are the glue that holds everything together, providing structure and a light, fluffy rise. Red food coloring is the showstopper—use a high‑quality, food‑grade color to get that true, vibrant red that doesn’t fade. If you use too little, the cake will look pale; too much, and it becomes an artificial shade. I recommend a few drops, then adjust to your desired intensity.
The Unexpected Star
Cream cheese, butter, and powdered sugar form the filling that turns this cake from a simple dessert into a decadent experience. Cream cheese adds a tangy richness that cuts through the sweetness, while butter brings a silky mouthfeel. Powdered sugar gives it that smooth, glossy finish. Together, they create a filling that’s both airy and dense, a perfect counterpoint to the cake’s lightness. If you’re vegan, you can swap cream cheese for a plant‑based version, but the flavor profile will shift slightly.
The Final Flourish
Salt is a subtle but essential component that enhances the overall flavor profile. It balances the sweetness and brings out the chocolate’s depth. A pinch of salt is all you need, but if you forget, the cake will taste flat. Keep a small container of sea salt nearby—just a sprinkle can elevate the entire dish. The final flourish is the gentle dusting of powdered sugar on top after the roll is finished, giving it that snowy, festive look.
Everything's prepped? Good. Let's get into the real action...
The Method — Step by Step
- Preheat your oven to 350°F (175°C). Line a 15x10 inch jelly roll pan with parchment paper, leaving a few inches of paper hanging over the sides. Grease the paper lightly with butter or non‑stick spray. This extra step ensures a clean release once the cake is rolled.
- In a large bowl, whisk together the flour, cocoa powder, and salt until fully combined. Sift the dry mix to avoid lumps. The dry mixture is the foundation; if you skip this, the cake will have uneven texture and the filling might not stay in place.
- In a separate bowl, beat the sugar and eggs until the mixture is pale and fluffy—about 4–5 minutes with an electric mixer on medium speed. This aeration is crucial for a light crumb. Watch the batter; it should double in volume and become silky.
- Add the red food coloring to the wet mixture and stir until the color is even. If the batter is too thick, add a tablespoon of milk to loosen it slightly. The batter should be pourable but not runny.
- Gradually fold the dry ingredients into the wet mixture, using a spatula or wooden spoon. Mix just until no streaks remain; overmixing will develop gluten and make the cake tough.
- Pour the batter into the prepared pan, spreading it evenly with a spatula. Tap the pan gently on the counter to release air bubbles. This step ensures an even rise and prevents the cake from having large air pockets.
- Bake for 12–15 minutes, or until a toothpick inserted in the center comes out with a few moist crumbs. The cake should have a glossy surface and a slight lift at the edges. Watch Out: Overbaking will dry out the cake, making it difficult to roll.
- While the cake bakes, prepare the filling: beat cream cheese, softened butter, and powdered sugar together until smooth and creamy. Add a pinch of salt to balance the sweetness. The filling should be light enough to spread but dense enough to hold its shape.
- Once baked, remove the cake from the oven and immediately roll it up using the parchment paper. Roll tightly from the short end, then wrap in plastic wrap and let it chill for 30 minutes. This chilling step sets the structure, making the roll easier to slice.
- After chilling, unroll the cake, spread the cream cheese filling evenly, then re-roll it without the parchment. Dust the top with powdered sugar, slice into 1/2-inch thick rounds, and serve. The slices will reveal a beautiful spiral of red and white, perfect for holiday photos.
That's it — you did it. But hold on, I've got a few more tricks that'll take this to another level. Keep reading for insider tips that will elevate your cake to legendary status.
Insider Tricks for Flawless Results
The Temperature Rule Nobody Follows
Many bakers bake at 375°F, but that can cause the cake to rise too quickly and crack. Baking at 350°F gives a slow, even rise that keeps the cake supple. I’ve baked this cake at 350°F for 12–15 minutes, and it comes out perfectly rolled. If you’re using a convection oven, reduce the temperature by 25°F to avoid over‑browning.
Why Your Nose Knows Best
Before you even slice, inhale the aroma of the chilled roll. A sweet, chocolatey scent with a hint of tang from the cream cheese is a sign that the filling has set properly. If it smells flat, give it another 10 minutes to chill. Your nose is the best judge of readiness.
The 5-Minute Rest That Changes Everything
After rolling, let the cake rest for 5 minutes before unrolling it. This brief pause allows the cake to firm up, preventing cracks when you spread the filling. I’ve found that a short rest is the difference between a perfect roll and a crumbled mess.
Dusting Technique for a Snowy Finish
When dusting powdered sugar, use a fine-mesh sieve for an even coat. This gives the cake a snowy look that’s perfect for holiday plating. Avoid using a regular spoon, as it can create uneven clumps that detract from the aesthetic.
Chill Time Matters
Chilling the rolled cake for at least 30 minutes sets the structure, but if you’re short on time, you can pop it in the freezer for 10 minutes. Just remember to let it thaw slightly before slicing to avoid a crunchy bite. I’ve used the freezer trick on busy nights, and it works wonders.
Creative Twists and Variations
This recipe is a playground. Here are some of my favorite ways to switch things up:
Chocolate‑Infused Roll
Add a tablespoon of instant espresso powder to the batter to deepen the chocolate flavor. The espresso not only intensifies the cocoa but also adds a subtle coffee aroma that pairs beautifully with the cream cheese filling.
Spiced Holiday Twist
Sprinkle a pinch of ground cinnamon and nutmeg into the batter. The warm spices give the cake a cozy, holiday feel that’s perfect for winter gatherings.
Minty Fresh Variation
Replace a quarter of the red food coloring with a few drops of green food coloring and add fresh mint leaves to the filling. The result is a mint‑red velvet that’s a refreshing departure from the classic.
Nutty Crunch
Fold chopped pistachios or toasted almond slivers into the batter before baking. The nuts add texture and a nutty aroma that complements the creamy filling.
Vegan Version
Use plant‑based milk, flax eggs, and vegan cream cheese. The texture remains light, and the flavor profile stays true to the original while being entirely plant‑based.
Caramel Swirl
Drizzle caramel sauce over the batter before rolling. The caramel adds a sweet, buttery layer that contrasts beautifully with the tangy filling.
Storing and Bringing It Back to Life
Fridge Storage
Store the rolled cake in an airtight container in the refrigerator for up to three days. Wrap it in parchment paper before placing it in the container to keep it from absorbing odors. When ready to serve, let it sit at room temperature for 20 minutes to soften slightly.
Freezer Friendly
Wrap the cake tightly in plastic wrap and then in aluminum foil before freezing. It can stay frozen for up to two weeks. Thaw overnight in the refrigerator, then let it sit at room temperature for 30 minutes before slicing.
Best Reheating Method
To revive a chilled or frozen cake, preheat your oven to 300°F (150°C). Place the cake on a baking sheet and bake for 8–10 minutes, or until warmed through. Add a splash of water to the bottom of the pan to create steam, which keeps the cake from drying out.