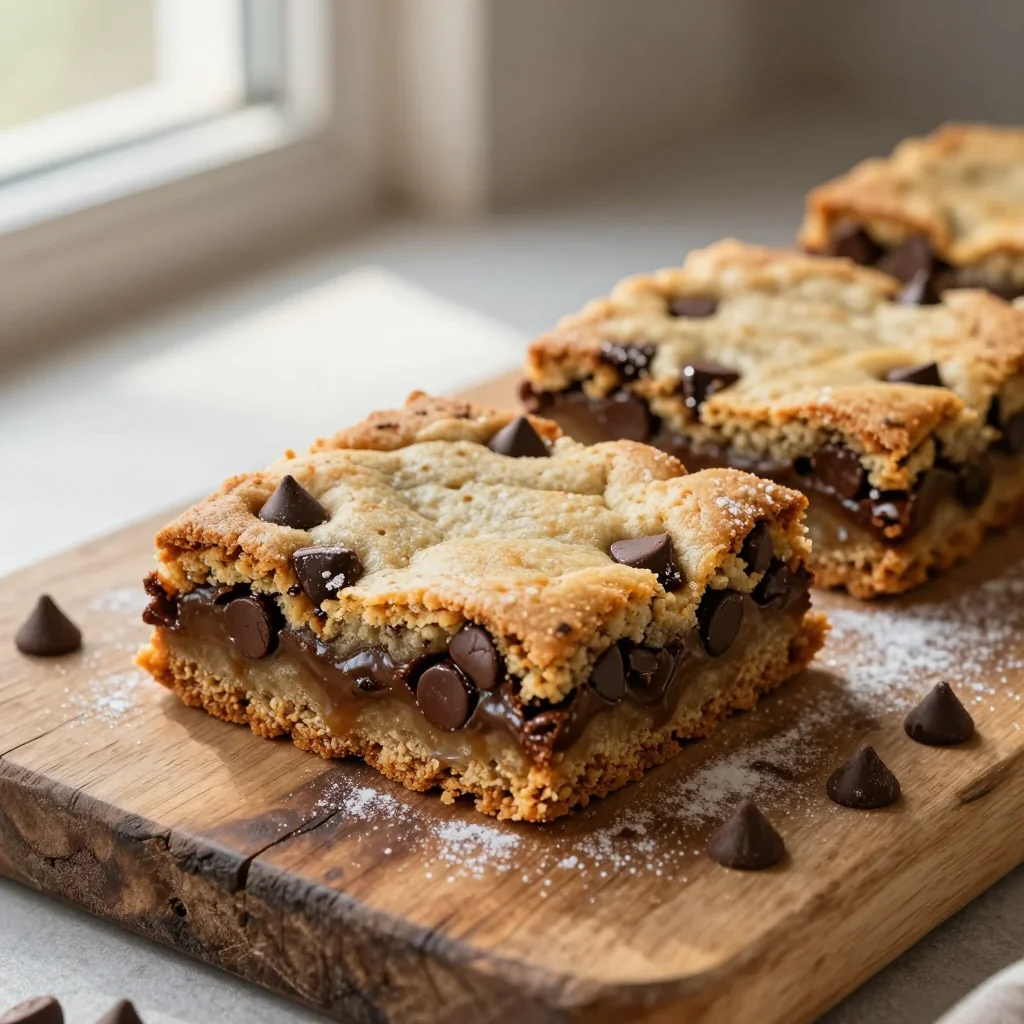
Soft, chewy, and packed with melty chocolate chips – the ultimate treat for any time of day.
There’s something magical about the moment a warm, chocolate‑studded cookie bar slides out of the oven. I first discovered this joy on a rainy Sunday afternoon, when the scent of melted butter and caramelized sugar drifted through my kitchen, coaxing my family to the table. The kids’ eyes widened as the first bar was broken, revealing a glossy river of chocolate chips that stretched like tiny, edible constellations.
These Cookie Bars have their roots in classic American bake‑sale fare, yet they carry a timeless charm that transcends borders. Whether you serve them at a brunch, a coffee break, or a midnight snack, they always feel like a comforting hug on a plate.
In this guide, I’ll walk you through every nuance – from selecting the perfect butter to mastering the ideal bake time – so you can reproduce that perfect chewy‑soft texture every single time. You’ll also learn a few pro tricks that turn a good batch into an unforgettable one.
Let’s roll up our sleeves, preheat the oven, and embark on a delicious adventure together!
🌟 Why This Recipe Will Win Your Heart
These Cookie Bars blend simplicity with indulgence, making them a go‑to treat for both novice bakers and seasoned dessert lovers.
- ✨ Perfect Balance of Sweet and Salty: The pinch of sea salt amplifies the chocolate’s richness, creating a harmonious flavor profile that keeps you reaching for more.
- ✨ Foolproof Texture: A precise ratio of butter to sugar ensures a tender crumb that stays soft for days without turning dry.
- ✨ Versatile Base: The recipe welcomes add‑ins like nuts, dried fruit, or flavored extracts, allowing endless personalization.
- ✨ Minimal Equipment Required: All steps can be completed with a mixing bowl, a spatula, and a baking sheet – perfect for small kitchens.
- ✨ Kid‑Friendly Involvement: Children love mixing the dough and spotting chocolate chips, making it a fun family activity.
- ✨ Shelf‑Stable Delight: Properly stored, these bars stay fresh for up to a week, giving you a ready‑made snack whenever cravings strike.
🥗 Ingredients
📝 Complete Ingredient List
For the Dough:
For Mix‑Ins:
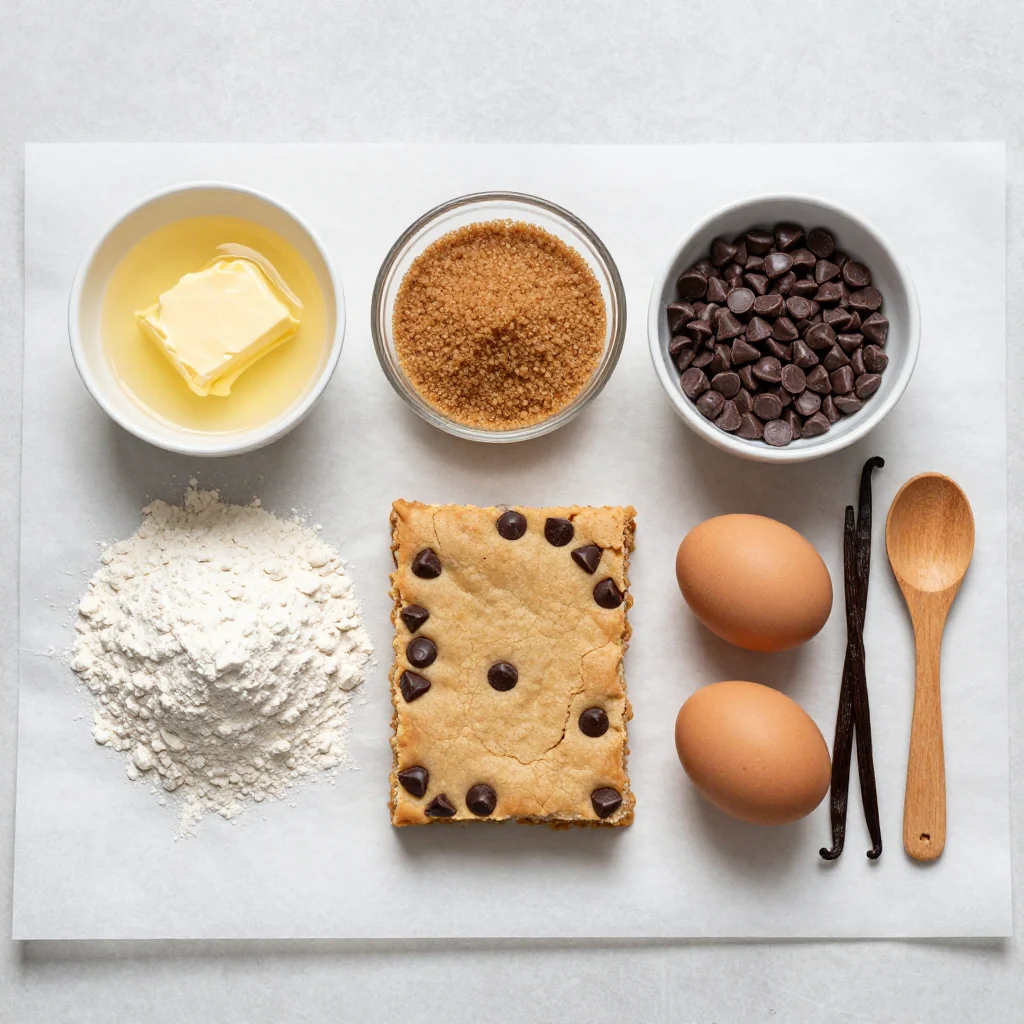
🔍 Focus on Key Ingredients
Unsalted Butter
Butter provides the rich, tender crumb that defines a great cookie bar. Using unsalted butter lets you control the salt level precisely, ensuring the final product isn’t overly salty. For the best texture, let the butter soften at room temperature rather than melting it, which could lead to a greasy dough.
Dark Chocolate Chips
Chocolate is the star of the show. Dark chocolate (70% cacao) offers a deep, slightly bitter counterpoint to the sweet dough, while still melting beautifully. If you prefer a sweeter profile, you can substitute semi‑sweet chips, but the dark variety adds complexity that makes these bars memorable.
Brown Sugar
Brown sugar contains molasses, which contributes moisture and a subtle caramel flavor. This ingredient is crucial for achieving the chewy interior. When combined with granulated sugar, it creates a balanced sweetness that isn’t cloying.
🔄 Quick Substitutions
| If you don’t have... | Use instead... |
|---|---|
| Unsalted butter | Salted butter (reduce added salt by ¼ tsp) |
| Dark chocolate chips | Semi‑sweet chips or chopped dark chocolate |
| Rolled oats | Quick oats (process briefly for similar texture) |
👨🍳 Step‑by‑Step Instructions
Follow these detailed steps to create perfectly chewy, chocolate‑laden bars that will impress family and friends alike.
📋 Phase 1: Preparation and Mise en Place
Gather your tools, preheat the oven, and bring the butter to a creamy consistency.
Soften the Butter
Place the softened butter in a large mixing bowl. Using a wooden spoon or hand mixer on low speed, beat the butter until it looks glossy and smooth—about 30 seconds. The butter should be soft enough that a fingertip leaves an indentation but not melted.
Incorporate Sugars
Add the brown sugar and granulated sugar to the butter. Beat on medium speed until the mixture is light, fluffy, and pale in color—approximately 2‑3 minutes. This aeration step is essential for a tender crumb.
Blend Eggs and Vanilla
Crack the two eggs into the bowl, one at a time, beating briefly after each addition. Pour in the vanilla extract and continue mixing until just combined. Over‑mixing can incorporate too much air, leading to a cakey texture.
🔥 Phase 2: Mixing Dry Ingredients and Baking
Combine the dry components, fold in the chocolate, and bake to golden perfection.
Combine Dry Ingredients
In a separate bowl, whisk together flour, baking soda, and sea salt. This ensures even distribution of leavening agents and prevents pockets of salt.
Integrate Dry Ingredients
Gradually add the dry mixture to the wet ingredients, mixing on low speed just until the flour disappears. The dough should be thick but pliable; stop mixing once combined to avoid over‑development of gluten.
Fold in Oats and Chocolate Chips
Using a spatula, gently fold in the rolled oats, chocolate chips, and optional walnuts. Ensure the chips are evenly dispersed, creating chocolate rivers throughout the bars.
Prepare Baking Sheet
Line a 9×13‑inch (23×33 cm) baking pan with parchment paper, allowing excess paper to overhang for easy removal. Lightly spray the paper with non‑stick cooking spray.
Spread the Dough
Transfer the dough to the prepared pan. Using a dampened spatula, spread it evenly to a thickness of about 1 cm (⅓ inch). Press gently to smooth the surface.
Bake
Place the pan in the pre‑heated oven (350°F / 175°C) and bake for 15‑18 minutes, or until the edges turn a light golden brown and a toothpick inserted into the center comes out with only a few moist crumbs.
✨ Phase 3: Finishing and Serving
Cool, cut, and present your bars for maximum enjoyment.
Cool Completely
Allow the pan to cool on a wire rack for at least 20 minutes. Then, using the parchment overhang, lift the entire sheet of bars onto a cutting board.
Cut Into Squares
Using a sharp knife, cut the cooled slab into 12 even squares (or 16 smaller pieces for a lighter serving). For clean cuts, wipe the blade with a damp cloth between slices.
Serve and Store
Enjoy the bars warm with a glass of milk, or let them cool completely and store in an airtight container. They stay soft for up to a week, and you can freeze them for longer storage.
💡 Expert Tips and Tricks
🛒 Choosing the Right Ingredients
When shopping, look for butter that’s labeled “European style” – it contains a higher butterfat content, which translates to richer flavor and a softer crumb. For chocolate chips, choose ones with a cocoa percentage of at least 70%; lower percentages melt too quickly and can become oily. Finally, select brown sugar with a deep, molasses‑rich color; lighter sugars may lack the caramel undertones that give these bars their signature depth.
🔪 Preparation Techniques
Before mixing, sift the flour and baking soda together. This not only eliminates lumps but also aerates the mixture, ensuring a lighter texture. When folding in chocolate chips, use a gentle “cut‑and‑turn” motion rather than stirring vigorously – this keeps the chips intact and prevents them from melting prematurely.
🌡️ Mastering the Bake
Every oven varies, so place the pan on the middle rack for even heat distribution. If the top browns too quickly, loosely cover the bars with a sheet of aluminum foil after 12 minutes. Use an instant‑read thermometer to check the internal temperature; it should read around 190°F (88°C) when done.
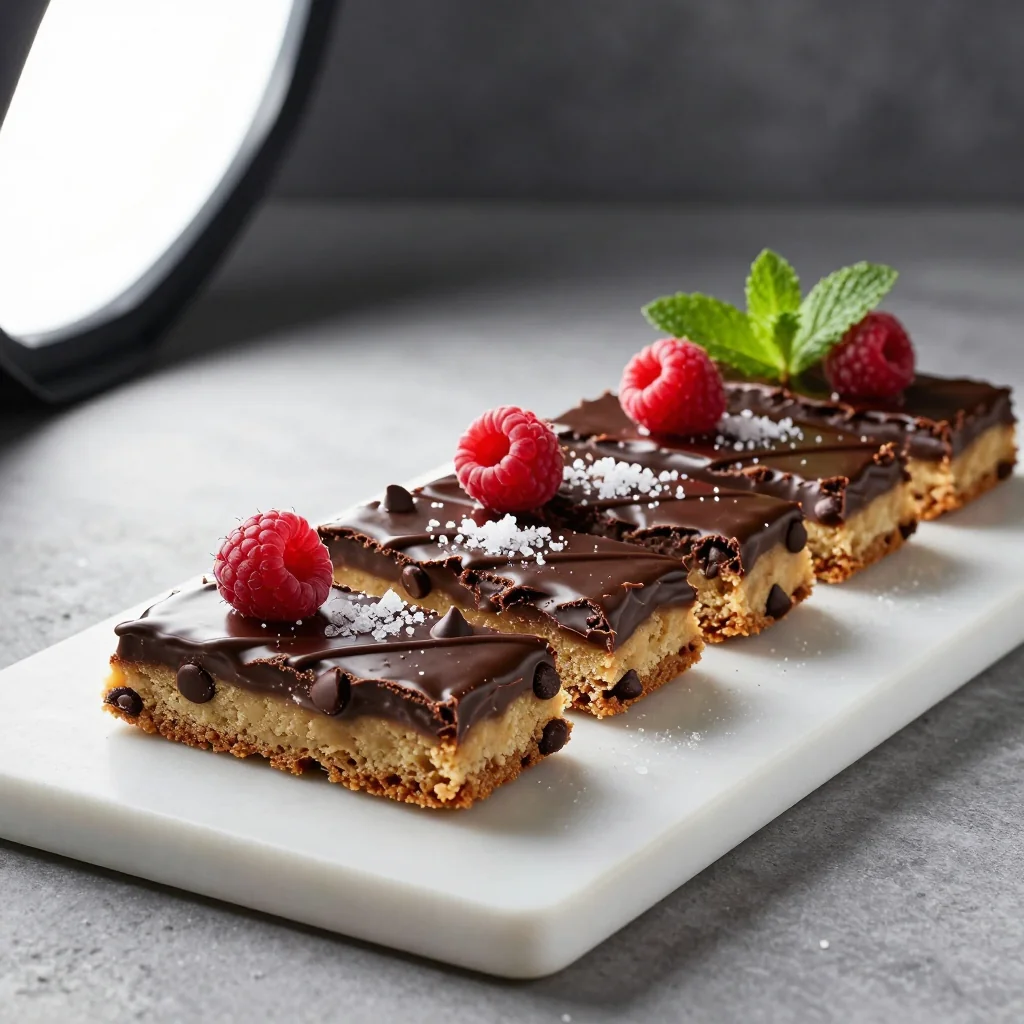
🍽️ Presentation and Service
For a polished look, drizzle a thin line of melted white chocolate across the top after the bars have cooled. Sprinkle a pinch of flaky sea salt just before serving to accentuate the chocolate’s sweetness. Pair with a dollop of lightly sweetened whipped cream for an elegant touch.
🏆 Pro Tips
Elevate your cookie bars from home‑cooked goodness to bakery‑level excellence with these insider secrets.
- 🎯 Control Moisture with Butter Temperature: Using butter at exactly 20 °C (68 °F) creates the ideal emulsion. Butter that’s too warm releases excess oil, making the bars greasy; too cold leaves pockets of unmixed butter, resulting in uneven texture.
- 🎯 Use a Digital Scale for Accuracy: Weighing ingredients eliminates the variability of cup measurements, especially for flour. A 280‑gram flour portion ensures the correct structure and prevents a dense bar.
- 🎯 Chill the Dough Briefly: After mixing, refrigerate the dough for 15 minutes. This firms the butter, reducing spread during baking and yielding a thicker, chewier bar.
- 🎯 Add a Touch of Espresso Powder: One teaspoon of finely ground espresso intensifies the chocolate flavor without adding a coffee taste, a technique used by professional pastry chefs.
- 🎯 Finish with a Light Glaze: Melt 30 g of dark chocolate with a splash of coconut oil; brush over the cooled bars for a glossy finish that also adds a subtle snap.
- 🎯 Portion Adjustment Precision: The built‑in portion calculator recalculates every ingredient based on your desired servings, preserving the balance of flavors and textures.
“The secret to unforgettable cookies is not just the ingredients, but the love and precision you pour into each step.” — Dominique Ansel
🔄 Variations and Adaptations
The basic recipe is a canvas; feel free to paint it with your favorite flavors and dietary needs.
🥬 Vegetarian / Vegan Version
Replace butter with an equal amount of solid coconut oil or a vegan butter alternative. Swap the eggs for ½ cup of unsweetened applesauce or a “flax egg” (1 tbsp ground flaxseed mixed with 3 tbsp water). Use dairy‑free chocolate chips to keep the recipe fully plant‑based.
- Vegan butter provides a buttery mouthfeel while staying plant‑derived.
- Flax egg adds binding power and a subtle nutty note.
🌶️ Flavor Variations
Explore different taste profiles by tweaking the mix‑ins and extracts.
Spicy Version
Add ½ tsp of cayenne pepper to the dry ingredients and fold in ¼ cup of chopped dried chili flakes for a gentle heat that complements the chocolate.
Mediterranean Version
Swap chocolate chips for ½ cup of chopped dried apricots and ¼ cup of toasted pine nuts. Add a teaspoon of orange zest for a bright, citrusy twist.
Asian Inspired Version
Replace chocolate chips with ½ cup of white chocolate and 2 tbsp of toasted sesame seeds. Add a drizzle of honey and a sprinkle of toasted coconut flakes after baking.
⚠️ Dietary Adaptations
Gluten‑Free
Use a 1‑to‑1 gluten‑free flour blend (e.g., rice flour, potato starch, and tapioca starch) in place of all‑purpose flour. Ensure the blend contains xanthan gum for structure.
Lactose‑Free
Swap butter for lactose‑free margarine and choose dairy‑free chocolate chips. The texture remains unchanged while eliminating lactose.
Low‑Calorie
Reduce sugar by 25 % and replace half the butter with unsweetened applesauce. Use mini chocolate chips to keep the chocolate intensity while cutting calories.
👶 Kid‑Friendly Version
For picky eaters, use semi‑sweet chocolate chips and omit the oats. Add a handful of colorful sprinkles after baking for visual appeal. Reduce the salt to a pinch to keep the flavor mild.
📦 Storage and Reheating
🧊 Conservation
Refrigerator
- Duration: 5 days
- Container: Airtight plastic or glass container
- Tip: Place a sheet of parchment between layers to prevent sticking.
Freezer
- Duration: 3 months
- Method: Wrap the entire pan tightly with foil, then place in a freezer‑safe bag.
- Defrosting: Transfer to the refrigerator overnight, then bring to room temperature before serving.
💡 For maximum freshness, keep the bars in a single layer if possible; stacking can cause moisture transfer.
♨️ Reheating
🔥 Oven (Recommended)
- Preheat to 175°C (350°F).
- Cover the bars loosely with aluminum foil.
- Heat for 8‑10 minutes.
- Remove foil and heat an additional 2‑3 minutes for a crisp top.
⚡ Microwave (Quick)
- Place a single bar on a microwave‑safe plate.
- Cover with a microwave‑safe lid or another plate.
- Heat on medium power for 30‑45 seconds.
- Check and add 10‑second bursts if needed.
🍳 Stovetop
Heat a non‑stick skillet over low heat, place a bar, and cover. Warm for 2‑3 minutes, flipping halfway for even heating.
🍷 Perfect Pairings
🥗 Side Dishes
- Fresh Berry Salad: A mix of strawberries, blueberries, and a drizzle of honey balances the richness.
- Greek Yogurt Parfait: Layered with granola and a touch of cinnamon, it adds a creamy contrast.
- Light Citrus Sorbet: The acidity cleanses the palate between bites.
🍷 Wine & Beverage Pairings
- Late Harvest Riesling: Its honeyed notes echo the caramel tones of the bars.
- Stout Beer: The roasted malt flavors complement the chocolate depth.
- Non‑Alcoholic: Sparkling water with a slice of orange adds a refreshing fizz.
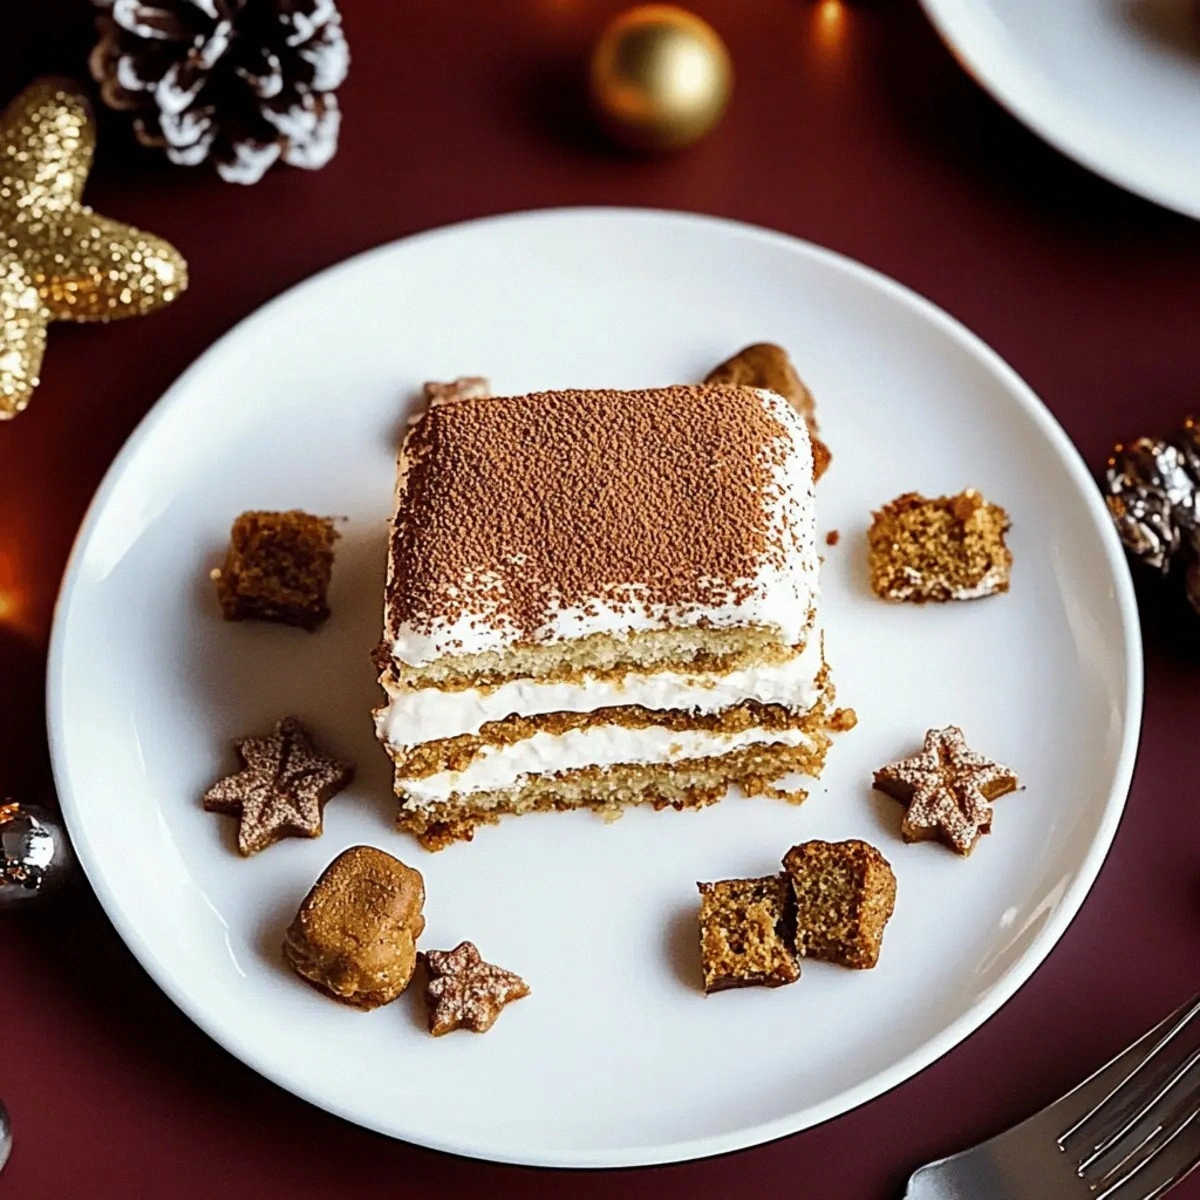
🍰 Complementary Courses
Start with a light lemon‑thyme soup or a crisp garden salad, then serve the cookie bars as a dessert. Follow with a simple vanilla ice cream or a dollop of mascarpone for an extra indulgent finale.
❓ Frequently Asked Questions
Q: Can I use melted butter instead of softened butter?
While melted butter can be incorporated, it changes the dough’s consistency, often resulting in a flatter, crisper bar rather than a soft, chewy texture. If you must use melted butter, let it cool to room temperature before mixing and reduce the liquid components slightly.
Q: How do I prevent the chocolate chips from sinking to the bottom?
Coat the chocolate chips lightly with a teaspoon of flour before folding them into the batter. This creates a barrier that helps the chips stay suspended throughout the dough during baking.
Q: My bars turned out too dry. What went wrong?
Over‑baking is the most common culprit. Check the bars a minute or two before the suggested time; they should be just set at the edges with a slightly soft center. Also, ensure the butter is softened, not melted, and that you haven’t over‑mixed the dough.
Q: Can I add other mix‑ins like dried fruit or coconut?
Absolutely! Dried cranberries, chopped dried apricots, or shredded coconut can replace or accompany the oats and nuts. Keep the total volume of mix‑ins around 1 ½ cups to maintain proper dough consistency.
Q: How can I make the bars gluten‑free without sacrificing texture?
Use a high‑quality gluten‑free flour blend that contains a starch and a binding agent (like xanthan gum). Adding a tablespoon of psyllium husk powder can also improve elasticity and prevent crumbly results.
Q: Is it safe to prepare the dough a day ahead?
Yes. Prepare the dough, shape it in the pan, cover tightly with plastic wrap, and refrigerate overnight. This actually enhances flavor as the ingredients meld, and you’ll still achieve the same texture after baking.
🎉 Let’s Get Baking!
These Cookie Bars with Chocolate Chips are more than just a sweet treat; they’re a celebration of texture, flavor, and the simple joy of homemade baking. By following the detailed steps, using quality ingredients, and applying the pro tips, you’ll create bars that are irresistibly soft, richly chocolatey, and perfectly balanced with a hint of salt.
Remember, the beauty of this recipe lies in its adaptability – whether you’re catering to dietary preferences, experimenting with new flavors, or sharing with friends, there’s always room for a personal twist. So preheat that oven, gather your ingredients, and let the aroma fill your kitchen.
Have you tried this recipe?
Leave a comment and rating below! Share your photos on Instagram with #CookieBarMagic for a chance to be featured.
Cookie Bars with Chocolate Chips
Soft, chewy bars packed with melty dark chocolate – perfect for any occasion.
📝 Ingredients
Dough
Mix‑Ins
👨🍳 Instructions
-
1
Preheat the oven to 350°F (175°C) and line a 9×13‑inch baking pan with parchment paper.
-
2
Cream the softened butter with brown and white sugars until light and fluffy.
-
3
Add eggs one at a time, then stir in vanilla extract.
-
4
Whisk together flour, baking soda, and sea salt; gradually incorporate into the wet mixture.
-
5
Fold in rolled oats, chocolate chips, and walnuts until evenly distributed.
-
6
Spread the dough evenly in the prepared pan, smoothing the top.
-
7
Bake for 15‑18 minutes, watching for golden edges and a slightly soft center.
-
8
Cool in the pan for 20 minutes, then lift using parchment and transfer to a board.
-
9
Cut into 12 equal squares, wiping the knife between cuts for clean edges.
-
10
Serve warm with milk, coffee, or a scoop of vanilla ice cream.
🥗 Nutritional Information (per serving)
*Nutritional values are estimates based on standard ingredient data.
📚 You Might Also Like
Double Chocolate Brownie Squares
Lemon Blueberry Muffins
Salted Caramel Tart


💬 Comments & Reviews
Leave a Comment
No comments yet. Be the first to share your thoughts!