I still remember the first time I attempted fried fish. It was a disaster of epic proportions — oil splattering everywhere, a soggy coating that slid off like a wet sock, and the inside still translucent and raw. My kitchen looked like a crime scene, and I was ready to swear off frying forever. But here's the thing: great fried fish is worth fighting for. That perfect golden crust that crackles under your fork, revealing steaming white flesh so tender it practically falls apart. The way the coating holds onto just enough oil to be decadent but not greasy. The pure satisfaction of hearing that crunch echo through your kitchen like applause.
After months of obsessive testing (my neighbors started avoiding eye contact when they saw me heading to the fish market), I finally cracked the code. This isn't just another fried fish recipe — this is the fried fish recipe that'll ruin restaurant versions for you forever. The coating stays shatter-crisp for hours, not minutes. The seasoning penetrates every layer, not just the surface. And here's the kicker: it's actually foolproof once you understand why each step matters. No more guessing games, no more crossing your fingers and hoping for the best.
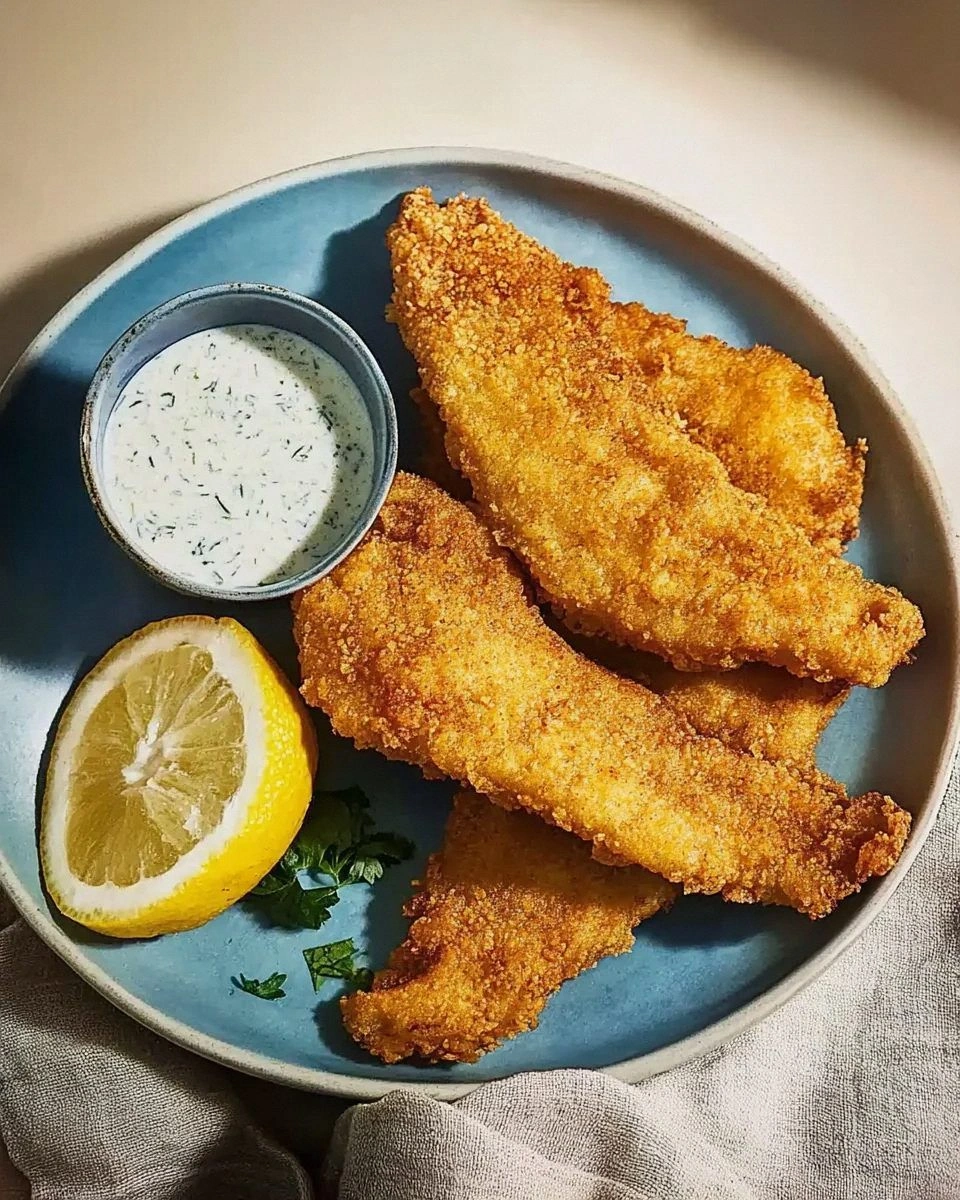
Picture this: You lift a piece from the oil, steam rising like a whispered promise. The crust is so golden it practically glows, with those gorgeous lacy edges that tell you it's going to be perfect. You break it open with your fork and that first bite — oh, that first bite — the coating shatters like spun sugar, giving way to fish so moist and flavorful that you close your eyes involuntarily. Your kitchen smells like the best coastal shack you've ever visited, and you're already planning when you can make it again before you've even finished chewing.
The secret? It's not just one thing — it's a symphony of techniques that most recipes completely overlook. We're talking about the science of starch versus flour, the temperature sweet spot that most home cooks miss by 15 degrees, and the counterintuitive resting method that locks in juiciness while keeping the exterior crisp. Stay with me here — this is worth it. Let me walk you through every single step — by the end, you'll wonder how you ever made it any other way.
What Makes This Version Stand Out
This isn't your grandmother's fried fish (though she'd probably approve after tasting it). What sets this apart is the combination of technique and intuition that transforms ordinary ingredients into something extraordinary. While most recipes give you vague instructions like "fry until golden," we're diving deep into the why behind every decision.
- Double-Coat Magic: The first coat creates a moisture barrier that keeps the fish from getting soggy, while the second coat builds that dramatic crunch that makes people close their eyes when they bite into it. Most recipes skip this step entirely, resulting in coating that separates from the fish like a bad breakup.
- Seasoned Flour That Actually Tastes Like Something: Plain flour is the enemy of flavor. We're building a complex seasoning blend into every layer, not just the surface. Your taste buds will thank you, and you'll never go back to bland, pasty coatings again.
- The 375°F Sweet Spot: Too low and your fish absorbs oil like a sponge. Too high and the outside burns while the inside stays raw. After testing dozens of temperatures, 375°F is the Goldilocks zone that gives you even cooking and perfect texture every single time.
- Resting Time That Defies Logic: Counter to every instinct you have, letting the coated fish rest for 10 minutes before frying actually makes it crispier. The flour hydrates and creates a stronger bond with the fish, preventing that dreaded coating slide-off.
- The Cornstarch Secret: Just two tablespoons mixed into your flour creates a coating so crisp it practically sings. It's the difference between good fried fish and the kind that makes people fight over the last piece.
- Buttermilk Bath Brilliance: This isn't just about flavor (though it adds plenty). The acidity in buttermilk gently tenderizes the fish while helping the coating adhere better than any egg wash ever could.
- Make-Ahead Magic: Unlike most fried foods that must be served immediately, this fish holds its crisp for up to two hours. Perfect for entertaining or those nights when dinner gets delayed by homework help or work emergencies.
- The Three-Minute Rule: Fish continues cooking after you remove it from oil. Taking it out at exactly three minutes (for most fillets) ensures it's perfectly done, not overdone and rubbery like so many restaurant versions.
Alright, let's break down exactly what goes into this masterpiece...
Inside the Ingredient List
Every ingredient here pulls its weight and then some. This isn't about fancy, hard-to-find items — it's about understanding how ordinary components transform when they work together. The magic happens in the ratios, the sequence, and the small details that most recipes gloss over.
The Foundation Squad
Fresh white fish fillets are your canvas, and quality matters more than species here. Cod, haddock, pollock, or even catfish work beautifully — what matters is that it smells like the ocean, not fish. Look for flesh that springs back when pressed and has no fishy smell. If your fishmonger looks at you funny when you ask to smell before buying, find a new fishmonger. The difference between day-old and fresh fish is the difference between a meal that makes you happy and one that makes you question your life choices.
All-purpose flour provides the structural backbone of your coating, but here's what most people get wrong: you need to season it aggressively. Plain flour tastes like wallpaper paste. We're adding salt, pepper, paprika, garlic powder, and a touch of cayenne to create layers of flavor that complement rather than compete with the fish. The flour should taste slightly over-seasoned when raw — that's how you know it'll be perfect when cooked.
Cornstarch is your secret weapon for shatter-crisp texture. Just two tablespoons mixed into your flour creates a coating that stays crispy for hours, not minutes. It's the difference between fried fish that makes you swoon and fried fish that makes you sad. Don't skip this — it's cheap insurance against soggy coating syndrome.
The Flavor Builders
Buttermilk does triple duty here: it tenderizes the fish with gentle acidity, helps the coating adhere better than any egg wash, and adds subtle tang that makes the whole dish taste more complex. Full-fat buttermilk works best, but low-fat works in a pinch. No buttermilk? Mix regular milk with a tablespoon of lemon juice or vinegar and let it sit for five minutes. It's not quite the same, but it'll get you close.
Old Bay seasoning brings that classic coastal flavor that makes you feel like you're eating at a beachside shack. If you don't have Old Bay, a mix of celery salt, paprika, black pepper, and a hint of mustard powder gets you close. But honestly, buy the Old Bay — it lasts forever and makes everything from shrimp to french fries taste like summer vacation.
Lemon zest adds brightness that cuts through the richness of fried food. Use a microplane and only the yellow part — the white pith underneath is bitter and will ruin everything. One lemon zested into your flour mixture is enough to make people ask "what's that amazing flavor?" without being able to identify it.
The Unexpected Stars
Rice flour might seem unnecessary, but just a quarter cup mixed into your coating creates those gorgeous lacy edges that make professional fried fish look so appealing. It also adds an extra layer of crispness that regular flour can't achieve. If you can't find rice flour, substitute cornstarch, but rice flour is worth seeking out at Asian markets.
Club soda in your batter (if you go that route) creates carbonation that makes the coating lighter and crispier. The bubbles expand when they hit hot oil, creating tiny air pockets that result in delicate crunch. Make sure it's ice cold — carbonation escapes faster in warm liquid, and you want maximum fizz for maximum effect.
Cornmeal adds pleasant grit and golden color that screams "authentic Southern cooking." Just a few tablespoons mixed into your flour creates texture contrast and visual appeal. Medium-grind works best — too fine and you lose the texture, too coarse and it overwhelms the delicate fish.
The Final Flourish
Kosher salt for finishing is non-negotiable. That light sprinkle right after frying hits different than salt mixed into the coating. Use Diamond Crystal if you can find it — the larger crystals dissolve slower, giving you pops of salinity that make each bite interesting. Table salt dissolves too quickly and can make your fish taste over-salted by the time it hits the table.
Fresh herbs aren't traditional, but a few fried parsley leaves scattered over the top add restaurant flair and herby brightness. Just drop parsley sprigs in the hot oil for 15 seconds until they stop sizzling. They're purely optional but make you look like a culinary genius when guests ask how you got them so crispy.
Everything's prepped? Good. Let's get into the real action...
The Method — Step by Step
This is where the magic happens, and I'm not going to lie — the first time you do this, you'll feel like you're juggling flaming torches. But stick with me. By your third batch, you'll be moving with the confidence of someone who's done this a thousand times. The key is mise en place: have everything measured, prepped, and within arm's reach before you start.
- Prep Your Fish Like a Pro: Pat your fillets dry with paper towels until no moisture remains on the surface. This isn't optional — water is the enemy of crisp coating. Cut into serving pieces if needed, keeping them roughly the same size so they cook evenly. Season both sides with salt and let them rest while you prepare everything else. The salt draws out surface moisture and seasons the fish from the inside out. Don't worry about over-salting here — most of it will stay in the fish, not the coating.
- Create Your Buttermilk Bath: Pour buttermilk into a shallow dish large enough to hold your fish pieces in a single layer. Add a teaspoon of hot sauce if you like — it won't make it spicy, just adds depth. The buttermilk should be cold; if it's room temperature, pop it in the freezer for 10 minutes. Cold buttermilk helps the coating adhere better and keeps the fish firm during the initial frying stage. This is also when you want to set up your breading station: buttermilk bath on the left, seasoned flour in the middle, and a clean plate on the right.
- Season Your Flour Aggressively: In a large shallow bowl, combine flour, cornstarch, rice flour (if using), Old Bay, paprika, garlic powder, cayenne, salt, and lemon zest. Whisk until the mixture is uniform and smells amazing. Taste a tiny pinch — it should be noticeably salty and flavorful. If it tastes bland, add more seasoning. This is your only chance to season the coating itself, so don't hold back. The flour should look speckled and slightly yellow from the paprika.
- Set Up Your Frying Station: Choose a heavy-bottomed pot or Dutch oven and fill with 2 inches of oil. Clip on a thermometer and heat over medium-high heat. While the oil heats, set up a cooling rack over a baking sheet lined with paper towels. This setup allows air to circulate under the fried fish, keeping it crisp. Don't use paper towels directly on a plate — steam gets trapped and makes the bottom soggy. Position everything within easy reach: oil, coated fish, cooling rack, and salt for finishing.
- First Coat Application: Dip each piece of fish in the buttermilk, letting excess drip off. Dredge in the seasoned flour, pressing gently to adhere. This first coat should be thin and even — you're creating a moisture barrier, not building crunch yet. Place coated pieces on the clean plate and let them rest for 5 minutes. This rest allows the flour to hydrate and form a stronger bond with the fish. Don't skip this step — it's the difference between coating that stays put and coating that abandons ship at the first bite.
- Second Coat for Maximum Crunch: Return each piece to the buttermilk for a quick second dip, then back into the flour for a generous second coating. This is where the magic happens — press the flour on firmly, creating those gorgeous craggy bits that fry up into crispy nuggets of deliciousness. The second coat should be visibly thicker and more textured than the first. Don't be shy here — really pack it on. Those irregular bits become the crispy edges that make people fight over the last piece.
- The Critical Rest Period: Let your double-coated fish rest for another 5-10 minutes while the oil comes to temperature. This rest is crucial — it allows the coating to set and prevents it from falling off in the oil. During this time, the flour continues to hydrate, creating a stronger structure that can withstand the violent bubbling of hot oil. Your oil should read 375°F on the thermometer. If it goes over 380°F, reduce the heat slightly. If it drops below 370°F, increase it.
- First Batch — The Moment of Truth: Gently lower 2-3 pieces of fish into the oil, away from you to prevent splashing. The oil should bubble vigorously but not violently. If it bubbles too aggressively, your oil is too hot. If it barely bubbles, it's too cool. Fry for 2-3 minutes, using tongs to gently move the pieces around after the first minute to prevent sticking. The coating should be deep golden and sound hollow when tapped with the tongs. Remove to your prepared rack and immediately season with salt.
- Master the Timing: While the first batch fries, check your oil temperature — it should return to 375°F between batches. If it drops too much, wait for it to recover before adding more fish. This patience prevents greasy, undercooked coating. Between batches, skim off any floating bits with a slotted spoon — they burn and impart bitter flavors. Your second and third batches might cook slightly faster as the oil retains more heat.
- Final Flourish and Serve: Once all your fish is fried, let it rest for 2-3 minutes. This allows the coating to set and excess oil to drain. Serve immediately with lemon wedges, tartar sauce, or just a sprinkle of fresh parsley. The coating stays crisp for up to 2 hours, but it's at its absolute peak in the first 15 minutes. That first bite, when the coating is still making tiny crackling sounds, is pure fried fish nirvana.
That's it — you did it. But hold on, I've got a few more tricks that'll take this to another level...
Insider Tricks for Flawless Results
Even with perfect technique, there are small details that separate good fried fish from the kind that makes people cancel dinner reservations because they know you're cooking. These are the secrets I learned through trial, error, and some spectacular failures that I'm choosing to call "learning experiences."
The Temperature Rule Nobody Follows
Everyone knows oil temperature matters, but here's what they don't tell you: room temperature fish cooks more evenly than cold fish straight from the fridge. Let your fish sit out for 15-20 minutes before coating and frying. Cold fish lowers oil temperature too dramatically, leading to greasy coating and uneven cooking. But don't go longer than 20 minutes — food safety matters, and you don't want to risk bacteria growth. This small window is the sweet spot where your fish is warm enough to fry properly but not so warm that it becomes a health hazard.
Why Your Nose Knows Best
Your nose is your built-in thermometer. When the oil is ready, it should smell faintly nutty and clean, not acrid or smoky. If you smell burning, your oil is too hot or has particles in it that are burning. Trust your senses — if something smells off, it probably is. Also, fresh oil has a different smell than oil that's been used before. Used oil (strained and stored properly) actually makes better fried fish because it's broken down slightly and creates a better bond with the coating. Just don't reuse oil more than 3-4 times, or it'll start tasting like whatever you fried last.
The 5-Minute Rest That Changes Everything
After frying, resist the urge to immediately dig in. That 5-minute rest on the wire rack allows the coating to set completely and excess oil to drain away. It's tempting to eat it hot out of the oil, but patience pays off. The coating actually gets crisper during this rest as steam escapes and the structure firms up. Plus, you won't burn your mouth, which is always a bonus. Use this time to plate your sides, pour drinks, or just admire your golden-brown handiwork.
The Double-Fry Secret for Extra Crunch
If you want coating that stays crispy for hours (perfect for parties or potlucks), try the double-fry method. Fry your fish for 2 minutes, remove and let drain for 1 minute, then return to the oil for another 30-60 seconds. This creates an ultra-crispy exterior that seems to defy the laws of physics by staying crisp seemingly forever. The first fry cooks the fish and sets the coating; the second fry creates the ultimate crunch. Just be careful not to overcook the fish during the second fry — it's already mostly cooked.
Season While It's Hot (But Not How You Think)
Everyone knows to season fried food while it's hot, but here's the pro move: season lightly before frying, then hit it again immediately after. The first seasoning flavors the coating from within, while the post-fry seasoning hits the surface where your tongue first contacts it. Use kosher salt for the post-fry seasoning — the larger crystals provide little bursts of saltiness that make each bite interesting. And don't forget a tiny bit of lemon zest scattered over the top — it brightens everything without adding more acid.
Creative Twists and Variations
This recipe is a playground. Once you master the basic technique, you can take it in so many directions that you'll never get bored. Here are some of my favorite variations that'll keep things interesting and impress anyone who thinks they've had every possible version of fried fish.
Coconut Curry Crusted
Replace half the flour with unsweetened shredded coconut, and add a teaspoon of curry powder to your seasoning blend. The coconut toasts beautifully and adds tropical flavor that pairs perfectly with flaky white fish. Serve with a mango chutney instead of tartar sauce for a complete flavor journey. The coconut oil in the coating helps it brown faster, so watch your temperature closely and reduce cooking time by 30 seconds.
Southern Cornmeal Style
Swap out half the flour for fine cornmeal and add a teaspoon of sugar to help with browning. This creates the classic Southern fish-fry texture with pleasant grit and golden color. Add some Cajun seasoning instead of Old Bay for authentic Louisiana flavor. The cornmeal creates a heartier coating that stands up well to bold seasonings and spicy remoulade sauce.
Japanese Panko Perfection
Use panko breadcrumbs instead of the second flour coating for ultra-crispy, light texture. Mix some furikake (Japanese rice seasoning) into your first flour coating for umami depth. The panko creates those gorgeous flaky bits that shatter beautifully. This version is especially good with a soy-ginger dipping sauce instead of traditional tartar.
Spicy Nashville-Style
Add a tablespoon of cayenne to your flour mixture and brush the finished fish with a mixture of hot oil and spices (like Nashville hot chicken). The spice level is not for the faint of heart, but the flavor is incredible. Serve with pickle chips and white bread for the full Nashville experience. Start with less cayenne if you're spice-sensitive — you can always add more heat, but you can't take it away.
Herb Garden Fresh
Add dried herbs to your flour mixture — dill, thyme, and oregano work beautifully. Fresh herbs burn in hot oil, but dried herbs infuse the coating with aromatic flavor. Mix some lemon pepper into the final seasoning for brightness. This version pairs beautifully with a herb mayonnaise or green goddess dressing for dipping.
Beer Batter Upgrade
Replace the buttermilk bath and flour coating with a beer batter made from flour, cornstarch, and ice-cold beer. The carbonation creates an incredibly light, puffy coating that's completely different from the crispy version but equally delicious. Use a light beer — dark beers can make the coating bitter. The batter should be the consistency of heavy cream and used immediately.
Storing and Bringing It Back to Life
Here's the reality: leftover fried fish will never be quite as good as fresh, but with the right techniques, you can get surprisingly close. The key is understanding that you're fighting two enemies: moisture that makes coating soggy and heat that can overcook the delicate fish.
Fridge Storage
Let the fish cool completely, then store in an airtight container lined with paper towels. The towels absorb excess moisture and help prevent the coating from getting soggy. Don't stack pieces on top of each other — single layers only. It'll keep for up to 3 days, but honestly, try to eat it within 2 for best quality. Store sauce separately — never refrigerate fried fish with sauce on it unless you enjoy soggy coating.
Freezer Friendly
Believe it or not, you can freeze fried fish and have it turn out decent. Cool completely, then freeze pieces on a baking sheet until solid. Transfer to freezer bags with as much air removed as possible. It'll keep for up to 2 months. The key is reheating from frozen, not thawed — thawing makes the coating mushy. Add 2-3 minutes to your reheating time when cooking from frozen.
Best Reheating Method
Oven reheating works best: place on a wire rack over a baking sheet in a 400°F oven for 8-10 minutes. The rack allows air to circulate and re-crisp the bottom. Skip the microwave unless you enjoy soggy coating. For extra crispiness, spritz lightly with cooking spray before reheating. If you're in a hurry, a toaster oven works almost as well as a full oven. Air fryers work great too — 3-4 minutes at 375°F usually does the trick.