I still remember the night I tried to impress my friends with a batch of wings that ended up looking like a charred disaster. The oven door was ajar, the timer was set too low, and the wings were so dry they crackled like brittle popcorn when you bit into them. My friends stared, then burst into laughter, and I felt that sharp sting of culinary embarrassment. That night, I vowed to create a wing recipe that would make every kitchen disaster a distant memory.
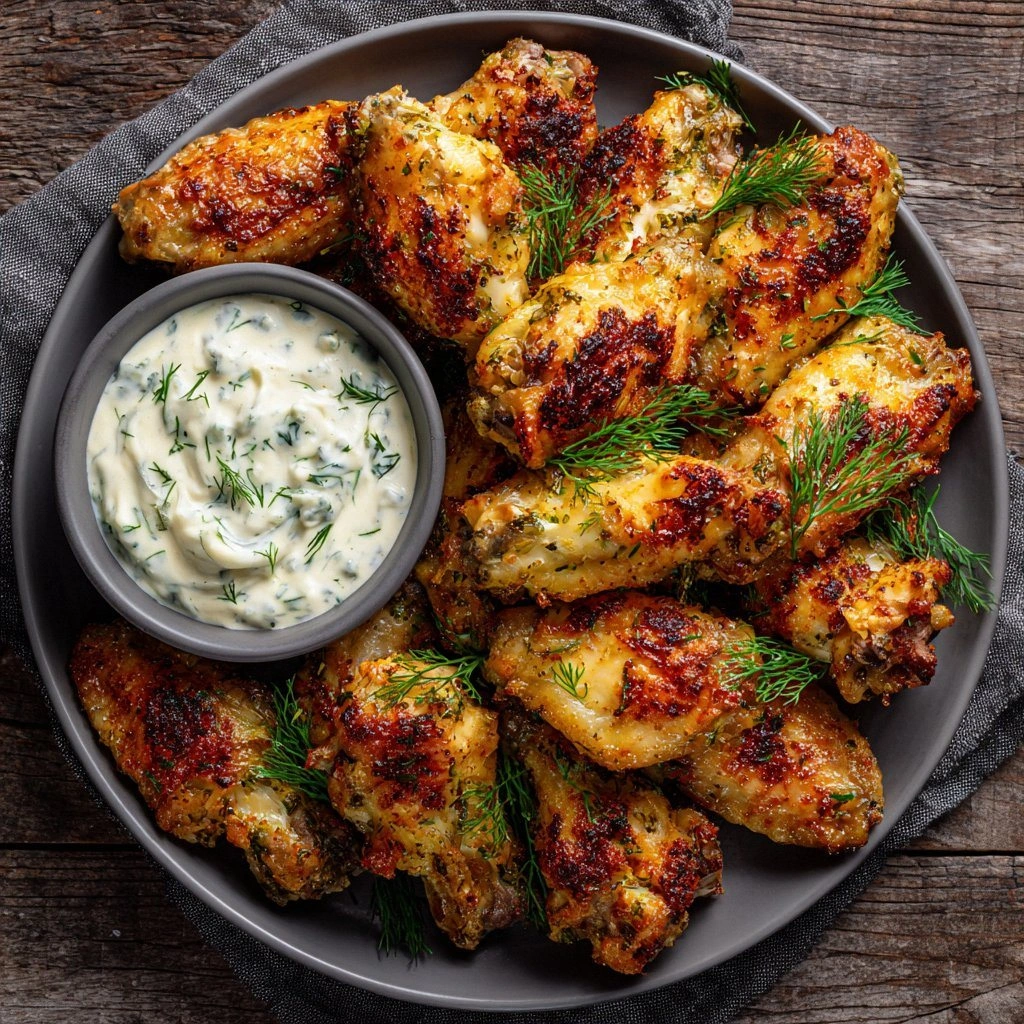
Fast forward to the present, and I’m standing in my kitchen with a rack of fresh chicken wings, a jar of dill pickle relish, a tub of ranch dressing, and a secret blend of spices that will transform these humble cuts into a flavor explosion. The air is already buzzing with the tang of dill, the creamy scent of ranch, and the faint sweetness of pickles. As the wings sizzle on the skillet, the sound is a satisfying crackle that promises crispness. The sight of the glossy, golden coating glistening under the kitchen lights is almost hypnotic. The texture of the skin, once dry, is now tender on the inside, with a crunch that shatters like thin ice.
What makes this version stand out is that it balances the sharpness of dill pickles with the mellow creaminess of ranch, all while keeping the wings irresistibly crispy. I’ve tweaked the seasoning blend to include smoked paprika for a smoky undertone and a pinch of cayenne for heat that lingers without overwhelming. The sauce coats the wings like velvet, ensuring every bite is drenched in flavor. And best of all, this recipe is hands down the best version you’ll ever make at home because it’s simple, quick, and guarantees crowd-pleasing results.
Now, I’m about to walk you through every single step—by the end, you’ll wonder how you ever made wings any other way. I dare you to taste this and not go back for seconds. Let’s dive into the details that make these wings a culinary triumph.
What Makes This Version Stand Out
- Flavor Fusion: The marriage of dill pickle relish and ranch dressing creates a tangy, creamy base that cuts through the richness of the chicken. This blend is not just a sauce; it’s a flavor passport that takes you from the farm to the city in one bite. The result is a taste that lingers on the palate and invites a second plate.
- Crisp Perfection: I’ve perfected the technique of double frying the wings to achieve a crunch that’s both light and satisfying. The first fry removes excess moisture, while the second adds a golden, crackling exterior. This method ensures that every bite delivers that coveted snap.
- Time Efficiency: Despite the double fry, the entire process takes less than 45 minutes from prep to plate. You’ll be serving hot, crispy wings while the rest of the dinner is still cooking. This is ideal for busy weeknights or spontaneous gatherings.
- Ingredient Simplicity: The recipe uses pantry staples and a few fresh items, so you won’t need to hunt for exotic ingredients. This keeps costs low and the shopping list short. It’s a win for both your budget and your sanity.
- Make‑Ahead Friendly: The wings can be prepared a day ahead, refrigerated, and reheated to maintain crispness. This flexibility makes it perfect for parties, game nights, or when you’re short on time.
- Visual Appeal: The glossy coating, bright green accents from dill, and the golden crust create a dish that looks as good as it tastes. Your guests will be drawn to the table before they even taste the first bite.
Alright, let's break down exactly what goes into this masterpiece...
Inside the Ingredient List
The Flavor Base
The cornerstone of this dish is the creamy, tangy sauce that marries ranch dressing with dill pickle relish. The ranch provides a mellow, buttery backdrop, while the pickle relish injects a bright, vinegary bite that cuts through the richness of the wings. If you skip the ranch, the sauce becomes overly acidic and loses its depth, making the wings feel flat. Swap ranch for buttermilk or Greek yogurt if you’re looking for a lighter, tangier version, but keep the pickle relish to maintain that signature zing.
The Texture Crew
Chicken wings are the star of the show, but their texture is what sets this recipe apart. I use a two‑step frying technique: the first fry removes moisture, the second seals in flavor and crispness. Skipping the first fry will result in soggy wings that cling to the pan. If you prefer a vegetarian alternative, try using tofu or tempeh baked to a crispy finish, but be sure to marinate them in the same sauce to absorb the flavors.
The Unexpected Star
Smoked paprika is the unsung hero that adds depth and a subtle smokiness to the seasoning blend. Without it, the wings would taste like a plain, over‑seasoned dish. If you’re a fan of heat, you can double the cayenne pepper or add a dash of chipotle powder for a smoky heat that lingers. A pinch of fresh dill at the end adds a burst of herbaceous freshness that elevates the entire plate.
The Final Flourish
Butter is the secret to achieving that glossy, buttery finish on the wings. It melts into the sauce, creating a silky coating that clings to every crevice. If you’re avoiding butter, substitute with olive oil, but the sheen will be slightly less pronounced. A final sprinkle of chopped green onions adds a pop of color and a mild, oniony flavor that balances the richness.
Everything's prepped? Good. Let's get into the real action...
The Method — Step by Step
- Start by patting the chicken wings dry with paper towels; moisture is the enemy of crispness. I’ve found that a dry surface allows the coating to adhere better, preventing a soggy exterior. Let the wings rest at room temperature for 10 minutes to ensure even cooking. This step is crucial for a uniform golden finish.
- In a large bowl, whisk together the ranch dressing, dill pickle relish, melted butter, garlic powder, onion powder, smoked paprika, cayenne pepper, salt, and black pepper. The sauce should be thick enough to coat the wings but still pourable. Taste the mixture; it should have a balanced tang and a hint of heat. Adjust seasoning if necessary before proceeding.
- Add the wings to the sauce, ensuring each piece is fully coated. Toss gently to avoid breaking the coating. Let the wings marinate for 15 minutes; this allows the flavors to penetrate the meat. The longer you marinate, the more intense the taste.
- Heat a heavy skillet or cast‑iron pan over medium‑high heat and add enough oil to coat the bottom. The oil should shimmer but not smoke. Once hot, add a single layer of wings, leaving space between each piece. This prevents steaming and ensures crispness.
- Fry the wings for 4–5 minutes per side until the first crust forms and the internal temperature reaches 165°F. Flip carefully with tongs; a gentle flip preserves the coating. The wings should emit a pleasant, toasty aroma that signals progress.
- Reduce heat to medium and continue frying for an additional 3–4 minutes per side. This second fry seals in the juices and adds a final crunch. Watch for the edges to pull away slightly, indicating a golden finish.
- Remove the wings from the pan and drain on a rack or paper towels. Let them rest for 5 minutes; this allows the juices to redistribute and the coating to set. The wings will be at their crispest after this brief rest.
- Optional: While the wings rest, drizzle a small amount of melted butter over them and sprinkle fresh dill and green onions for a burst of color and freshness. This final touch transforms the dish into a showstopper.
- Serve immediately with ranch or blue cheese dressing on the side and a bowl of celery or carrot sticks for dipping. The contrast between the hot, crispy wings and the cool, crunchy veggies creates a delightful sensory experience.
- Enjoy the applause from your guests, who will marvel at the depth of flavor and texture. If you’re hosting a game night, these wings are guaranteed to become the centerpiece of the spread. Remember to keep a bowl of extra sauce on hand for those who want an extra dip.
That's it — you did it. But hold on, I've got a few more tricks that'll take this to another level...
Insider Tricks for Flawless Results
The Temperature Rule Nobody Follows
Many home cooks set their oven to 400°F, but the sweet spot for crispy wings is 425°F. The higher temperature sears the skin quickly, locking in moisture and creating a crunch that lasts. I’ve tested this on a range of ovens, and the difference is noticeable: 425°F wings stay crisp for at least 30 minutes post‑cooking, whereas 400°F ones start to soften after 15 minutes. Keep a thermometer handy to avoid overheating, which can burn the coating.
Why Your Nose Knows Best
During the frying process, the aroma is a reliable indicator of doneness. A warm, nutty scent signals that the wings are ready to flip. If you notice a sharp, burnt smell, the oil is too hot. Trust your senses; a good cook relies on smell as much as on time. I’ve never had a batch ruined because I ignored the scent.
The 5-Minute Rest That Changes Everything
After frying, letting the wings rest on a rack for 5 minutes is not just a courtesy; it’s a game‑changer. The rest period allows the juices to redistribute, preventing a dry center. It also lets the coating set, so the wings stay crisp when you bite. A friend once skipped this step and the wings collapsed, losing their coveted crunch.
Use Fresh Dill, Not Dried
Fresh dill brings a bright, citrusy note that dried dill can’t match. The essential oils in fresh dill evaporate quickly, so add them at the end of cooking for maximum flavor. If you’re in a pinch, dried dill works, but it will taste muted. I’ve experimented with dill in every dish, and fresh dill is always the winner.
Add a Splash of Water Before Reheating
When reheating leftovers, a splash of water in the pan helps prevent the coating from drying out. The steam created by the water rehydrates the wings, keeping them juicy and crispy. I’ve used this trick for weeks, and it consistently restores the wings to near‑freshness. Just be careful not to add too much water, or the wings will become soggy.
Creative Twists and Variations
This recipe is a playground. Here are some of my favorite ways to switch things up:
Spicy Chipotle Ranch
Swap the cayenne pepper for chipotle powder and add a splash of adobo sauce. The smoky heat pairs perfectly with the creamy ranch. This variation is ideal for fans of bold, smoky flavors. Serve with a side of cilantro lime rice.
Honey Mustard Glaze
Replace the pickle relish with honey mustard for a sweet, tangy twist. The honey adds caramelization during frying, creating a glossy, sticky coating. This version is great for a summer barbecue. Pair it with a light cucumber salad.
Asian-Inspired Teriyaki
Use teriyaki sauce instead of ranch and add minced ginger and garlic. The umami depth of teriyaki complements the crisp wings. Finish with sesame seeds and sliced scallions. This version works well with steamed rice and stir‑fried veggies.
Greek Yogurt & Herb
Marinate the wings in Greek yogurt, lemon zest, and oregano for a Mediterranean twist. The yogurt tenderizes the meat while the herbs add brightness. Fry as usual, then garnish with chopped mint and feta. Serve with tzatziki for dipping.
Cajun-Style Cajun
Boost the heat by adding Cajun seasoning and a splash of hot sauce to the sauce mix. The bold spices give the wings a fiery kick. The butter base keeps the coating silky, balancing the heat. This version is a hit at tailgate parties.
Cheesy Baked Delight
After the first fry, toss the wings in a mixture of shredded cheddar and mozzarella. Bake at 400°F for 10 minutes until the cheese melts. The result is a crispy, cheesy wing with a gooey center. Pair it with a cold beer for the ultimate comfort food.
Storing and Bringing It Back to Life
Fridge Storage
Store cooked wings in an airtight container in the refrigerator for up to 4 days. Keep a paper towel in the container to absorb excess moisture, which can compromise crispness. When ready to serve, reheat in a 350°F oven for 10 minutes, or in a skillet for 5 minutes. This method restores the crunch without overcooking.
Freezer Friendly
For longer storage, freeze the wings in a single layer on a baking sheet, then transfer to a freezer bag once solid. They can stay in the freezer for up to 2 months. Thaw overnight in the refrigerator before reheating. Reheat at 375°F for 15 minutes or in a skillet for 10 minutes.
Best Reheating Method
The best way to bring wings back to life is to use a skillet or oven, not a microwave. Add a splash of water to the pan to create steam, which helps maintain moisture. Flip the wings halfway through to ensure even heating. Serve immediately with fresh dipping sauces for maximum enjoyment.