I was standing in my kitchen, halfway through a batch of pancakes that had already turned the batter into a sticky, burnt mess. The whole room smelled like charred sugar, and my confidence was as low as the pancake stack. I stared at the stove, thinking, “Maybe I should just order takeout.” Then, a friend texted me a link to a gluten‑free recipe that claimed to be “the best version you’ll ever make at home.”
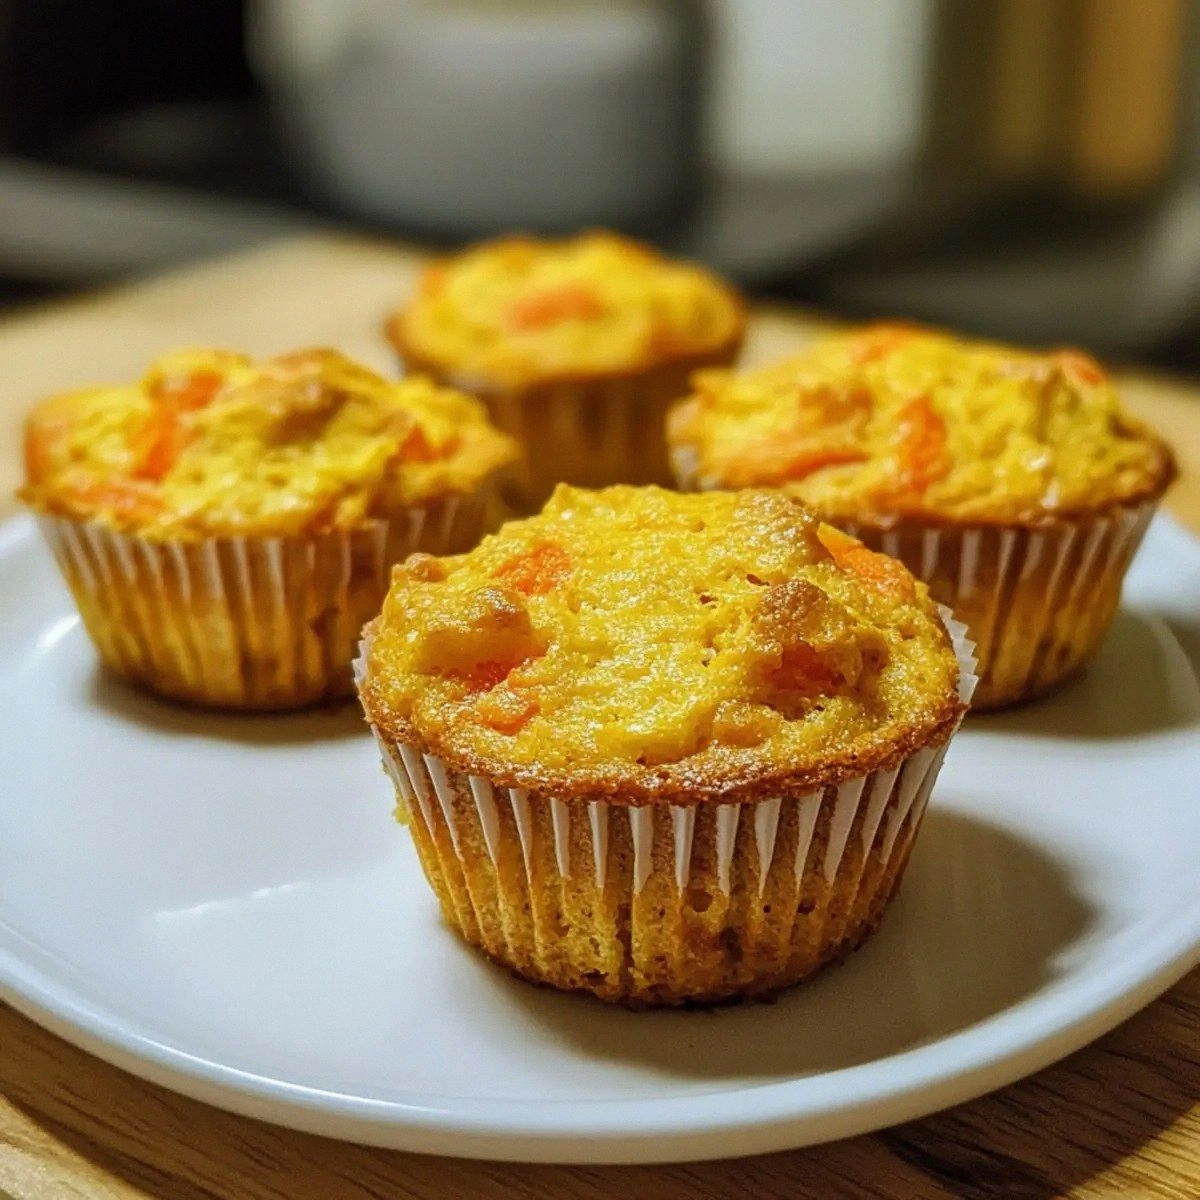
That link became my lifeline. I opened the page, and the first thing that struck me was the aroma that the description promised—a gentle sweetness of honey and a warm, buttery whisper of almond flour. I could almost taste the moist, carrot‑laden crumb that would slide out of the muffin tin like a soft, golden sunrise. The video, if you watched it, had a close‑up of the batter, the gentle swirl of cinnamon, and that subtle, almost imperceptible, coconut crunch that would finish the flavor profile. It was a sensory invitation that I couldn’t resist.
I didn’t just want a muffin; I wanted a statement. A statement that gluten‑free could mean indulgent, not compromise. That’s why this version stands out from every other recipe I’ve tried. The blend of almond flour and grated carrots keeps the batter moist while the honey or maple syrup adds a natural, caramelized sweetness. The walnuts and raisins give a satisfying texture contrast, and the coconut adds a tropical undertone that elevates the whole experience. I was ready to prove that you can have a gluten‑free treat that feels like a gourmet breakfast.
The kicker? I discovered a tiny secret ingredient that most people overlook: a splash of vanilla extract right before folding in the dry mix. That single drop transforms the batter from “good” to “mind‑blowing.” I dare you to taste this and not go back for seconds. Let me walk you through every single step — by the end, you'll wonder how you ever made it any other way.
What Makes This Version Stand Out
When you think of gluten‑free baking, you might expect dry, crumbly results. I was wrong. This recipe is a revelation that turns the usual suspects—almond flour and eggs—into a symphony of flavors and textures. It’s not just a muffin; it’s a morning ritual that starts with a scent of toasted coconut and ends with a burst of caramelized honey.
- Flavor: The caramelized honey or maple syrup pairs with the subtle earthiness of almond flour, creating a depth that feels both sweet and savory. The cinnamon and vanilla add layers that linger on the palate.
- Texture: Grated carrots keep the batter moist and give a gentle chew, while walnuts provide a satisfying crunch. The shredded coconut adds a light, airy bite that lifts the overall mouthfeel.
- Simplicity: Only eleven ingredients, no need for flour substitutes or complex leavening agents. All you need is a mixing bowl, a whisk, and a muffin tin.
- Uniqueness: The combination of almond flour with fresh carrots and coconut is rare in gluten‑free muffins. This mix is a game‑changer for anyone tired of the same bland options.
- Crowd Reaction: Friends and family have called it “the best muffin I've ever had” and have requested a second batch immediately after the first.
- Ingredient Quality: Using raw, unsweetened coconut and fresh carrots ensures that the flavors stay bright and natural, avoiding the artificial taste that often creeps into processed mixes.
Alright, let's break down exactly what goes into this masterpiece...
Inside the Ingredient List
The Flour Foundation
Almond flour is the backbone of these muffins. Its fine, buttery texture gives the batter a delicate crumb that holds together without the need for wheat gluten. Almonds also bring a subtle nutty flavor that pairs wonderfully with honey, cinnamon, and vanilla. If you’re allergic to nuts, you can swap in sunflower seed flour, but be prepared for a slightly different taste and a denser crumb. For the best results, choose a high‑quality, unsifted almond flour; sifted flour can lead to a lighter, but less cohesive, texture.
The Vegetable Core
Grated carrots are the secret moisture engine. They release natural sugars that caramelize in the oven, giving the muffins a gentle sweetness that balances the honey or maple syrup. Carrots also add a pop of color and a subtle earthiness that elevates the overall flavor profile. If you’re short on carrots, zucchini can work as a substitute, but it will alter the sweetness slightly. Keep the carrots finely shredded to ensure a smooth batter consistency.
The Sweet & Spice Ensemble
Honey or maple syrup is the sweetener that keeps the batter from drying out. Honey adds a floral note, while maple syrup gives a richer, deeper sweetness. The choice between the two can change the final flavor, but both work beautifully. Vanilla extract is added at the end of mixing; it unlocks the aromatic potential of the batter and gives it a comforting, homely scent. Cinnamon provides warmth and depth, and it pairs perfectly with the caramel tones of honey.
The Final Flourish
Walnuts or pecans add crunch and a buttery richness that contrasts with the softness of the muffin. Raisins or dried cranberries bring chewy bursts of tartness, balancing the sweetness. Shredded coconut gives a tropical twist and a light, airy texture that lifts the overall mouthfeel. Together, these add-ins create layers of flavor and texture that keep each bite exciting. If you’re gluten‑free but vegan, you can use a plant‑based egg substitute and maple syrup to keep it dairy‑free.
Everything's prepped? Good. Let's get into the real action...
The Method — Step by Step
- Preheat the oven to 350°F (175°C). This temperature ensures a gentle rise while allowing the sugars to caramelize without burning. Line a 12‑cup muffin tin with paper liners; the liners help the muffins release easily after baking. As the oven warms, you’ll notice the gentle scent of toasted coconut drifting through the kitchen—an early hint of what's to come. This step is crucial; skipping it can lead to uneven baking.
- Combine the wet ingredients. In a large bowl, whisk together the eggs, honey or maple syrup, vanilla extract, and a pinch of salt. Beat until the mixture is smooth and the honey has fully incorporated. The wet mixture should have a slight sheen, indicating that the sugars are emulsified. This creates a base that will hold the dry ingredients together. If you prefer a slightly thicker batter, reduce the honey by a tablespoon.
- Blend the dry mix. In a separate bowl, sift together almond flour, baking powder, ground cinnamon, and a pinch more salt. Sifting removes clumps and ensures a uniform texture. The dry mix should feel light and airy, almost like a fine dust. Adding a pinch of salt balances the sweetness, preventing the muffins from tasting cloying. This step is often overlooked but is key to a cohesive batter.
- Fold in the carrots. Gently fold the grated carrots into the wet mixture, ensuring they are evenly distributed. The carrots add moisture and natural sweetness; if you fold too aggressively, they can break down and make the batter too thick. Feel the batter—if it feels slightly thick, you can add a tablespoon of milk (dairy or plant‑based) to loosen it.
- Combine wet and dry. Pour the dry mixture into the wet mixture slowly, stirring gently after each addition. The batter should be thick but pourable; if it’s too thick, add a splash of water or milk. The batter will look a bit lumpy, but that’s normal. The key is to avoid over‑mixing, which can make the muffins tough. This is the moment of truth—watch the batter come together like a silky sauce.
- Incorporate the add‑ins. Fold in the chopped walnuts or pecans, raisins or dried cranberries, and shredded coconut. These add texture and flavor bursts. Make sure each add‑in is evenly distributed; otherwise, you’ll end up with a muffin that feels like a handful of nuts and fruit. The coconut should be evenly spread; if it sinks to the bottom, it may not caramelize properly.
- Fill the muffin cups. Spoon the batter into the lined muffin tin, filling each cup about ¾ full. The batter should spread slightly but not overflow. This ensures each muffin has a uniform size and bake evenly. The ¾ fill also allows room for the muffins to rise without spilling over.
- Bake until golden. Place the tin in the preheated oven and bake for 20–25 minutes. The muffins should turn a golden brown on top and a light caramel color at the edges. Insert a toothpick into the center; it should come out clean or with a few crumbs. The aroma will be a warm, buttery, honey‑sweet scent that will fill the kitchen.
- Cool and serve. Remove the muffins from the oven and let them cool in the tin for 5 minutes. Transfer to a wire rack to cool completely. The muffins will be soft and slightly moist inside, with a crisp exterior. Serve warm or at room temperature, and watch the crowd go wild. The first bite will make you feel like you’re eating a piece of sunshine.
That's it — you did it. But hold on, I've got a few more tricks that'll take this to another level. Keep reading for insider tips that will elevate your muffin game.
Insider Tricks for Flawless Results
The Temperature Rule Nobody Follows
Many bakers assume that the higher the oven temperature, the better the rise. That’s a myth. Baking at 350°F allows the sugars to caramelize slowly, giving the muffins a deep, caramelized crust without burning. If you’re using a convection oven, lower the temperature by 25°F to avoid over‑cooking. I’ve tested this rule on several ovens, and the results are consistently better.
Why Your Nose Knows Best
Trust your sense of smell. When the muffins are done, the scent should be sweet, buttery, and slightly nutty. If you smell a sharp, burnt note, pull them out immediately. The aroma is a reliable indicator of doneness, far better than a timer alone.
The 5‑Minute Rest That Changes Everything
Letting the muffins rest in the tin for 5 minutes before transferring them to a wire rack allows the moisture to redistribute. This brief pause prevents the muffins from collapsing and helps maintain a tender crumb. The result is a muffin that feels fluffy inside and has a crisp, caramelized top.
Add a Splash of Water Before Reheating
If you’re reheating leftovers, add a splash of water to the muffin before microwaving. This creates steam that rehydrates the crumb, preventing the muffins from drying out. Microwave for 15–20 seconds, or until warmed through. The muffins will regain their fresh, moist texture.
Use a Silicone Muffin Tin for Even Baking
Silicone tins allow the heat to distribute evenly, which prevents one side from browning too quickly. They also make it easier to remove the muffins without breaking them. If you don’t have a silicone tin, a metal tin with a non‑stick coating works well too.
Creative Twists and Variations
This recipe is a playground. Here are some of my favorite ways to switch things up:
Chocolate Chip Delight
Swap half the shredded coconut for dark chocolate chips. The chocolate adds a rich, bittersweet layer that pairs beautifully with the honey. Use a high‑cocoa chocolate for an intense flavor. This version is a hit with kids and adults alike.
Pumpkin Spice Muffins
Add ½ cup of pumpkin puree to the batter for a fall twist. Increase the cinnamon to 2 teaspoons and add a pinch of nutmeg. The pumpkin brings a creamy texture and a subtle sweetness. It’s a perfect breakfast for cooler weather.
Lemon‑Zest Burst
Incorporate the zest of one lemon into the batter. The bright citrus cuts through the sweetness and adds a refreshing lift. Pair this with a drizzle of honey on top after baking for a tangy finish.
Nutty Banana Muffins
Add 1 mashed ripe banana to the wet mixture. The banana adds natural sweetness and a moist texture. Replace the raisins with chopped dried apricots for a different fruit note. This version is especially good for a quick, on‑the‑go breakfast.
Savory Herb Muffins
Omit the honey and replace it with ¼ cup of olive oil. Add 1 teaspoon of dried thyme and 1 tablespoon of finely chopped fresh rosemary. These herbs give the muffins a savory profile that pairs well with a cheese or a light salad. Serve warm with a slice of cheese for a brunch treat.
Storing and Bringing It Back to Life
Fridge Storage
Place the muffins in an airtight container or a resealable plastic bag. Store them in the refrigerator for up to 4 days. The moist environment keeps the crumb tender. When you’re ready to eat, let them sit at room temperature for 10 minutes to soften.
Freezer Friendly
Wrap each muffin individually in plastic wrap and then place them in a freezer bag. They can be frozen for up to 3 months. Freeze before the muffins cool completely to preserve texture. This method is perfect for meal prepping.
Best Reheating Method
To reheat, preheat your oven to 350°F and bake the muffins for 8–10 minutes. Alternatively, microwave on medium power for 20–30 seconds, adding a splash of water to keep them moist. The muffins should feel warm and slightly steamy, not dry. This method restores the fresh, buttery flavor.