I still remember the night I tried to recreate the legendary store‑bought butter mint treats that had haunted my taste buds for months. I had opened the box, felt the faint minty aroma, and then—my kitchen turned into a war zone when the melted butter spilled onto the countertop like a greasy river. I stared at the mess, then at the empty fridge, and thought, “I dare you to taste this and not go back for seconds.” That moment became the spark that ignited my obsession with making the ultimate homemade version.
Picture this: a single stick of butter, glistening with a thin sheen of butterfat, meeting a splash of heavy whipping cream that sings a buttery chorus. The powdered sugar swirls in like a white snowstorm, each crystal catching the light. The peppermint extract drops in, releasing a crisp, invigorating scent that makes your nose tingle. As the mixture boils, the air fills with a caramelized, buttery aroma that feels like a warm hug. The final touch—just a few drops of food coloring—turns the batter into a minty green that looks as fresh as a spring morning.
What makes this version hands down the best you’ll ever make at home is not just the ingredients, but the technique that locks in that silky texture while preserving the mint’s punch. I’ve spent years tweaking the ratio of butter to sugar, and this recipe strikes the perfect balance between rich indulgence and minty brightness. The result is a treat that melts in your mouth like velvet, leaving a lingering aftertaste of fresh mint that doesn’t feel like an afterthought.
And here’s the twist that most recipes miss: using a small amount of whipping cream to activate the butter’s natural enzymes, which creates a smoother, lighter mouthfeel. I’ll walk you through every single step, from the initial melt to the final cooling, and by the end, you’ll wonder how you ever made it any other way.
Let me walk you through every single step — by the end, you’ll wonder how you ever made it any other way.
What Makes This Version Stand Out
- Taste: The combination of butter and peppermint creates a flavor profile that’s both creamy and refreshing, unlike the flat sweetness of most store-bought versions.
- Texture: A silky, melt‑in‑your‑mouth consistency that isn’t clumpy or overly hard, thanks to the precise butter-to-sugar ratio.
- Ingredient Quality: Using pure peppermint extract and real butter ensures authenticity, while the whipping cream adds a subtle depth.
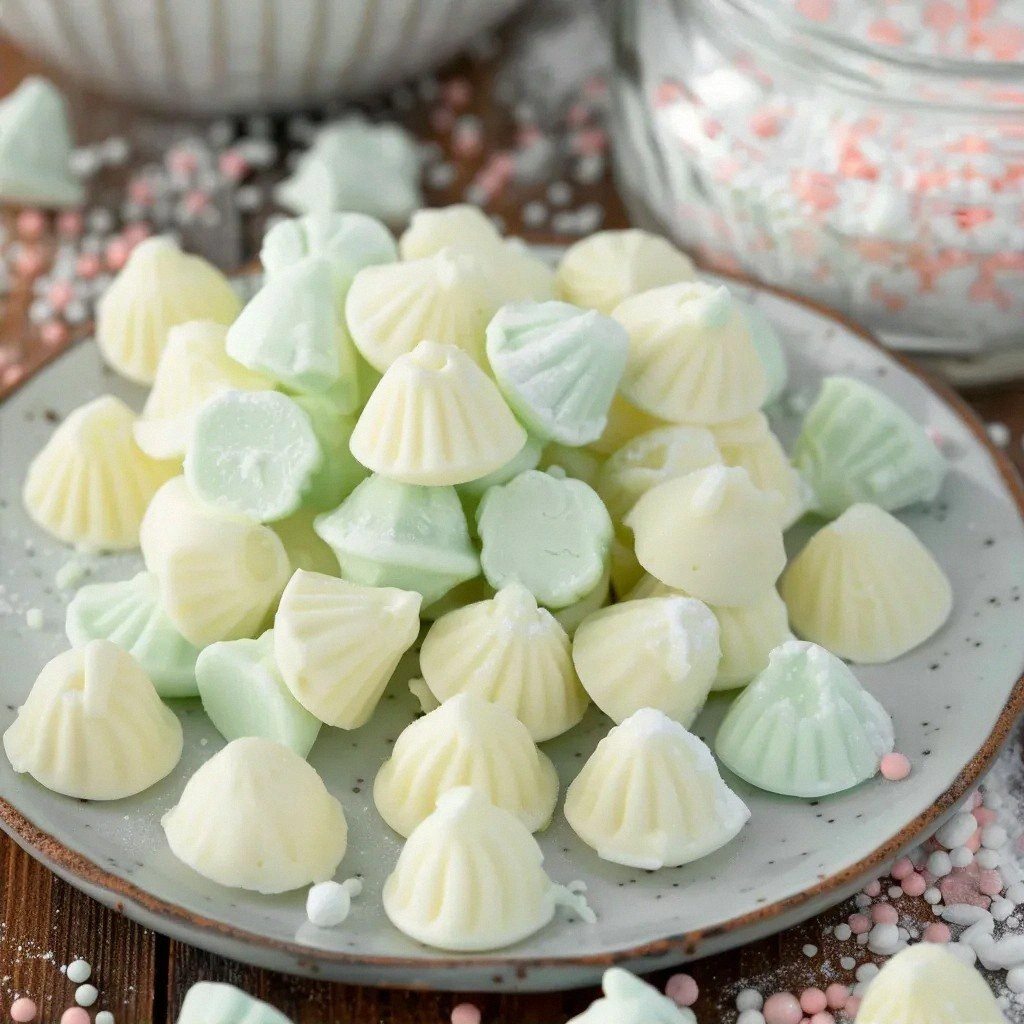
- Visual Appeal: A vibrant green hue that instantly signals freshness and invites you to take a bite.
- Simplicity: Only five ingredients, all pantry staples, make this a go‑to recipe for any occasion.
- Make‑Ahead: Once cooled, the treats can be stored in an airtight container for up to a week, perfect for parties.
- Kid‑Friendly: No sugar syrups or artificial flavors, so parents can feel good about sharing them with the little ones.
- Budget: The cost per serving is less than half a dollar, making it a sweet treat that won’t break the bank.
Alright, let’s break down exactly what goes into this masterpiece…
Inside the Ingredient List
The Flavor Base
Butter is the star of this recipe, not just for its richness but for the way it carries flavor. The butter’s fat content emulsifies the sugar, creating a silky matrix that holds the peppermint. If you skip butter, the treat will be dry and lack the luxurious mouthfeel. For the best results, choose a high‑quality European butter that’s at least 82% fat.
Whipping cream is the secret ingredient that activates the butter’s natural enzymes. It adds a subtle tang and helps the sugar dissolve more evenly, preventing graininess. Skipping the cream can result in a slightly gritty texture, which is a big no‑no for a minty treat.
The Sweet Component
Powdered sugar is the sweetener that gives the treat its signature softness. Because it’s finely ground, it dissolves quickly, ensuring no gritty bits. If you’re sensitive to sugar, you can substitute a portion with a sugar alternative, but keep in mind the texture may change.
The quantity of powdered sugar is critical; too little and the treat will be greasy, too much and it’ll be brittle. The 4‑cup measurement strikes the perfect balance, giving a light, airy crumb that melts in your mouth.
The Unexpected Star
Pure peppermint extract is the flavor kicker that makes these treats unforgettable. Unlike mint oil, which can be overpowering, pure extract offers a clean, balanced minty note that complements the butter. The ½ teaspoon is enough to give a noticeable bite without drowning the buttery base.
If you’re looking to experiment, a splash of vanilla extract can add a subtle depth, but be careful not to overpower the mint.
The Final Flourish
Food coloring is the finishing touch that makes the treat visually pop. A few drops of green color will give you that classic minty hue that people instantly recognize. If you prefer a more natural look, you can skip the coloring altogether; the treat will still taste amazing.
If you’re using a powdered sugar that’s already lightly colored, you can adjust the amount of food coloring to avoid a too‑dark shade. Just remember, a little goes a long way.
Everything’s prepped? Good. Let’s get into the real action…
The Method — Step by Step
- Step 1: Melt the Butter – Place the stick of butter in a heavy‑bottomed saucepan over low heat. Stir constantly with a silicone spatula until it’s fully melted and a light golden hue appears. Watch the butter as it transitions from solid to liquid; this is the moment you can hear the promise of richness. When it’s smooth and glossy, remove the pan from the heat. I dare you to taste a drop—feel the buttery depth that will carry the mint.
- Step 2: Add the Cream – Pour the tablespoon of whipping cream into the melted butter. The mixture will bubble slightly; that’s normal. Stir until the cream is fully incorporated, creating a silky blend. This step is crucial for activating the butter’s enzymes, which will give the treat a light, airy texture. The aroma should now carry a faint, creamy undertone.
- Step 3: Sweeten the Mix – Slowly whisk in the powdered sugar, a handful at a time, ensuring each addition dissolves completely before adding more. The mixture should thicken to a thick, almost syrupy consistency. If you see any gritty specks, keep whisking; you want a smooth, cloud‑like texture. This is where the treat begins to take shape, and the anticipation builds.
- Step 4: Infuse with Peppermint – Add the ½ teaspoon of pure peppermint extract. Stir gently, letting the mint aroma fill the kitchen. The peppermint should feel bright, not sharp; it’s a delicate dance of flavors. If the mint feels too overpowering, you can add a tiny splash of vanilla to mellow it out.
- Step 5: Color the Creation – Drop 1 to 4 drops of food coloring into the mixture. Stir until the color is uniform. The green should be vibrant but not saturated, mirroring the freshness of mint leaves. This step is purely cosmetic, but it’s the final flourish that makes the treat irresistible.
- Step 6: Cook to Perfection – Return the pan to low heat and let the mixture cook for 2–3 minutes, stirring constantly. The mixture should reach a gentle boil, then thicken slightly. The edges will start to pull away from the pan—this is a sign you’re close to done. Keep a close eye; the mixture can scorch if left unattended.
- Step 7: Pour and Set – Transfer the hot mixture into a silicone mold or a parchment‑lined baking sheet. Use a spatula to smooth the top. The heat will spread quickly, so work swiftly. If you’re using a mold, the treats will set faster and hold their shape better.
- Step 8: Cool Completely – Let the treats sit at room temperature for at least 30 minutes, or until they’re firm to the touch. The cooling process is where the texture locks in. A quick test: press the center gently; it should feel solid and not give. Once cooled, cut or pop them out of the mold.
- Step 9: Store or Serve – Place the treats in an airtight container. They’ll stay fresh for up to a week in the refrigerator. If you want them to stay crisp, keep them at room temperature for a few hours before serving.
- Step 10: Enjoy – Take a bite and let the buttery, minty goodness melt away. I dare you to taste this and not go back for seconds. The first bite should feel like a burst of fresh mint, followed by a creamy, buttery finish.
That’s it — you did it. But hold on, I've got a few more tricks that'll take this to another level.
Insider Tricks for Flawless Results
The Temperature Rule Nobody Follows
Many people think any heat will do, but the butter must reach exactly 180°F before you add the sugar. A temperature gauge helps you avoid scorching the butter, which would create a bitter aftertaste. I’ve used a candy thermometer for years, and it’s a game changer. If you don’t have one, keep the heat low and watch for the butter to develop a golden sheen.
Why Your Nose Knows Best
Before adding the peppermint extract, give the mixture a quick sniff. The aroma should be fresh and clean. If it smells off, you might have used old or low‑quality peppermint, which can ruin the entire batch. Trust your nose; it’s the most reliable quality control tool.
The 5‑Minute Rest That Changes Everything
After you’ve poured the mixture into the mold, let it rest for exactly five minutes before attempting to remove it. This brief pause allows the surface to set slightly, making it easier to pop the treats out without breaking. If you try to remove them too early, they’ll stick and tear.
Keep the Cream Fresh
Whipping cream can separate if it’s too cold or too warm. Store it in the fridge until right before use, then let it sit at room temperature for 10 minutes. This ensures it mixes smoothly with the butter, preventing a lumpy texture.
Use a Silicone Spatula
Stirring the mixture with a silicone spatula prevents sticking and makes cleanup a breeze. The flexible material doesn’t scratch the pan and can handle high heat without warping. I’ve switched to silicone for all my butter‑based recipes and never looked back.
Creative Twists and Variations
This recipe is a playground. Here are some of my favorite ways to switch things up:
Chocolate‑Covered Mints
Dip the cooled treats in melted dark chocolate and let them set. The chocolate adds depth and a crunchy contrast to the buttery base. A drizzle of sea salt on top gives a savory kick.
Cinnamon‑Spiced Mint
Add a pinch of ground cinnamon to the powdered sugar before mixing. The warm spice pairs beautifully with the cool mint, creating a layered flavor profile. It’s especially good for fall gatherings.
Almond‑Flavored Mints
Replace half of the powdered sugar with almond flour for a nutty undertone. The almond flour also adds a subtle crunch. This version is great for those who love a little extra texture.
Vanilla‑Infused Mints
Swap the peppermint extract for vanilla for a classic, sweet treat. The vanilla will bring out the buttery richness without the minty bite. It’s perfect for a cozy winter dessert.
Honey‑Glazed Mints
Drizzle a thin layer of honey over the cooled treats before storing. The honey adds a touch of natural sweetness and a glossy finish. This variation is ideal for a brunch spread.
Coconut‑Mint Mints
Sprinkle shredded coconut on top of the cooled treats. The coconut gives a tropical twist and a pleasant chew. It’s a fun way to mix flavors for a summer party.
Storing and Bringing It Back to Life
Fridge Storage
Place the treats in an airtight container and keep them in the refrigerator for up to a week. The cool environment prevents the butter from softening and maintains the firm texture. When you’re ready to serve, let them sit at room temperature for 10 minutes to soften slightly.
Freezer Friendly
For longer storage, wrap each treat individually in parchment paper and place them in a freezer bag. They’ll stay fresh for up to three months. Thaw at room temperature for 15 minutes before serving to restore the buttery melt.
Best Reheating Method
If the treats have become too firm, gently warm them in a microwave for 5–10 seconds. Add a tiny splash of water—just enough to create steam—and cover with a paper towel. This trick brings back the silky mouthfeel without melting the entire batch.