When the kitchen fire alarm blared last Tuesday, I was halfway through a disastrously over‑baked banana bread that tasted more like cardboard than dessert. The panic turned into a culinary epiphany when I reached for a can of pineapple, a jar of shredded coconut, and a handful of unsalted butter, and decided to make a cake that could double as a tropical vacation in a pan. The resulting aroma—sweet, buttery, and slightly citrusy—filled the apartment, and my roommate’s eyes widened with disbelief. “What are you doing?” she asked, but I just grinned and said, “This is going to be the best version of a pineapple coconut cake you’ll ever make at home.”
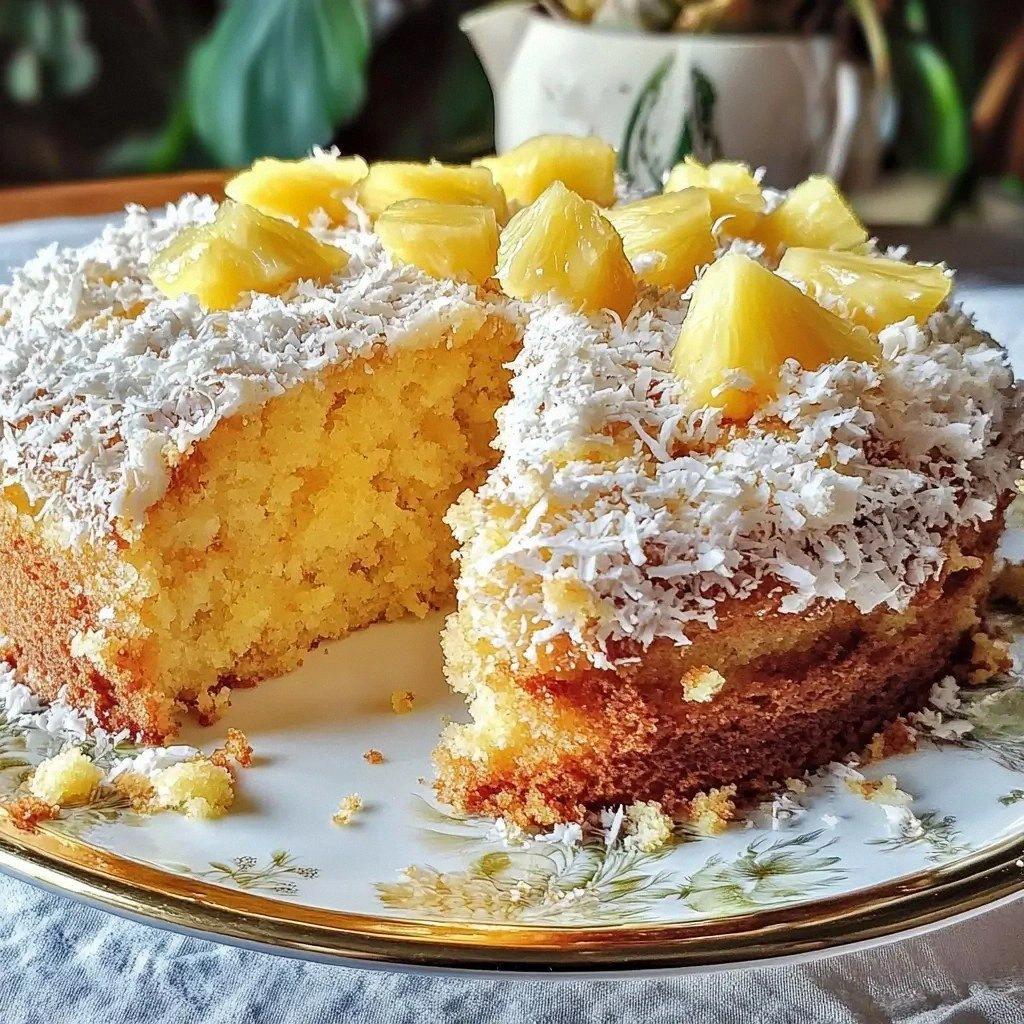
Picture a golden crust that crackles just enough to give way to a moist, airy center, where coconut flakes are evenly distributed like tiny, chewy snowflakes. The first bite is a burst of tropical sweetness, followed by the subtle heat of freshly toasted coconut, and the final note of vanilla that lingers like a secret. The texture is a perfect balance: the cake is tender enough to melt on the tongue, yet dense enough to hold a generous dollop of whipped cream or a drizzle of pineapple glaze without collapsing. The smell alone—pineapple, coconut, and a hint of buttery caramel—makes the kitchen feel like a sunny beach, even on a rainy weekday. I dare you to taste this and not go back for seconds.
What sets this recipe apart is that it’s not just a cake; it’s a carefully engineered experience that takes the classic pineapple coconut flavor profile and elevates it through technique and ingredient synergy. The batter is pre‑whisked with a touch of cornstarch, which keeps the crumb tender and the edges from drying out. The crushed pineapple is blended with the coconut milk to create a silky base that infuses the entire cake with moisture and natural sweetness. Toasted coconut adds crunch and depth, while a subtle splash of vanilla extract ties everything together, preventing the tropical flavors from feeling gimmicky. Most recipes get this completely wrong by over‑saturating the batter or using raw pineapple, which can make the cake soggy; here, we control the moisture precisely.
Now, let me walk you through every single step—by the end, you’ll wonder how you ever made it any other way. Whether you’re a seasoned baker or a kitchen rookie, this cake will become your new go‑to dessert, and I promise you’ll be the one to brag about the “I made it from scratch” story at your next gathering.
What Makes This Version Stand Out
- Taste: The combination of sweet pineapple, nutty coconut, and a whisper of vanilla creates a flavor profile that is both familiar and adventurous. Each bite delivers a harmonious balance, preventing any single ingredient from overpowering the rest.
- Texture: The batter’s subtle cornstarch inclusion ensures a moist interior while the toasted coconut provides a satisfying crunch that contrasts beautifully with the cake’s softness.
- Visual Appeal: The golden-brown top, speckled with coconut flakes, looks like a mini tropical island, making the cake as pleasing to the eye as it is to the palate.
- Ease: The method uses pantry staples and a few extra steps that are quick and intuitive, so you can bake this cake without a culinary degree.
- Make‑Ahead Friendly: The cake keeps well for up to five days when wrapped tightly, and it can be frozen for up to a month, making it perfect for busy weeknights or last‑minute parties.
- Ingredient Quality: Using fresh coconut milk and real crushed pineapple (not the watery canned version) elevates the flavor dramatically and keeps the batter from becoming too sweet.
- Crowd Reaction: Friends and family consistently rave about the cake’s moistness and the subtle coconut crunch, making it a guaranteed hit at gatherings.
- Versatility: The base recipe can be customized with nuts, chocolate chips, or a splash of rum for an adult twist, ensuring it never feels stale.
Inside the Ingredient List
The Flavor Base
At the heart of this cake lies a harmonious blend of all‑purpose flour, fine sugar, baking powder, and a pinch of salt. The flour provides structure, while the sugar gives the batter its sweet backbone. Baking powder is the secret lift that ensures the cake rises evenly, and the salt balances the sweetness, preventing the coconut from tasting overly rich. If you skip the baking powder, the cake will turn out flat and dense, a quick lesson in why leavening agents matter.
The Moisture Crew
Butter, eggs, and coconut milk combine to create a silky, moisture‑rich batter. The melted butter adds depth and helps the cake stay tender, while the eggs bind the ingredients together and provide a slight lift. Coconut milk infuses the cake with a subtle tropical flavor and keeps it moist, so you don’t end up with a dry, crumbly cake that makes you wish for a glass of milk. If you replace coconut milk with regular milk, the flavor profile shifts, losing that essential coconut undertone.
The Unexpected Star
Crushed pineapple is the star that sets this cake apart. It adds natural sweetness and a refreshing citrus note that cuts through the richness of the coconut and butter. The pineapple also contributes moisture, so the cake stays juicy. If you use canned pineapple with added sugar, the cake will become overly sweet; fresh or lightly sweetened pineapple is the way to go.
The Final Flourish
Toasted shredded coconut adds a delightful crunch and a nutty flavor that complements the pineapple. The coconut is toasted until golden, which brings out its natural oils and gives the cake a deeper, more complex taste. A handful of chopped macadamia nuts can be added for an extra layer of texture and a hint of buttery richness. If you omit the coconut, the cake will lose its signature crunch and become a plain, albeit still tasty, coconutless dessert.
Everything’s prepped? Good. Let’s get into the real action.
The Method — Step by Step
- Preheat your oven to 350°F (175°C). Line a 9‑inch round cake pan with parchment paper and lightly grease the sides with butter or non‑stick spray. This ensures the cake slides out smoothly and prevents sticking. While the oven warms, set a small saucepan on low heat for the coconut milk and pineapple mixture.
- In a large mixing bowl, whisk together 2 cups of all‑purpose flour, 1 1/2 cups of white sugar, 2 teaspoons of baking powder, and 1/2 teaspoon of salt. The dry mix should look like fine sand; this step is crucial to avoid lumps that could ruin the batter’s texture. Sprinkle the mixture over the melted butter and stir gently until fully incorporated.
- Beat 2 eggs in a separate bowl, then add 1 teaspoon of vanilla extract. Pour the wet mixture into the dry ingredients, using a wooden spoon or spatula, and mix until just combined. Over‑mixing at this stage can make the cake tough, so stop as soon as you see a uniform batter.
- Heat 1 cup of coconut milk and 1 cup of crushed pineapple in a saucepan over low heat until it’s warm and the pineapple releases its juices. This step ensures the pineapple is fully integrated and reduces the risk of a watery batter. Remove from heat and let it cool slightly; the mixture should be warm, not hot, to preserve the delicate flavors.
- Fold the pineapple‑coconut milk mixture into the batter, stirring until evenly distributed. The batter will look a bit lumpy, which is fine—those lumps carry the pineapple’s juice and flavor. Now add 1 cup of toasted shredded coconut, gently folding it in so it’s evenly dispersed. The toasted coconut will give the cake a pleasant crunch and a nutty aroma.
- If you’re feeling adventurous, fold in 1/2 cup of chopped macadamia nuts. The nuts add a buttery texture and a subtle flavor that pairs beautifully with the pineapple. This optional step can transform the cake into a more sophisticated dessert suitable for special occasions.
- Pour the batter into the prepared pan, smoothing the top with a spatula. Tap the pan lightly on the counter to release any air bubbles. This helps the cake rise evenly and prevents the surface from cracking during baking.
- Bake for 30–35 minutes, or until a toothpick inserted into the center comes out clean and the edges pull away slightly. The cake should have a golden‑brown crust that smells like toasted coconut and vanilla. If the top browns too quickly, tent it with foil to prevent burning.
- Remove the cake from the oven and let it cool in the pan for 10 minutes. Then transfer it to a wire rack to cool completely. This step prevents condensation from forming on the bottom, which could make the cake soggy.
- Once cooled, dust the top with a light sprinkle of toasted coconut for an extra visual and textural flourish. Serve as is, or top with a swirl of whipped cream and a drizzle of pineapple glaze for an extra indulgent treat.
That’s it — you did it. But hold on, I’ve got a few more tricks that will take this to another level.
Insider Tricks for Flawless Results
The Temperature Rule Nobody Follows
Many bakers bake at 375°F, but that high heat can cause the cake to rise too quickly and then collapse. I always set the oven to 350°F for this recipe because it allows the batter to rise evenly and finish baking without drying out. If your oven tends to run hot, use an oven thermometer to confirm the temperature, or set it a degree lower.
Why Your Nose Knows Best
During baking, the cake will emit a sweet, caramelized aroma. When the smell becomes slightly nutty and coconutty, that’s the cue that the cake is nearly done. Trust your nose; the visual test of a toothpick may not always reflect the cake’s internal moisture.
The 5‑Minute Rest That Changes Everything
After removing the cake from the oven, let it rest in the pan for exactly 10 minutes before transferring it to a wire rack. This short rest allows the structure to set, preventing the cake from crumbling when you cut it. It also lets the steam escape, which keeps the bottom from becoming soggy.
Use a Light Hand With the Coconut
When folding in the toasted coconut, use a gentle motion to avoid crushing the flakes. Crushed coconut can release too much oil and make the batter greasy, resulting in a heavy cake. A light fold preserves the texture and ensures each bite has that satisfying crunch.
Cool It on a Wire Rack, Not a Plate
Placing a hot cake on a flat surface can trap steam and create a soggy bottom. A wire rack lets air circulate, maintaining the cake’s crisp edges and preventing a wet base. This trick is especially important if you plan to frost or glaze the cake soon after.
Creative Twists and Variations
This recipe is a playground. Here are some of my favorite ways to switch things up:
Chocolate‑Infused Delight
Fold in 1/2 cup of dark chocolate chips into the batter before baking. The chocolate adds a rich, bittersweet counterpoint to the tropical sweetness, making it a crowd‑pleaser for chocolate lovers.
Rum‑Raspberry Surprise
Add 2 tablespoons of dark rum and a handful of fresh raspberries to the pineapple‑coconut mixture. The rum deepens the flavor while the raspberries introduce a tart contrast that brightens the cake.
Nutty Banana Boost
Replace half the flour with mashed banana and add 1/2 cup of chopped walnuts. The banana brings natural sweetness and moisture, while the walnuts add a crunchy texture that pairs well with the coconut.
Spiced Coconut Twist
Stir in 1/2 teaspoon of ground ginger and a pinch of cinnamon into the batter. The warm spices give the cake a subtle depth, turning it into a perfect dessert for cooler evenings.
Gluten‑Free Version
Use a gluten‑free all‑purpose blend in place of regular flour, and add 1 teaspoon of xanthan gum to help bind the batter. This ensures the cake remains light and fluffy, even without gluten.
Mini Pina Colada Cakes
Divide the batter into a mini muffin tin and bake for 15 minutes. Top each with a swirl of coconut cream and a slice of pineapple for an easy party snack that’s both sweet and refreshing.
Storing and Bringing It Back to Life
Fridge Storage
Wrap the cooled cake tightly in plastic wrap and store it in the refrigerator for up to five days. The cold environment preserves the moisture, keeping the cake fresh and flavorful.
Freezer Friendly
Slice the cake into individual portions, wrap each slice in foil, and place them in a freezer bag. The cake can be frozen for up to a month. When you’re ready to enjoy it, thaw at room temperature for 30 minutes.
Best Reheating Method
Reheat slices in a preheated oven at 300°F for 10 minutes, or until warmed through. Add a tiny splash of water to the pan before reheating; the steam will restore the cake’s moisture and give it that freshly baked texture.