Picture this: you’re standing in your kitchen, the clock ticking past midnight, and a sudden craving for something sweet, salty, and ridiculously indulgent hits you like a freight train. I was in that exact spot last week, after a marathon of spreadsheets and a half‑finished Netflix binge, when I realized the only thing that could rescue my mood was a bite‑sized miracle that could survive the freezer and still taste like it was fresh‑made. I rummaged through the pantry, found a tub of Greek yogurt that had been chilling for days, a jar of peanut butter that never disappoints, and a stash of chocolate chips that were practically begging to be melted. I thought, “Why not combine these champions into one bite‑size wonder?” and the rest, as they say, is delicious history.
The kitchen was a symphony of sounds: the clink of the spoon against the glass bowl, the soft thud of chocolate chips dropping into the mix, and the low hum of the freezer door opening and closing like a secret portal to dessert heaven. The air filled with the sweet perfume of honey mingling with the earthy tang of Greek yogurt, while the peanut butter added a buttery, nutty depth that made my nostrils dance. When I finally scooped the first bite onto a parchment square and slipped it into the freezer, I felt like a mad scientist watching a crystal‑clear experiment set to solidify into perfection. The anticipation built as the timer ticked down, and when I finally pulled the first bite out, the contrast of creamy, cool yogurt against the snap of dark chocolate was nothing short of fireworks.
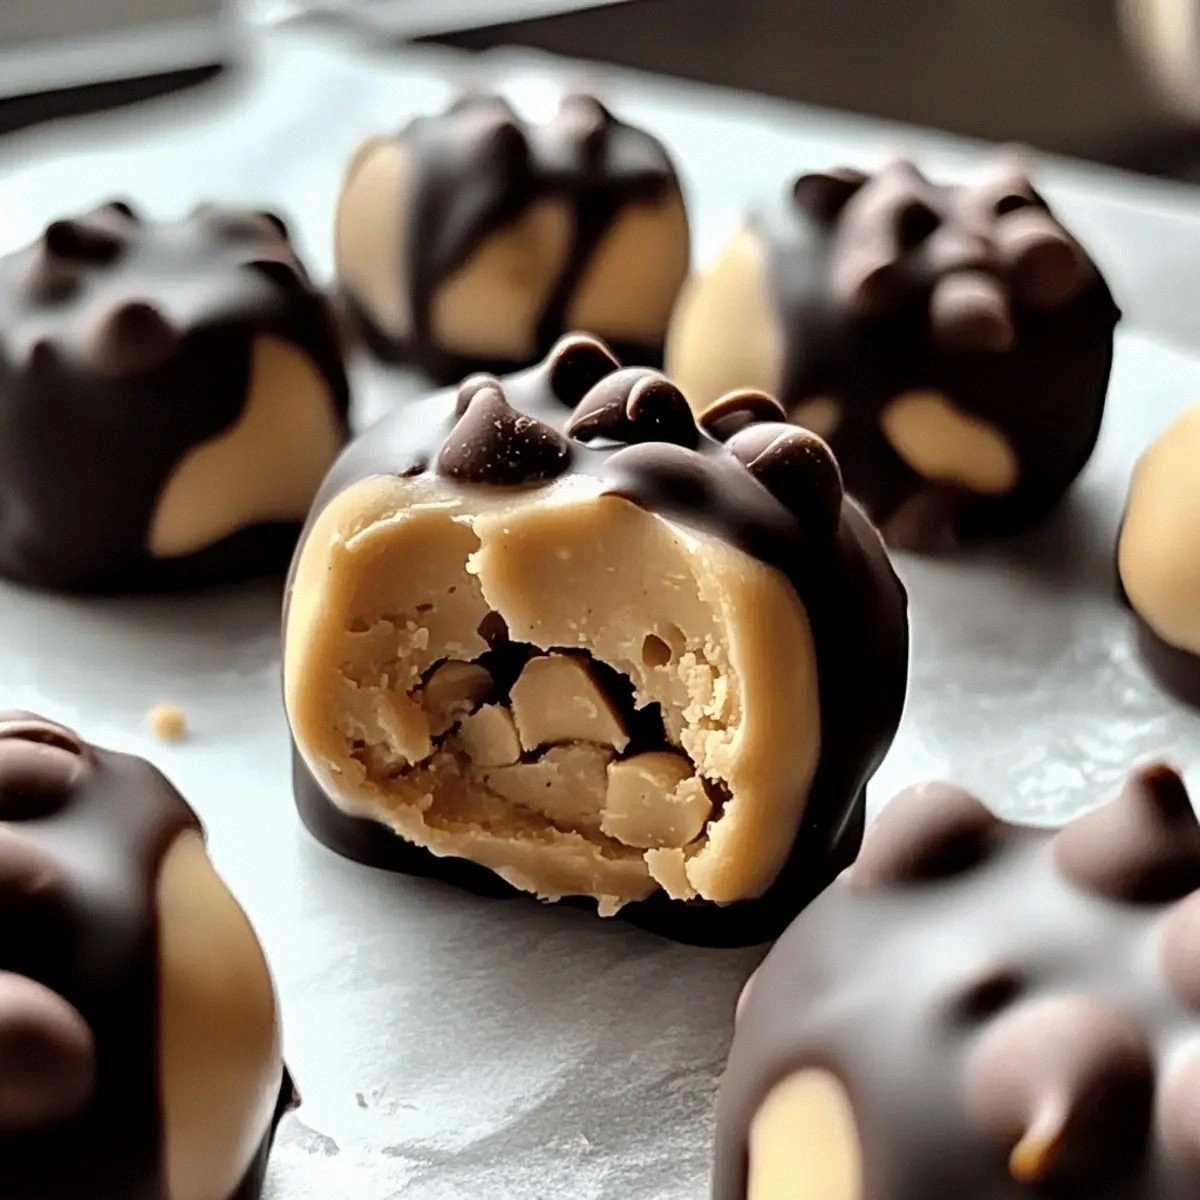
Most frozen yogurt bites end up either soggy or bland, but this version hits every note on the taste spectrum. The secret? A perfect balance of tangy Greek yogurt, rich peanut butter, and a double‑layer of chocolate that creates a textural dance—soft, creamy centers surrounded by a crisp chocolate shell that shatters like thin ice. I dare you to taste this and not go back for seconds; the combination is so addictive you’ll be sneaking bites between meetings, and I’ll be honest — I ate half the batch before anyone else got to try it. Most recipes get this completely wrong. Here’s what actually works: the addition of a tablespoon of coconut oil to the chocolate coating, which gives it a glossy sheen and a snap that’s pure bliss.
And now the fun part: I’m going to walk you through every single step, from selecting the creamiest Greek yogurt to mastering the chocolate tempering trick that makes the coating shine like a jewel. By the end, you’ll wonder how you ever made these bites any other way. Okay, ready for the game‑changer? Let’s dive in.
What Makes This Version Stand Out
- Flavor Fusion: The tang of Greek yogurt meets the salty depth of peanut butter, creating a sweet‑savory harmony that’s impossible to ignore.
- Texture Contrast: A silky interior wrapped in a crisp chocolate shell gives you a bite that snaps, melts, and lingers all at once.
- Simplicity: Only ten ingredients, five of which you probably already have, and no fancy equipment beyond a freezer and a microwave.
- Ingredient Quality: Using plain Greek yogurt and dark chocolate ensures a rich, authentic taste without unnecessary additives.
- Crowd Reaction: These bites disappear at parties faster than you can say “one more,” making them the ultimate crowd‑pleaser.
- Make‑Ahead Magic: Store them for weeks in the freezer; they stay fresh and firm, ready for an impromptu snack.
- Health Boost: Packed with protein from the yogurt and healthy fats from peanut butter and coconut oil, they’re a guilt‑free indulgence.
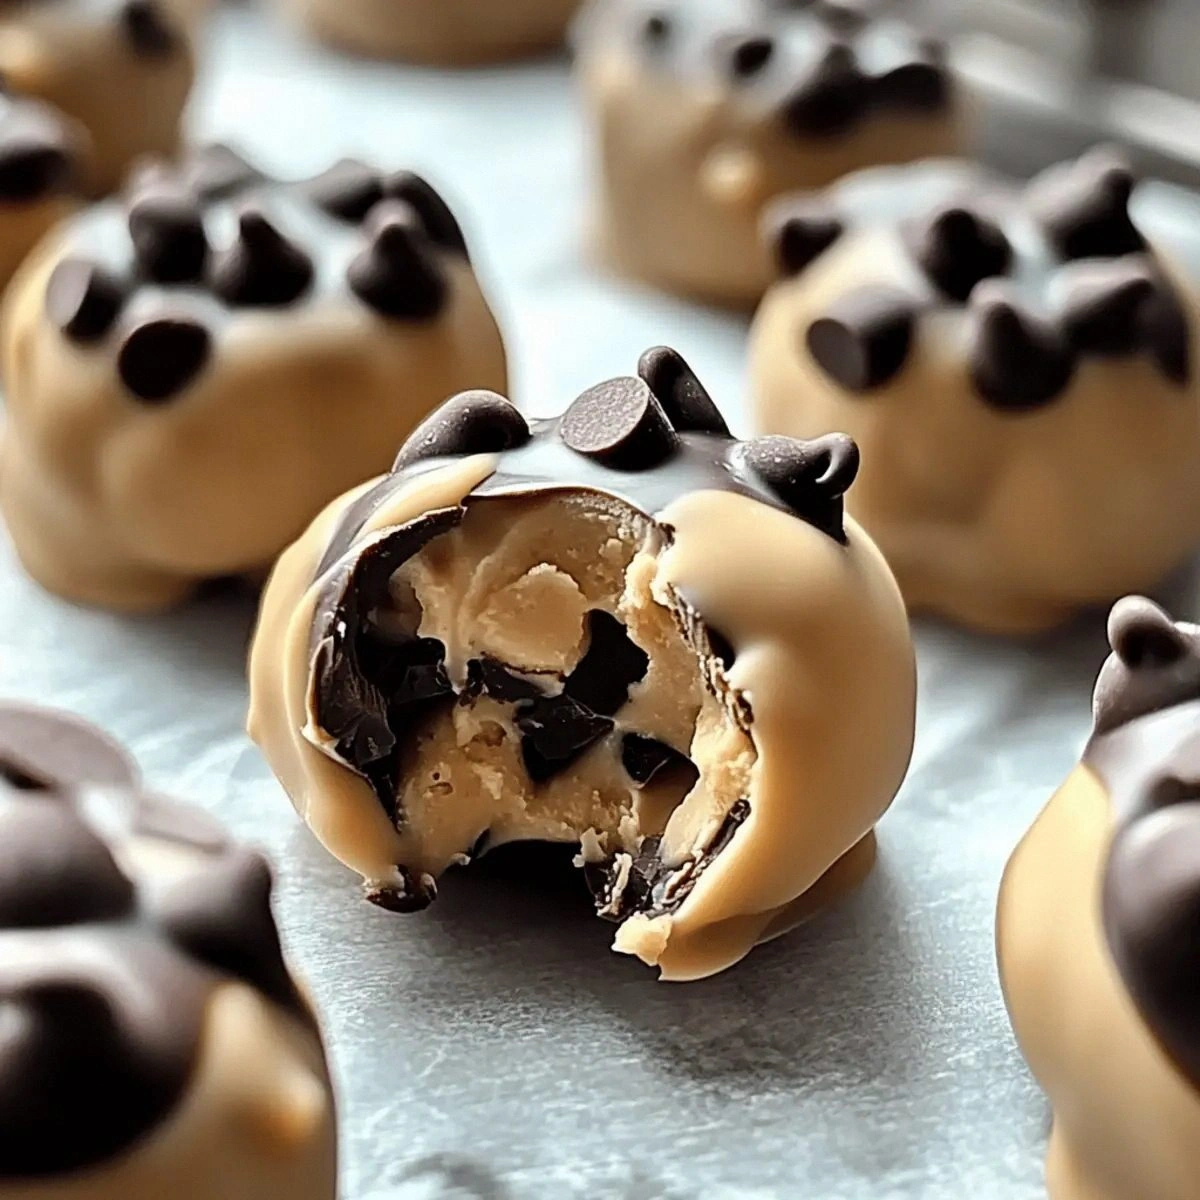
- Visual Appeal: The glossy dark chocolate coating dotted with mini chips and a sprinkle of sea salt makes them look as good as they taste.
Inside the Ingredient List
The Flavor Base
Plain Greek Yogurt (1 cup): This is the heart of the bite, providing a thick, tangy canvas that balances the sweetness of honey and chocolate. Choose a full‑fat version for creaminess; low‑fat can make the center watery. If you skip it, you’ll lose the signature tang that makes these bites feel like a frozen dessert rather than just a chocolate‑coated candy.
Creamy Peanut Butter (½ cup): The peanut butter adds a nutty richness and a subtle saltiness that elevates the overall flavor profile. Opt for a natural, unsweetened variety to keep the sugar level in check. Swapping it for almond butter works, but you’ll lose that classic peanut punch.
Honey (¼ cup): Honey is the natural sweetener that binds the yogurt and peanut butter while adding floral notes. It also helps the mixture freeze more smoothly. If you’re allergic to honey, maple syrup is a decent stand‑in, though the flavor will shift slightly.
The Texture Crew
Mini Chocolate Chips (½ cup): These tiny gems melt into the coating, creating pockets of molten chocolate that burst with each bite. They’re essential for that “pop‑in‑your‑mouth” sensation. Using regular chips will give you larger pockets, which is fine if you prefer a chunkier texture.
Dark Chocolate Chips (1 cup): The outer shell’s backbone, dark chocolate provides a bittersweet snap that contrasts the sweet interior. Choose at least 70% cacao for the best flavor; lower percentages can make the coating too sweet and waxy.
Coconut Oil (1 tbsp): This secret weapon gives the chocolate coating a glossy finish and a firm snap once set. It also lowers the melting point, ensuring the bites stay soft enough to bite into straight from the freezer. If you’re avoiding coconut, try a neutral‑flavored oil, but you’ll miss the subtle tropical hint.
The Unexpected Star
Crushed Peanuts: Sprinkled on top, they add a crunchy contrast that mimics a toasted nut topping. If you skip them, you’ll lose that satisfying crunch that makes each bite multidimensional.
Sea Salt Flakes: A pinch of sea salt on the chocolate surface amplifies the sweetness and adds a sophisticated finish. Too much salt can overwhelm, so a light dusting is key.
Shredded Coconut: This optional garnish adds a chewy, aromatic layer that pairs beautifully with the coconut oil in the coating. It’s also a great way to introduce a tropical twist without overpowering the core flavors.
Everything's prepped? Good. Let’s get into the real action…
The Method — Step by Step
First, grab a large mixing bowl and whisk together the plain Greek yogurt, creamy peanut butter, honey, and vanilla extract until the mixture is smooth and glossy. This should take about two minutes of steady whisking; you’ll notice the blend thickening as the peanut butter emulsifies with the yogurt. If the mixture feels too loose, pop the bowl in the freezer for five minutes—this quick chill helps it hold shape later. Power transition: Now that the base is silky, we’re moving on to the chocolate coating.
While the base rests, melt the dark chocolate chips with the coconut oil in a microwave‑safe bowl. Heat in 30‑second bursts, stirring between each burst, until the chocolate is completely melted and shimmering. The mixture should look like liquid satin; any graininess means you need to stir a bit longer.
Kitchen Hack: Add a teaspoon of butter along with the coconut oil for an even glossier finish.Stir the mini chocolate chips into the melted dark chocolate, letting them melt just enough to create tiny pockets of molten chocolate. You’ll hear a faint sizzle as the chips meet the hot chocolate—That sizzle when it hits the pan? Absolute perfection. Keep stirring until the chips are fully incorporated and the mixture looks speckled with glossy flecks.
Line a baking sheet with parchment paper. Using a small cookie scoop or a teaspoon, drop rounded mounds of the yogurt‑peanut butter mixture onto the parchment, spacing them about an inch apart. Press each mound gently with the back of a spoon to flatten them into discs about half an inch thick.
Watch Out: If the discs are too thick, the chocolate coating won’t fully encase them, leading to a soggy bite.Place the tray of yogurt discs into the freezer for at least 20 minutes, or until they are firm to the touch. This quick chill creates a solid core that won’t melt when you dip them later. While they’re chilling, you can prep your garnish: crush a handful of peanuts, set sea salt flakes aside, and have shredded coconut ready.
Once the cores are firm, remove them from the freezer. Using a fork or a small spatula, dip each disc into the melted chocolate, ensuring the entire surface is coated. Let any excess chocolate drip back into the bowl—don’t over‑coat, or you’ll drown the yogurt center. Place the freshly coated bites back onto the parchment, still frozen, to let the chocolate set.
Immediately sprinkle each bite with a pinch of crushed peanuts, a few sea‑salt flakes, and a light dusting of shredded coconut. The cold surface helps the toppings adhere without sliding off.
Kitchen Hack: Use a fine-mesh sieve for the sea salt to get an even, delicate flake distribution.Return the fully assembled bites to the freezer for a final set—about 15 minutes. When you pull them out, the chocolate should be firm, glossy, and have a satisfying snap. The interior will stay cool and creamy, creating that perfect contrast we promised.
Transfer the finished bites to an airtight container or a zip‑top bag, separating layers with parchment to prevent sticking. Store them in the freezer for up to three weeks. When you’re ready to serve, let them sit at room temperature for two minutes so the chocolate softens just enough to bite through without shattering.
That’s it — you did it. But hold on, I’ve got a few more tricks that’ll take this to another level…
Insider Tricks for Flawless Results
The Temperature Rule Nobody Follows
Never underestimate the power of a cold bowl. When your yogurt mixture is chilled, it holds its shape better during the dip, preventing those dreaded “runny centers.” I once tried this at room temperature and ended up with a mushy mess that clumped together. The cold bowl trick is the reason my bites keep their perfect bite‑size geometry.
Why Your Nose Knows Best
Smell is your secret quality gauge. When the chocolate is melted, it should give off a deep, roasted cocoa aroma—if it smells “buttery” or “waxy,” you’ve overheated it. Trust that nose; it’s smarter than any thermometer. I’ve saved countless batches by stopping the microwave the moment the cocoa scent hits full‑blown.
The 5‑Minute Rest That Changes Everything
After coating, let the bites rest for exactly five minutes before the final freeze. This short pause lets the chocolate’s outer layer form a thin skin, which creates that satisfying snap. Skipping this step leads to a softer coating that can get gummy after a few days in the freezer.
Crunch Factor Calibration
Don’t just dump crushed peanuts on top—toast them lightly in a dry skillet for 2‑3 minutes. The toasting brings out a nutty aroma and a crunch that stays crisp even after freezing. I once served these bites with raw peanuts, and they turned soggy within minutes; the toast saved the day.
Portion Control (or Not)
If you’re serving a crowd, use a mini‑scoop (about ½ teaspoon) for the yogurt base. This ensures uniform size, which means even coating and consistent eating experience. I’ve seen parties where some bites were the size of golf balls and others the size of marbles—confusing for guests and disastrous for plating.
Creative Twists and Variations
This recipe is a playground. Here are some of my favorite ways to switch things up:
Matcha Madness
Swap half of the dark chocolate chips for matcha‑infused white chocolate. The bright green hue pairs surprisingly well with the peanut butter, and the subtle earthy flavor adds a new dimension. Perfect for spring gatherings.
Berry Burst
Fold in a tablespoon of freeze‑dried raspberry powder into the yogurt mixture. The tartness cuts through the sweetness, and the pink speckles make the bites look Instagram‑ready. Top with a single fresh raspberry for an extra pop.
Spicy Kick
Stir a pinch of cayenne pepper into the peanut butter before mixing. The heat sneaks up on the palate after the chocolate coating melts, creating a thrilling sweet‑heat combo. Serve at a summer BBQ for a surprise twist.
Nut‑Free Delight
Replace peanut butter with sunflower seed butter and crushed peanuts with toasted pumpkin seeds. The flavor remains rich, and the texture stays crunchy, making it safe for those with nut allergies without sacrificing enjoyment.
Vegan Version
Swap Greek yogurt for a thick coconut‑milk yogurt and use agave syrup instead of honey. The rest of the ingredients stay the same, and you still get that luscious creamy core with a vegan‑friendly label.
Double‑Chocolate Overload
Use 100% cacao chocolate for the coating and add cocoa nibs to the interior mix. This creates a deep, almost bittersweet bite that satisfies the most hardcore chocolate lovers. Pair with a glass of cold milk for balance.
Storing and Bringing It Back to Life
Fridge Storage
If you plan to eat the bites within 24‑48 hours, transfer them to an airtight container and store them in the refrigerator. They’ll stay soft and slightly less firm than freezer‑stored versions, making them easier to bite into without a pre‑room‑temp pause.
Freezer Friendly
For longer‑term storage, keep the bites in a single layer on a parchment‑lined tray, then cover the tray with plastic wrap before sealing it in a zip‑top bag. This prevents freezer burn and keeps each bite individually protected. They’ll stay fresh for up to three weeks.
Best Reheating Method
When you’re ready to serve, let the container sit at room temperature for two minutes, then pop the bites back into the freezer for a quick 5‑minute boost. If the chocolate feels too hard, a tiny splash of water (about a teaspoon) on the surface before the final freeze creates a gentle steam that revives the gloss without making the coating soggy.