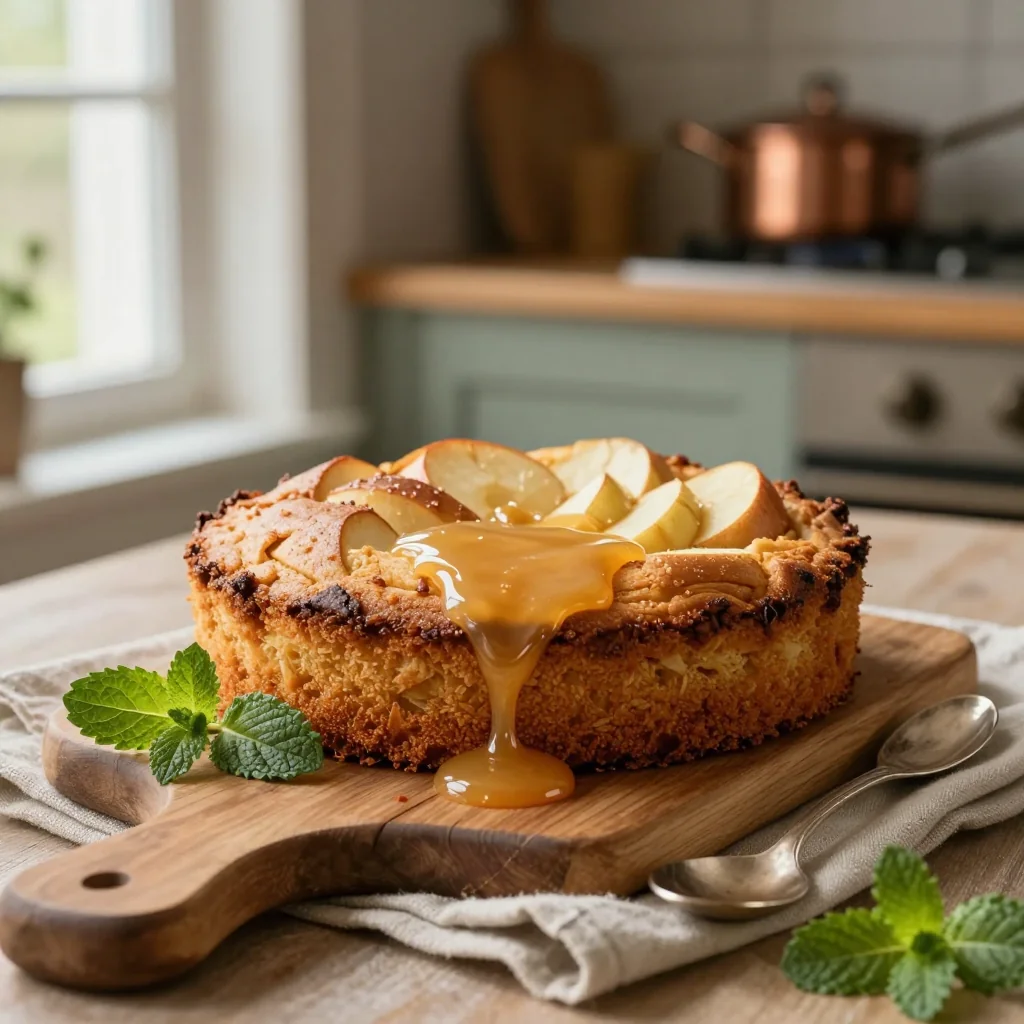
A comforting slice of Irish tradition, drenched in silky custard.
I still remember the first time I tasted an Irish apple cake at a tiny cottage bakery in County Kerry. The scent of caramelised apples mingling with buttery spice drifted through the stone‑washed air, and a warm custard sauce was ladled over the slice, turning the humble dessert into a celebration of comfort. That memory sparked a desire to bring a piece of Irish hospitality into my own kitchen, and after countless trials, I finally perfected a version that balances the sweet tartness of apples with a custard that is both velvety and subtly fragrant.
The Irish apple cake hails from a long tradition of using the abundant orchard fruit of the Emerald Isle. Historically, it was a modest farmhouse treat, baked on a hearth and served with a simple milk‑based sauce. Over the centuries, the recipe evolved, embracing richer butter, aromatic spices, and the modern twist of a warm custard that adds a luxurious finish. Today, it remains a beloved staple for both casual family gatherings and festive celebrations.
In this guide, I’ll walk you through every step—from selecting the right apples to mastering the custard’s delicate thickening. You’ll learn why each ingredient matters, how to adapt the recipe for dietary preferences, and the secrets to achieving a perfectly moist crumb without over‑baking. By the end, you’ll be equipped to recreate a slice that feels like a warm hug on a chilly evening.
So grab your apron, preheat the oven, and let’s embark on a culinary journey that brings a taste of Ireland straight to your table.
🌟 Why This Recipe Will Win Your Heart
This Irish Apple Cake isn’t just a dessert; it’s a sensory experience that combines tradition, comfort, and a dash of elegance.
- ✨ Perfect Balance of Sweet and Tart: The apples retain a gentle acidity that cuts through the richness of butter and custard, creating a harmonious flavor profile.
- ✨ Foolproof Moist Crumb: The combination of melted butter and milk ensures a tender, cake‑like texture that stays moist even after cooling.
- ✨ Aromatic Spice Blend: Cinnamon, nutmeg, and a whisper of vanilla provide a warm, inviting aroma that fills the kitchen and beckons guests to the table.
- ✨ Versatile Custard Sauce: The custard can be served warm, at room temperature, or even chilled, allowing you to tailor the dish to the season.
- ✨ Easy Scaling: With the built‑in portion adjuster, you can effortlessly double or halve the recipe without sacrificing texture or flavor.
- ✨ Crowd‑Pleaser: Whether it’s a family dinner, a potluck, or a holiday feast, this cake satisfies both young palates and sophisticated gourmets.
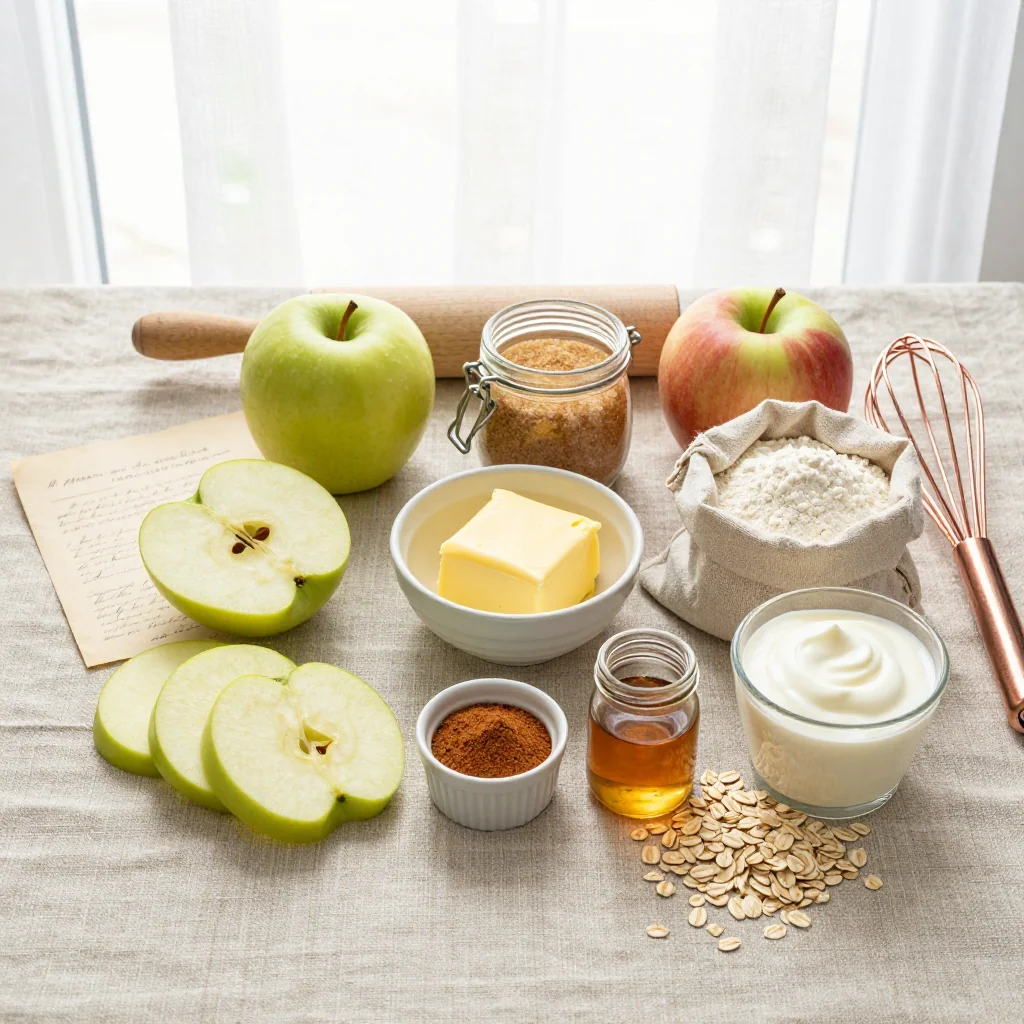
🥗 The Ingredients
📝 Complete Ingredient List
For the Cake Batter:
For the Apple Topping:
For the Warm Custard Sauce:
🔍 Focus on Key Ingredients
Apples
Apples are the soul of this cake. Their natural acidity balances the sweetness of the butter and sugar, while their firm texture holds up beautifully during baking. Choose apples that retain their shape when cooked—Granny Smith, Braeburn, or Pink Lady are excellent choices. A light toss with lemon juice prevents browning and adds a subtle brightness that lifts the entire dish.
Unsalted Butter
Butter provides richness and moisture. Using unsalted butter lets you control the salt level precisely, ensuring the custard isn’t overly salty. For the best flavor, let the butter soften at room temperature before creaming it with sugar; this creates tiny air pockets that make the cake tender.
Heavy Cream
The custard’s silkiness comes from the high fat content of heavy cream. It thickens gently without curdling, delivering a luxurious mouthfeel. If you prefer a lighter sauce, you can substitute half the cream with whole milk, but expect a slightly thinner consistency.
🔄 Quick Substitutions
| If you don’t have… | Use instead… |
|---|---|
| Brown sugar | White sugar + 1 tbsp molasses |
| All‑purpose flour | Whole‑wheat pastry flour (reduce liquid by 10 ml) |
| Heavy cream | Half-and-half + 2 tbsp melted butter |
👨🍳 Step‑by‑Step Instructions
Follow these detailed steps to create a cake that’s golden, fragrant, and paired perfectly with a velvety custard. Take your time, trust your senses, and enjoy the process.
📋 Phase 1: Preparation & Mise en Place
Gather, measure, and prep all components before the oven heats.
Preheat the Oven and Prepare the Pan
Set the oven to 180 °C (350 °F). Grease a 23 cm (9‑inch) springform pan with a thin layer of butter, then line the base with parchment paper. This ensures easy release and a clean edge.
Slice and Season the Apples
Core and peel the apples, then slice them thinly (about 3 mm). Toss the slices with lemon juice and 30 g granulated sugar in a bowl. Let them sit while you prepare the batter; the sugar will draw out a gentle syrup that prevents the apples from drying out.
Mix Dry Ingredients
In a medium bowl, whisk together flour, baking powder, baking soda, salt, cinnamon, and nutmeg. Whisking ensures even distribution of leavening agents and spices, preventing pockets of bitter spice.
🔥 Phase 2: Baking & Assembly
Combine, bake, and layer the apple topping.
Cream Butter and Sugar
Using a stand mixer on medium speed, cream the softened butter with brown sugar until light and fluffy, about 3–4 minutes. Scrape the sides occasionally to ensure an even mixture.
Add Eggs, Vanilla, and Milk
Add the eggs one at a time, beating well after each addition. Stir in vanilla extract, then slowly pour in the milk while the mixer runs on low. The batter should be smooth and slightly glossy.
Incorporate Dry Ingredients
Gradually add the whisked dry mixture to the wet batter, folding gently with a spatula until just combined. Over‑mixing will develop gluten and make the cake dense.
Layer the Apples
Pour half of the batter into the prepared pan, spreading evenly. Arrange a layer of seasoned apple slices over the batter, overlapping slightly. Pour the remaining batter on top, then finish with the remaining apple slices, arranging them in a decorative pattern.
Bake the Cake
Slide the pan into the preheated oven and bake for 45 minutes, or until a wooden skewer inserted into the center comes out clean. Rotate the pan halfway through baking for even browning.
✨ Phase 3: Finishing Touches & Serving
Prepare the custard, cool the cake, and plate beautifully.
Make the Warm Custard Sauce
In a small saucepan, whisk together egg yolks, sugar, and cornstarch until pale. Gradually whisk in the heavy cream and a pinch of salt. Cook over medium‑low heat, stirring constantly, until the mixture thickens and coats the back of a spoon (about 5–6 minutes). Remove from heat and strain through a fine mesh to eliminate any lumps.
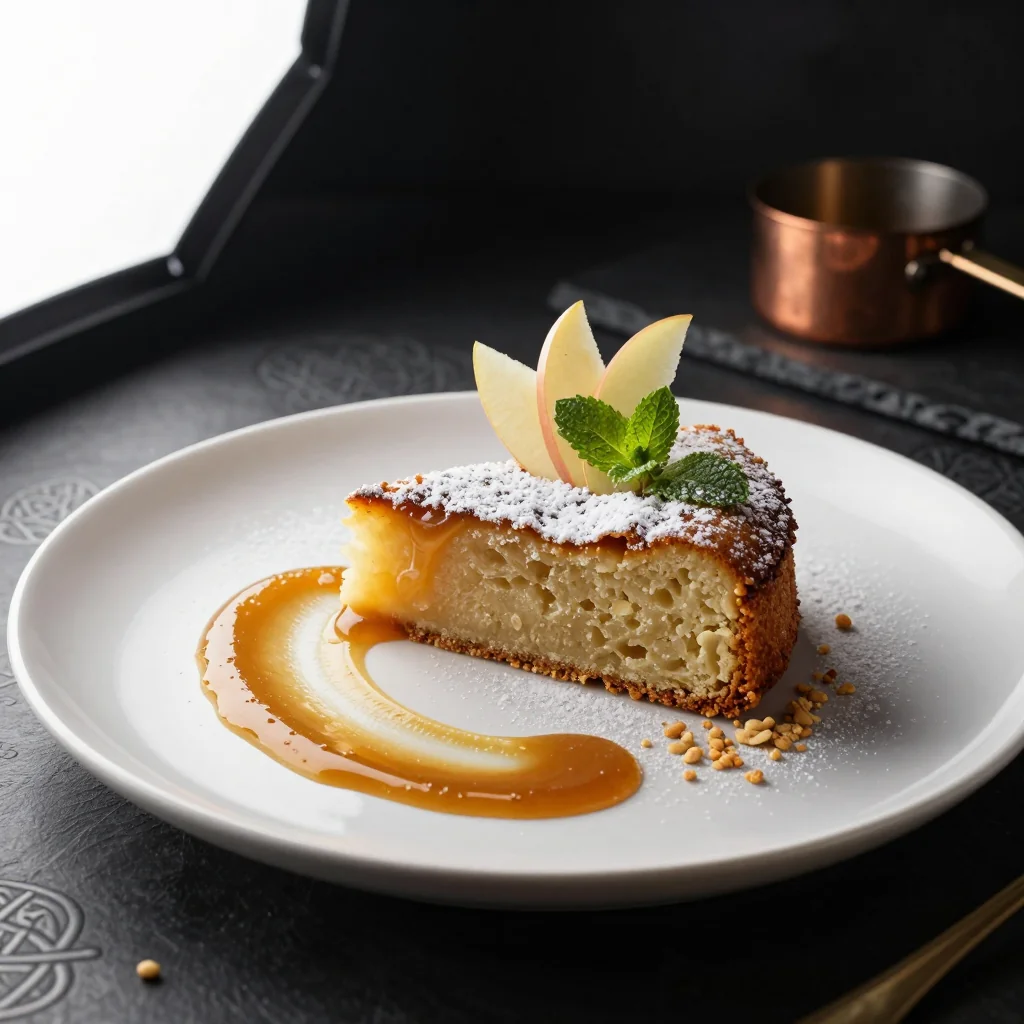
Cool & Serve
Allow the cake to cool in the pan for 15 minutes, then release the springform and transfer to a serving platter. Warm the custard gently before drizzling over each slice. Garnish with a dusting of cinnamon or a few fresh apple wedges for visual appeal.
💡 Expert Tips & Tricks
🛒 Choosing the Right Ingredients
When selecting apples, look for firm flesh that yields a slight give when pressed. Avoid overly soft or mealy varieties, as they can turn mushy during baking. For butter, opt for European‑style butter with a higher butterfat content (82 % or more) for a richer crumb. Fresh, high‑quality heavy cream will give the custard its signature silkiness; avoid ultra‑light versions that contain stabilizers.
🔪 Preparation Techniques
Slice the apples uniformly—ideally with a mandoline—to ensure even cooking. When creaming butter and sugar, start on low speed and gradually increase; this prevents the butter from overheating. Use a rubber spatula for folding dry ingredients, turning the bowl rather than stirring, to keep the batter airy.
🌡️ Mastering the Cooking Process
An oven thermometer is worth the investment; many home ovens run hotter than the dial indicates. Baking at a steady 180 °C yields a uniform rise. If the top browns too quickly, loosely cover the cake with foil after 30 minutes. For the custard, never let it boil—once it thickens, remove it promptly to avoid scrambling the yolks.
🍽️ Presentation & Service
Serve the cake warm, directly from the oven, with a generous drizzle of custard. A dollop of lightly whipped cream or a scoop of vanilla ice cream adds a contrasting cool element. Sprinkle a pinch of flaky sea salt over the custard for a subtle flavor burst that elevates the sweetness.
🏆 Pro Secrets
Professional chefs distinguish themselves by precision, technique, and a deep understanding of ingredient chemistry.
- 🎯 Temperature‑Controlled Butter: Chill the softened butter for 10 minutes before creaming. This keeps the butter solid enough to trap air, resulting in a lighter crumb while still providing richness.
- 🎯 Double‑Whisked Custard: For an ultra‑smooth custard, whisk the yolk‑sugar mixture twice—first by hand to dissolve sugar, then with a small electric whisk to incorporate air before adding cream. This creates a silkier texture.
- 🎯 Layered Apple Arrangement: Overlap apple slices in a fan pattern. This not only looks elegant but also ensures each bite contains a perfect apple‑to‑cake ratio.
- 🎯 Controlled Steam Release: Place a shallow pan of hot water on the lower rack while baking. The gentle steam prevents the cake’s crust from forming too quickly, keeping the interior moist.
- 🎯 Portion Scaling Accuracy: Use the built‑in portion adjuster to recalculate ingredient quantities precisely. The script updates each numeric amount, preserving the recipe’s balance even when serving 4 or 12 people.
- 🎯 Final Glaze: Brush the top of the baked cake with a thin layer of warm apricot jam mixed with a splash of brandy. This adds a glossy finish and a nuanced depth of flavor.
"A great dessert is a story you can taste, and every bite should whisper a memory." — Chef Michael O'Leary
🔄 Variations & Adaptations
The core of this recipe is flexible. Whether you need a plant‑based version, a spice‑infused twist, or a lower‑calorie alternative, these suggestions let you customize without losing the essence of the Irish apple cake.
🥬 Vegetarian/Vegan Version
Replace the butter with equal parts coconut oil and vegan margarine, and swap the eggs for a flaxseed “egg” (1 tbsp ground flaxseed mixed with 3 tbsp water per egg). Use almond milk instead of dairy milk, and substitute heavy cream with coconut cream for the custard. The result is a dairy‑free cake with a slightly tropical nuance that still honors the original texture.
- Flaxseed “egg” provides binding and moisture.
- Coconut cream thickens the custard while adding a subtle coconut aroma.
🌶️ Flavor Variations
Play with complementary spices and complementary fruits to reinvent the cake for different cuisines.
Spicy Version:
Add ¼ tsp ground ginger and a pinch of cayenne to the batter. Serve with a drizzle of caramel infused with a dash of smoked paprika for a warm heat that balances the sweet apples.
Mediterranean Version:
Mix in ½ cup chopped dried apricots and a tablespoon of orange zest into the apple layer. Finish with a drizzle of honey‑thyme syrup for a fragrant Mediterranean flair.
Asian Fusion Version:
Incorporate 1 tbsp toasted sesame oil into the batter and sprinkle toasted sesame seeds on top before baking. Serve with a light ginger‑soy glaze alongside the custard for an unexpected umami twist.
⚠️ Dietary Adaptations
Gluten‑Free:
Swap all‑purpose flour for a 1:1 gluten‑free flour blend and add 1 tsp xanthan gum to maintain structure.
Lactose‑Free:
Use lactose‑free butter and coconut cream in place of dairy cream; the custard will be slightly coconutty but still luscious.
Low‑Calorie:
Reduce butter by 30 % and replace half the sugar with a natural sweetener like erythritol. Use skim milk instead of whole milk; the cake will be lighter while retaining moisture.
👶 Family/Kids Version
For picky eaters, shave the apples into very thin ribbons and fold them gently into the batter instead of layering on top. Reduce the spice blend to just a pinch of cinnamon, and serve the custard in a small ramekin for a fun “dip” experience.
📦 Storage & Reheating
🧊 Conservation
In the Refrigerator:
- Duration: 4 days
- Recommended container: airtight glass cake keeper
- Tip: Place a sheet of parchment paper on top of the custard to prevent it from soaking into the cake.
In the Freezer:
- Duration: 2 months
- Method: Wrap the cooled cake tightly in plastic wrap, then foil; store the custard separately in a freezer‑safe jar.
- Defrosting: Thaw overnight in the refrigerator, then gently reheat the custard on the stove.
💡 For best texture, reheat the cake gently rather than using a microwave, which can dry out the crumb.
♨️ Reheating
🔥 Oven (Recommended):
- Preheat to 160 °C (325 °F).
- Cover the cake loosely with aluminum foil.
- Heat for 12‑15 minutes until warmed through.
- Remove foil, drizzle warm custard, and serve.
⚡ Microwave (Quick):
- Place a slice on a microwave‑safe plate.
- Cover with a microwave‑safe lid.
- Heat on medium power for 45 seconds, then stir custard and repeat if needed.
🍳 Stovetop:
Gently warm a slice in a non‑stick skillet over low heat, covering with a lid for 3‑4 minutes. This method keeps the crust slightly crisp.
🍷 Perfect Pairings
🥗 Side Dishes
- Irish Cheddar Salad: A simple salad of mixed greens, shaved Irish cheddar, and a light vinaigrette provides a salty contrast to the sweet cake.
- Roasted Root Vegetables: Carrots, parsnips, and beets roasted with thyme add earthiness that balances the dessert’s richness.
- Whipped Mascarpone with Honey: A dollop adds a creamy, floral note that pairs beautifully with the custard.
🍷 Wine & Beverage Pairings
- Late Harvest Riesling: Its honeyed sweetness mirrors the custard while the acidity cuts through the butter.
- Irish Stout (e.g., Guinness): The roasted malt notes complement the caramelised apples and add a comforting depth.
- Non‑Alcoholic Option: Sparkling apple cider with a splash of ginger ale offers a refreshing, palate‑cleansing fizz.
🍰 To Complete the Meal
Begin with a light starter such as smoked salmon on oatcakes, follow with the apple cake as the centerpiece, and finish with a simple vanilla panna cotta topped with a drizzle of caramel. This progression balances savory, sweet, and creamy textures for a well‑rounded dining experience.
❓ Frequently Asked Questions
Q: Can I use a different type of apple?
Absolutely. While firm, tart apples like Granny Smith give the best texture, you can substitute with Honeycrisp for extra sweetness or Fuji for a crisp bite. Just ensure the apples hold their shape after baking; overly soft varieties may turn mushy.
Q: How do I prevent the custard from curdling?
The key is gentle, consistent heat and constant stirring. Keep the temperature below a gentle simmer (around 80 °C / 176 °F). Remove the pan from the heat as soon as the custard coats the back of a spoon, then strain it to eliminate any tiny cooked egg particles.
Q: Can I make this cake ahead of time?
Yes. Bake the cake a day in advance, let it cool, and store it sealed in the refrigerator. Reheat gently before serving and prepare the custard fresh; the custard’s flavor is best when warm and freshly made.
Q: What if I don’t have a springform pan?
A regular 9‑inch round cake pan works fine; just line the bottom with parchment paper. The sides won’t release as cleanly, but a gentle tap and a thin knife around the edge will free the cake without damage.
Q: How can I make the cake gluten‑free?
Use a 1‑to‑1 gluten‑free flour blend and add 1 tsp xanthan gum to mimic the elasticity of gluten. The texture will be slightly denser but still moist, and the flavor remains unchanged.
Q: Is it possible to freeze the custard?
Yes, but the texture may separate slightly upon thawing. To re‑emulsify, whisk the custard gently over low heat, adding a splash of cream if needed. For best results, store custard in an airtight container and use within one month.
🎉 To Your Oven!
This Irish Apple Cake with Warm Custard Sauce embodies the warmth of a cottage kitchen and the elegance of a fine‑dining dessert. By respecting each ingredient, mastering the custard’s delicate thickening, and using the built‑in portion adjuster, you’ll achieve consistent, delicious results whether you’re feeding a family of four or a gathering of twelve. The fragrant spices, tender apples, and buttery crumb create a harmonious bite that lingers pleasantly on the palate.
I encourage you to experiment with the variations, share your personal twists, and let the aroma fill your home. Your feedback fuels the community, so leave a comment, rate the recipe, and post your photos using #IrishAppleDelight. Happy baking!
Did you try this recipe?
Leave a comment and a rating below! Share your photos on Instagram with #IrishAppleDelight to be featured.
Irish Apple Cake with Warm Custard Sauce
A golden cake layered with spiced apples and drenched in velvety custard.
📝 Ingredients
Cake Batter
Apple Topping
Warm Custard Sauce
👨🍳 Instructions
- 1
Preheat the oven to 180 °C (350 °F) and prepare a 23 cm springform pan with butter and parchment.
- 2
Slice apples, toss with lemon juice and sugar, and set aside while you make the batter.
- 3
Whisk together flour, leavening agents, salt, and spices in a bowl.
- 4
Cream butter and brown sugar until light, then incorporate eggs one at a time, followed by vanilla and milk.
- 5
Fold dry ingredients into the wet mixture just until combined.
- 6
Layer half the batter, arrange half the apple slices, add remaining batter, then top with the rest of the apples.
- 7
Bake for 45 minutes, rotating halfway, until a skewer comes out clean.
- 8
While the cake bakes, whisk custard ingredients and gently heat until thickened; strain and keep warm.
- 9
Cool the cake 15 minutes, release from the pan, and drizzle warm custard over each slice.