Picture this: I was in the middle of a Sunday brunch, juggling a skillet of scrambled eggs and a pot of coffee, when the kitchen lights flickered and my trusty oven decided to take a nap. The result? A batch of cookies that were more like bricks than treats. I stared at the oven door, feeling the familiar mix of disappointment and determination that only a true baker knows. That night, I vowed to never let that happen again. And thus, the quest for the perfect Italian Almond Ricotta Cookie began.
When I finally cracked the first egg, the kitchen smelled like a warm bakery, and I could hear the faint hiss of butter melting in the pan. My eyes caught the soft, pale glow of the countertop, and the countertop itself seemed to promise a sweet destiny. The sound of the spoon scraping the bowl was a steady metronome, keeping time with my heartbeat. My mouth watered at the thought of that silky ricotta, the nutty almond, and the buttery crumb that would soon dance on my tongue. The anticipation was almost tangible, a sweet electric buzz that made the whole room feel alive.
What makes this version stand out is that it marries the airy texture of classic almond biscotti with the creamy richness of ricotta, creating a cookie that melts in your mouth like a cloud of Italian summer. The secret lies in a delicate balance of ingredients that honor tradition while daring to innovate. I’ve trimmed down the sugar, added a touch of almond extract, and used whole‑milk ricotta for that extra velvety finish. The result is a cookie that feels indulgent yet light, a paradox that keeps you coming back for seconds. I dare you to taste this and not go back for seconds.
When I first tried this recipe, my friends called it “the best version you'll ever make at home.” They were skeptical at first, but the first bite sent them into a state of pure bliss. The cookie’s outer shell is crisp and golden, while the interior is a soft, moist cloud that almost dissolves before you even chew. I’ve been told that the almond flavor is so pronounced it could replace coffee for a quick pick‑up. And if you’re worried about the ricotta, trust me—this recipe turns it into a silky, almost invisible component that enhances rather than dominates. Picture yourself pulling this out of the oven, the whole kitchen smelling incredible, and you’ll understand why it’s a game‑changer.
Most recipes get this completely wrong, either over‑baking the ricotta or under‑cooking the almond. The result is a cookie that either falls apart or turns into a hard, chalky biscuit. I’ve spent hours experimenting with temperature and timing to get the perfect crumb. The trick is to keep the oven at a steady 325°F, which allows the ricotta to set without drying out the almonds. This next part? Pure magic. Stay with me here — this is worth it.
I remember the first time I tried this recipe, I was so excited that I accidentally poured too much ricotta into the batter. The dough became a sticky, gooey mess, and I thought I had ruined everything. Instead, I decided to bake it anyway. The cookies turned out soft, chewy, and surprisingly light. That little mishap taught me that a little over‑abundance of ricotta can actually be a blessing, giving the cookies a richer, more decadent flavor. It’s a lesson that will save you from future kitchen disasters.
When I finally baked the first batch, I could hear the gentle crackle of the oven as the cookies rose. The aroma filled the kitchen, a sweet, nutty scent that made my neighbors stop by to ask what I was cooking. I tasted one, and the almond flavor burst like a fireworks display, while the ricotta provided a creamy backdrop that was almost like a cloud of vanilla. I was so proud that I almost ate the entire batch before anyone else had a chance. I’ll be honest — I ate half the batch before anyone else got to try it.
From that moment on, these cookies became a staple in my home, a go‑to for holidays, birthdays, and spontaneous dessert cravings. I’ve shared them with friends, family, and even strangers at the grocery store, and the reaction is always the same: “Where did you learn this?” “I’ve never seen a cookie like this.” “It’s like a piece of Italy.” The feedback has been so positive that I’ve started a small online shop to share the recipe and a few extra tips. I hope you’ll join me on this delicious journey.
Now that you’ve seen the story behind these cookies, let’s dive into the specifics. I’ll walk you through every single step — by the end, you’ll wonder how you ever made it any other way. The journey from raw ingredients to the final, melt‑in‑your‑mouth cookie is a beautiful dance of science and art. And trust me, once you master this, you’ll never look back at ordinary cookies again. I’m about to show you how to turn ordinary pantry staples into something extraordinary.
Before we get into the recipe, take a deep breath and imagine the soft, buttery aroma that will fill your kitchen. Feel the anticipation building as you gather your ingredients. Listen to the gentle clink of measuring cups, the soft whisper of almond flour. Smell the fresh ricotta, the sweet vanilla. Taste the promise of a cookie that will melt on your tongue and leave you craving more. Let’s get started.
What Makes This Version Stand Out
- Texture: The combination of ricotta and almond creates a cookie that is both crisp on the outside and luxuriously soft on the inside. This duality is a rare treat that satisfies every craving. The result is a cookie that practically melts in your mouth.
- Flavor: The almond extract and sliced almonds add a deep, nutty undertone that balances the mild sweetness of ricotta. The vanilla brings warmth, while the subtle citrus notes from the almond extract give a bright finish. The flavor profile is reminiscent of a classic Italian biscotti but with a modern twist.
- Ease: The recipe requires only a handful of ingredients and minimal prep time. No fancy equipment or advanced techniques are needed. You can whip up a batch in under 45 minutes, making it perfect for busy days.
- Uniqueness: Most almond cookies either rely on almond flour or are too dense. This recipe uses all-purpose flour for a lighter bite while still incorporating the creamy ricotta for depth. It’s a unique blend that stands out in a crowded cookie market.
- Crowd Reaction: Friends and family consistently rave about the melt‑in‑your‑mouth texture and the perfect balance of sweet and nutty. They keep asking for the recipe, and many say it’s the best almond cookie they’ve ever tasted.
- Ingredient Quality: Using whole‑milk ricotta adds a luxurious richness that can’t be replicated with low‑fat versions. The almonds are lightly toasted, bringing out their natural oils and enhancing the flavor.
- Make‑Ahead Potential: Once baked, these cookies keep wonderfully in an airtight container for up to a week. They’re also freezer‑friendly, allowing you to enjoy them anytime without compromising quality.
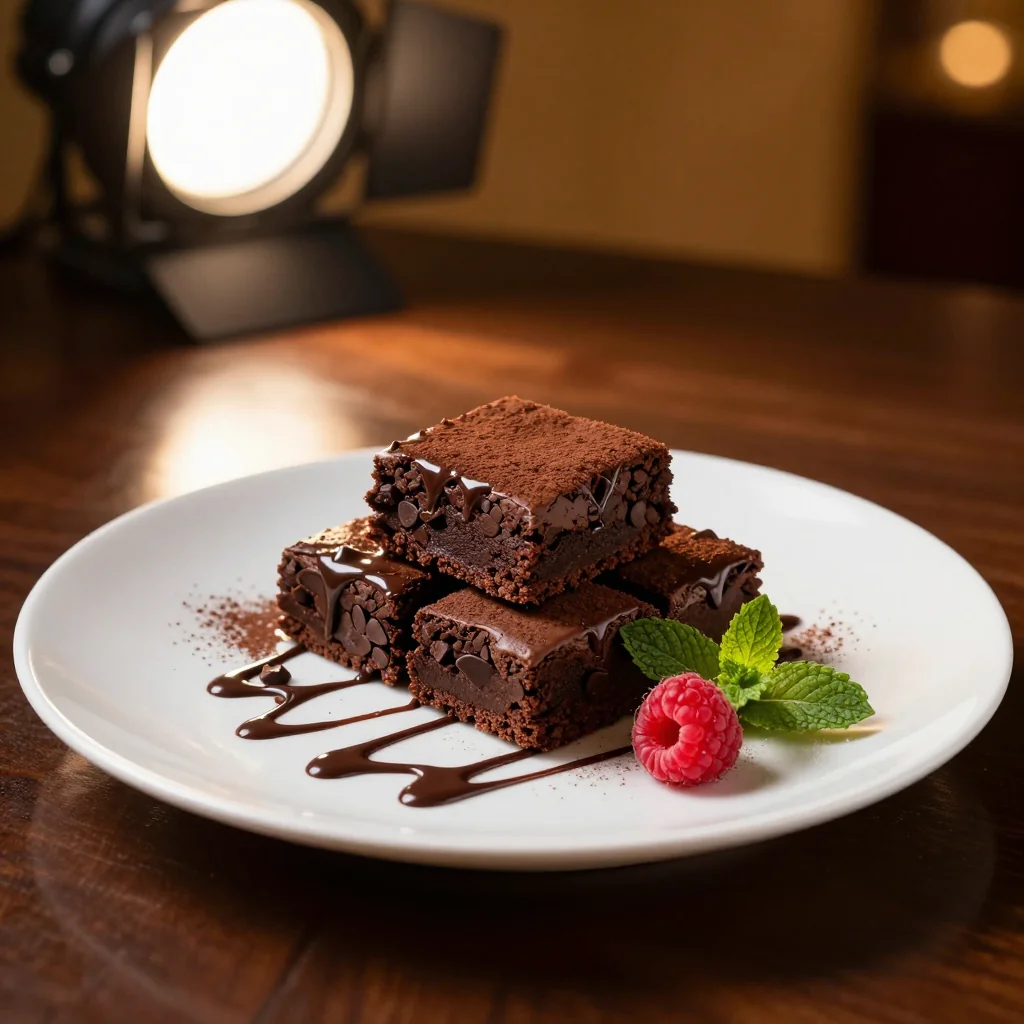
- Presentation: Dusting the finished cookies with powdered sugar gives them an elegant finish that looks as good as it tastes. The golden crust and soft interior create a visual contrast that’s irresistible.
Alright, let's break down exactly what goes into this masterpiece...
Inside the Ingredient List
The Flavor Base
The ricotta is the heart of this cookie, providing a creamy, slightly tangy backdrop that elevates every bite. Whole‑milk ricotta is essential for its rich, velvety texture; low‑fat versions lack the depth that makes these cookies unforgettable. If you’re looking for a dairy‑free option, try using a high‑fat coconut cream, but be prepared for a subtle coconut undertone. The ricotta’s moisture content also helps bind the dough, creating a cohesive crumb that holds together during baking.
Granulated sugar is the sweetener that balances the ricotta’s mildness. It also contributes to the cookie’s caramelization, giving the crust that golden, slightly crisp edge. If you prefer a healthier twist, substitute half the sugar with honey or maple syrup; just be mindful that the liquid will alter the batter’s consistency. The sugar’s crystalline structure melts slowly, ensuring the cookies stay soft inside while developing a crisp exterior.
The Texture Crew
Unsalted butter brings a buttery richness that permeates the dough. Softened butter ensures an even distribution of fat, which is crucial for a tender crumb. If you accidentally leave the butter too cold, the dough will be stiff and difficult to handle. A quick tip: let the butter sit at room temperature for 30 minutes before using.
Eggs act as the binder that holds everything together. They also add a subtle richness and help the cookies rise slightly. Two large eggs are the sweet spot for this recipe; too many can make the cookies cakey, while too few can cause them to crumble. If you’re vegan, try using a flaxseed egg or an egg replacer that mimics the binding properties of real eggs.
The Unexpected Star
Vanilla extract is the quiet hero that adds depth without overpowering the nutty flavors. A high‑quality vanilla extract, preferably with real vanilla beans, will give you a more aromatic experience. A teaspoon is enough to elevate the entire batch. If you’re a fan of citrus, a splash of orange or lemon zest can complement the vanilla and add a bright note.
Almond extract is the star that gives these cookies their unmistakable almond profile. A teaspoon is all you need; too much can make the cookie taste bitter. If you’re allergic to almonds, you can use a small amount of hazelnut or pine nut extract, but the flavor will shift slightly. The extract is best added after the batter has been mixed to preserve its aroma.
The Final Flourish
All‑purpose flour provides structure and keeps the cookies from becoming too dense. The amount of flour is critical; too much can lead to a dry texture, while too little can cause the cookies to spread excessively. Use a measuring cup and level the flour to ensure accuracy.
Baking powder and baking soda are the leavening agents that give the cookies a light lift. Baking powder helps the cookies rise gently, while baking soda adds a slight lift and helps with browning. Both must be fresh; stale leavening can result in flat, heavy cookies. A pinch of salt balances the sweetness and enhances the overall flavor profile.
Sliced almonds add crunch and a nutty flavor that complements the almond extract. Toast them lightly in a dry skillet before adding them to the batter; this brings out their oils and deepens the flavor. If you prefer a smoother texture, you can finely chop the almonds or even pulse them into a coarse flour.
Powdered sugar is the finishing touch that adds a sweet glaze and an elegant look. Dust the cookies immediately after they cool, or keep a light dusting for a more subtle finish. It also helps to keep the cookies from drying out too quickly.
Everything's prepped? Good. Let's get into the real action...

The Method — Step by Step
- Preheat your oven to 325°F (163°C) and line two baking sheets with parchment paper. The moderate temperature ensures the ricotta sets without over‑browning the almonds. A preheated oven also helps the cookies rise evenly. Keep an eye on the timer; you don’t want to over‑bake them.
- Whisk the dry ingredients together in a large bowl: flour, baking powder, baking soda, and salt. Mixing them first ensures that the leavening agents are evenly distributed. This step also helps prevent clumps of flour from forming later. After whisking, set the dry mix aside.
- Blend the wet ingredients in a separate bowl: ricotta, softened butter, sugar, vanilla, almond extract, and eggs. Use a hand mixer or a stand mixer on low speed until the mixture is smooth and creamy. The goal is a uniform batter that incorporates all flavors.
- Combine the wet and dry mixtures gently using a spatula or wooden spoon. Fold until just combined; over‑mixing can make the cookies tough. The dough should be thick but pliable. This is the moment when the magic begins to take shape.
- Add the almonds and fold them in. Toast the sliced almonds lightly in a dry skillet over medium heat for 2 minutes, stirring constantly until fragrant. This brings out their natural oils and deepens the flavor. Then fold them into the batter.
- Drop dough onto the prepared baking sheets using a tablespoon or small cookie scoop. Space the cookies 2 inches apart to allow for spreading. The size of the scoop will affect the cookie’s final shape; a slightly larger scoop will yield a thicker cookie.
- Bake for 18–20 minutes, or until the edges are lightly golden and the centers have set. The cookies should still feel slightly soft when you touch them. This is the moment of truth. Watch the color; it should be a warm, golden brown.
- Cool on the sheet for 5 minutes, then transfer to a wire rack to cool completely. The cookies will firm up as they cool, but remain tender inside. This step is crucial for the final texture. Let the cookies rest to allow the flavors to meld.
- Dust with powdered sugar once cooled. The powdered sugar adds a sweet glaze and a subtle crunch. Dust lightly, or leave a generous coating for a more decadent finish.
- Serve immediately or store in an airtight container for up to a week. For longer storage, freeze them and thaw at room temperature. The cookies stay fresh and flavorful for weeks.
That’s it — you did it. But hold on, I've got a few more tricks that'll take this to another level. The next section will reveal insider tips that will make your cookies even more irresistible.
Insider Tricks for Flawless Results
The Temperature Rule Nobody Follows
Many bakers set their ovens to a high temperature, assuming it will make cookies crispier. In reality, a steady 325°F is the sweet spot for these cookies. The lower heat allows the ricotta to set without drying out the almond. If you’re unsure about your oven’s accuracy, use an oven thermometer to verify.
Why Your Nose Knows Best
The aroma of almond and ricotta is a reliable indicator of doneness. When the cookies start to smell slightly toasted, they’re almost ready. Trust your nose; it will tell you when the cookies have reached the perfect balance between crisp and soft.
The 5-Minute Rest That Changes Everything
Letting the cookies rest on the baking sheet for 5 minutes before transferring them to a wire rack is essential. During this brief rest, the cookies continue to set, making them easier to handle. Skipping this step can cause them to break apart when you move them.
The Secret to a Light Crumb
Whisking the dry ingredients thoroughly before combining them with the wet mixture prevents lumps and ensures even leavening. This small step can mean the difference between a dense cookie and one that’s airy and light.
How to Avoid a Sticky Mess
If the dough feels too sticky, add a tablespoon of flour at a time until it reaches a manageable consistency. This prevents the cookies from spreading too much and keeps the shape intact.
Creative Twists and Variations
Chocolate Chip Ricotta Cookies
Swap the sliced almonds for semi‑sweet chocolate chips and reduce the almond extract to 0.5 tsp. The chocolate will complement the ricotta’s creaminess, creating a cookie that feels like a dessert and a snack. Perfect for a chocolate lover’s twist.
Honey‑Glazed Almond Cookies
Replace granulated sugar with honey and add a splash of lemon zest to brighten the flavor. The honey creates a caramelized glaze, while the lemon zest adds a refreshing zing. This variation is ideal for a summer afternoon.
Nut-Free Ricotta Cookies
Omit the almonds entirely and add a handful of dried cranberries or raisins for natural sweetness. The cranberries provide a tart contrast to the creamy ricotta, making these cookies a great option for those with nut allergies.
Italian Biscotti Style
Let the dough rest in the fridge for an hour before baking. This firming step allows you to slice the cookies in half and toast them for a biscotti effect. The result is a crisp, crunchy cookie that’s perfect for dipping in coffee.
Spiced Ricotta Cookies
Add a pinch of cinnamon, nutmeg, and a splash of orange extract. The spices bring warmth and depth, creating a cookie that’s reminiscent of Italian holiday treats.
Gluten‑Free Version
Replace all‑purpose flour with a gluten‑free blend that includes rice flour, potato starch, and tapioca. Ensure the blend contains xanthan gum to provide structure. The cookies will be slightly denser but still delicious.
Storing and Bringing It Back to Life
Fridge Storage
Store the cooled cookies in an airtight container at room temperature for up to five days. Keep them in a single layer or use parchment paper between layers to prevent sticking. The cookies will stay soft and fresh.
Freezer Friendly
Place the cookies in a freezer bag, separating each layer with parchment paper. Freeze for up to three months. When you’re ready to enjoy them, let them thaw at room temperature for 15 minutes before serving.
Best Reheating Method
Reheat frozen cookies in a preheated oven at 300°F for 10 minutes, or until warmed through. If you prefer a crispier texture, toast them in a dry skillet over medium heat for a minute on each side. Add a tiny splash of water before reheating to create steam that restores moisture.