Picture this: I’m in my tiny kitchen, the clock ticking like a metronome, and I’ve just realized I’ve completely run out of butter for my toast. Panic? Absolutely. But then, out of the blue, a rogue pear rolls off the counter, lands with a soft thud, and I swear I heard it whisper, “Make jam.” That moment of desperation turned into a culinary epiphany, and I’m about to drag you along on the wild ride that birthed the most unforgettable rosemary‑and‑pear jam you’ll ever taste. I dare you to taste this and not go back for seconds, because once the sweet‑savory symphony hits your palate, there’s no turning back.
The kitchen transformed into a sensory orchestra. The pear’s perfume, faintly floral, mingled with the sharp, citrusy zing of lemon, while the rosemary released piney, almost resinous notes that cut through the sweetness like a perfectly timed drum solo. I could hear the gentle sizzle as the fruit hit the pan, a sound that reminded me of rain on a tin roof—soft, steady, promising. My fingertips felt the heat radiating from the pot, the subtle tremor of the simmering mixture, while the air filled with a scent so intoxicating it could have been bottled and sold as “autumn in a jar.”
Most jam recipes treat fruit as the sole star, relegating herbs to a cameo or, worse, ignoring them entirely. Not this one. This version stands out because it balances the natural sugar of Bartlett pears with the earthy, aromatic punch of fresh rosemary, creating a spread that’s simultaneously sweet, herbaceous, and just a touch tangy. It’s the culinary equivalent of a well‑written novel—layers of flavor that reveal new secrets with every bite. And yes, I’m being dramatic, but this is hands down the best version you’ll ever make at home.
Now, I’m about to spill the beans—or rather, the pears—about a technique that will make your jam glossy, thick, and perfectly set without the dreaded runny mess. Hint: it involves a brief, high‑heat finish that caramelizes the sugars just enough to give the jam a seductive sheen. Okay, ready for the game‑changer? Let me walk you through every single step — by the end, you’ll wonder how you ever made it any other way.
What Makes This Version Stand Out
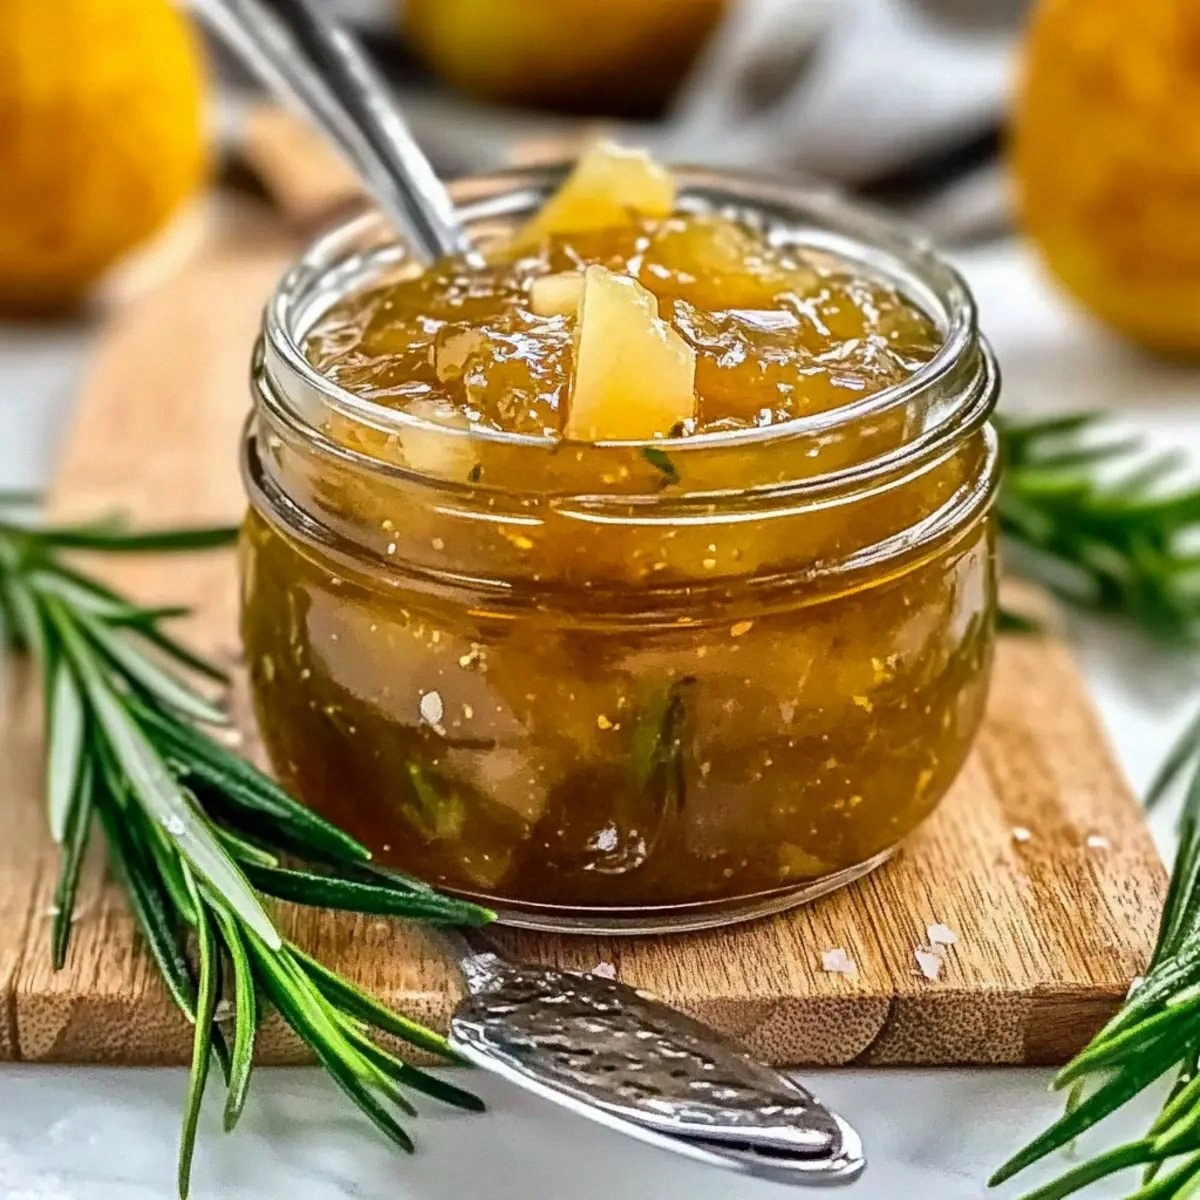
- Flavor Harmony: The sweet pear and piney rosemary don’t clash; they flirt, creating a balanced profile that’s both comforting and exciting. The lemon juice adds a bright counterpoint, preventing the jam from becoming cloyingly sweet.
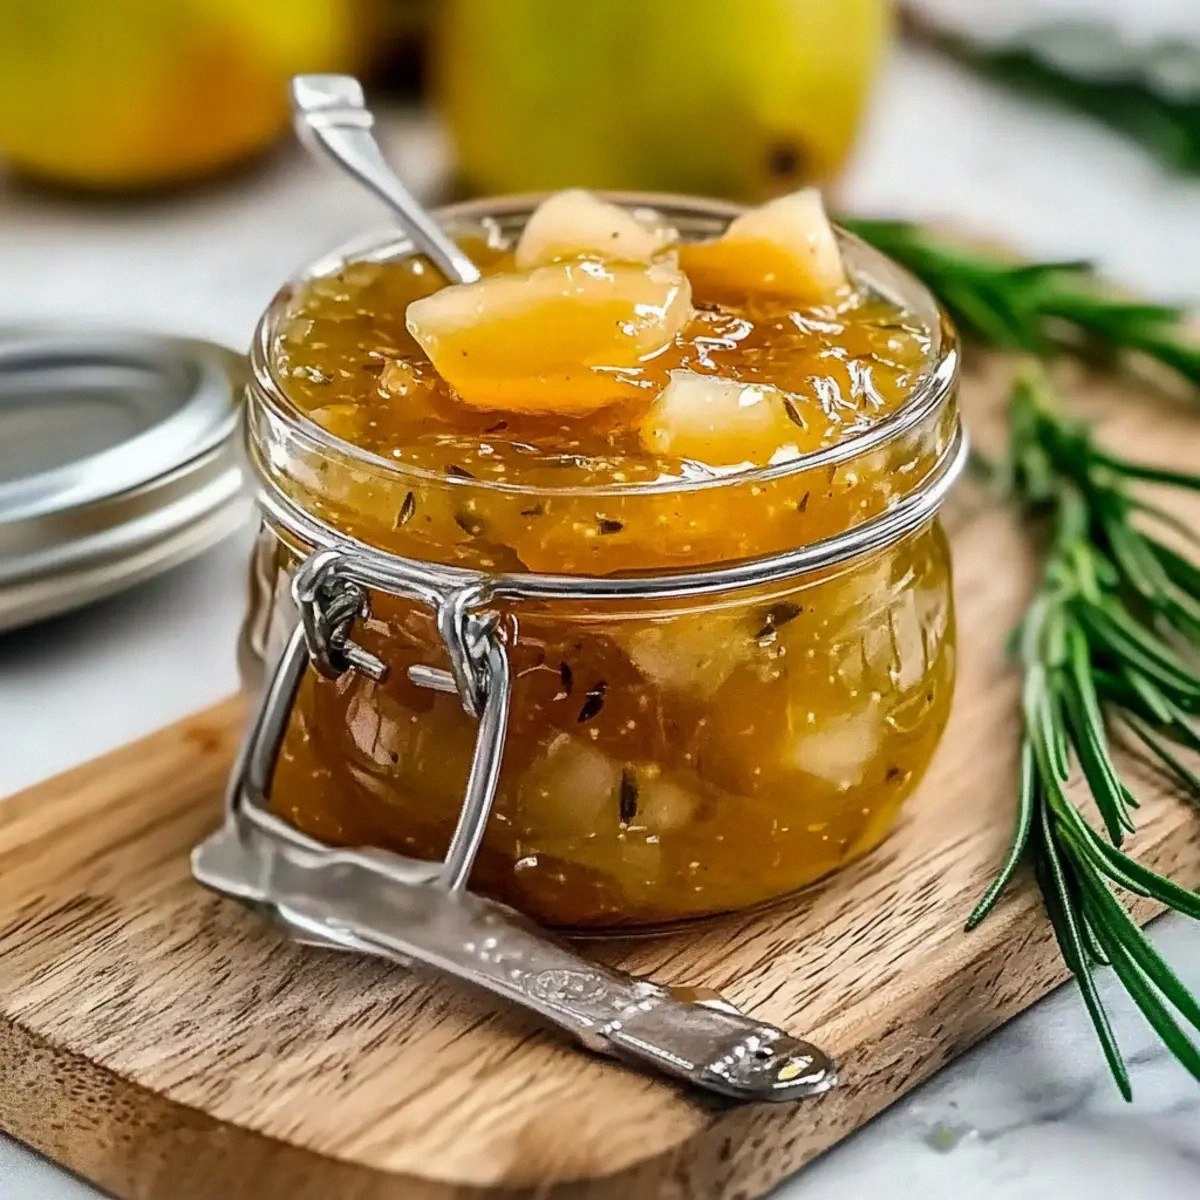
- Texture Perfection: By cooking the pears just long enough to break down but not dissolve completely, you get a spread that’s velvety with tiny, delightful fruit pieces—think silk with a whisper of crunch.
- Simplicity: Only four ingredients, yet the result feels like a gourmet masterpiece. No fancy equipment, just a sturdy pot and a wooden spoon, making it accessible to anyone who can boil water.
- Unique Twist: Most fruit jams skip herbs. Adding rosemary introduces a savory depth that makes this jam a star on cheese boards, toast, and even grilled meats. It’s the culinary equivalent of adding a splash of bourbon to a classic cocktail.
- Crowd Reaction: Serve it at a gathering and watch faces light up. People will ask, “What’s in this?” and you’ll get to brag about your herb‑infused genius. I’ll be honest — I ate half the batch before anyone else got to try it.
- Ingredient Quality: Using ripe Bartlett pears ensures natural sweetness, while fresh rosemary provides a bright, aromatic punch. The lemon juice preserves color and adds a zing that keeps the palate from getting bored.
- Cooking Method: A low‑and‑slow simmer followed by a quick high‑heat finish locks in flavor and creates that glossy finish that makes the jam look as good as it tastes.
- Make‑Ahead Potential: This jam keeps beautifully in the fridge for weeks and freezes like a charm, so you can prep a big batch and enjoy it all season long.
Inside the Ingredient List
The Flavor Base
3 cups ripe Bartlett pears, chopped – These pears are the sweet backbone of the jam. Their high natural sugar content means you won’t need a ton of added sugar, and their flesh breaks down into a buttery texture when cooked. If you skip them or use a firmer variety like Bosc, you’ll end up with a jam that’s too stiff and lacks that melt‑in‑your‑mouth quality. For the best results, choose pears that yield slightly to pressure but aren’t mushy.
The Sweetener & Brightener
1 cup granulated sugar – Sugar does more than sweeten; it helps the jam set by interacting with the fruit’s pectin. Using granulated sugar ensures an even dissolve, preventing grainy texture. If you’re watching sugar, you can reduce it to ¾ cup, but expect a softer set and a slightly sharper fruit flavor. I’ve tried honey once; it added a floral note but made the jam a bit too runny.
2 tablespoons fresh lemon juice – Lemon juice is the unsung hero that balances the jam’s sweetness and activates the pectin, giving the jam its glossy finish. It also prevents the pears from oxidizing and turning brown during cooking. If you’re out of lemons, a splash of apple cider vinegar works, but the flavor will shift subtly toward tangy.
The Unexpected Star
2 tablespoons fresh rosemary – Fresh rosemary brings an herbaceous depth that turns a simple fruit spread into a sophisticated condiment. Its piney, slightly resinous notes contrast beautifully with the pear’s mellow sweetness. If you accidentally use dried rosemary, the flavor will be overpoweringly bitter; fresh is essential for that bright, clean herb punch.
Everything's prepped? Good. Let's get into the real action...
The Method — Step by Step
First, gather a heavy‑bottomed saucepan—preferably stainless steel—to ensure even heat distribution. Add the chopped pears, granulated sugar, and lemon juice. Stir gently until the sugar dissolves, then turn the heat to medium. That sizzle when it hits the pan? Absolute perfection. You’ll notice the mixture start to bubble lightly, releasing a fragrant steam that smells like a fall orchard.
Bring the mixture to a gentle boil, then reduce to a simmer. This is the moment where patience pays off. Let it simmer for about 15‑20 minutes, stirring occasionally with a wooden spoon. You’ll see the pears soften and the liquid thicken; the edges will start pulling away from the sides of the pan—a visual cue that the jam is approaching the right consistency.
Kitchen Hack: Toss a pinch of sea salt into the simmering mixture; it amplifies the fruit’s natural sweetness without making the jam salty.Once the pears are tender, it’s time to introduce the rosemary. Strip the needles from the stems, give them a quick chop, and sprinkle them into the pot. Stir well, allowing the rosemary to release its essential oils. The aroma will shift dramatically, turning from fruity to herbaceous in seconds. If you’re a fan of bold flavors, let the rosemary steep a minute longer; otherwise, a quick 30‑second infusion keeps the herb from dominating.
Now, the secret high‑heat finish. Increase the heat to medium‑high and let the jam bubble vigorously for 3‑5 minutes. Watch closely: the mixture will thicken rapidly, and you’ll see a glossy sheen form on the surface. This step is pure magic; it caramelizes a tiny fraction of the sugars, giving the jam a deep, amber glow. Watch out: If the heat is too high, the sugars can burn, leaving a bitter aftertaste.
Watch Out: Stir constantly during this high‑heat stage; the jam can scorch in seconds, and a burnt bottom ruins the whole batch.When the jam reaches the desired thickness—test it by placing a small spoonful on a chilled plate; if it firms up after a minute, it’s ready. This is the moment of truth. If it’s still runny, keep it on the heat for another minute, but remember that it will thicken further as it cools.
Remove the pot from the heat and let the jam sit for a minute to settle. Then, carefully ladle it into sterilized glass jars, leaving about a ¼‑inch headspace. Seal the jars while the jam is still warm; the residual heat will create a gentle vacuum seal, extending shelf life.
Allow the jars to cool completely at room temperature. You’ll hear a faint “pop” as each lid seals—think of it as the jam giving you a tiny applause. Once cooled, store the jars in the refrigerator for up to four weeks, or freeze for longer storage.
And now the fun part: tasting! Spread a generous dollop on warm toast, pair it with creamy goat cheese on a cracker, or swirl it into a vinaigrette for a roasted vegetable glaze. The flavors will dance on your tongue, each bite revealing a new layer. Picture yourself pulling this out of the oven, the whole kitchen smelling incredible, and you’re the hero of the snack table.
That's it — you did it. But hold on, I've got a few more tricks that'll take this to another level...
Insider Tricks for Flawless Results
The Temperature Rule Nobody Follows
Most home cooks think “low and slow” is the only way to jam, but the final high‑heat burst is what gives the jam its glossy finish. Keep a candy thermometer handy; aim for 105 °C (221 °F) during the finish. This precise temperature ensures the pectin sets perfectly without over‑cooking the rosemary.
Why Your Nose Knows Best
Never rely solely on a timer. Trust the aroma. When the rosemary’s piney scent becomes more mellow and the jam smells caramel‑sweet, you’re at the sweet spot. I once let a batch go a minute too long and ended up with a slightly bitter edge—my nose saved me from a disaster.
The 5‑Minute Rest That Changes Everything
After you’ve ladled the jam into jars, let them sit uncovered for five minutes before sealing. This brief pause lets any trapped steam escape, preventing a cloudy lid seal. It also allows the jam to settle, giving a smoother texture.
Stirring with the Right Tool
Use a wooden spoon, not a metal whisk. The wood’s gentle flex prevents bruising the delicate fruit pieces, while a whisk can break them down too much, turning your jam into a puree. A wooden spoon also helps you feel the thickness as you stir.
Double‑Check the Seal
After the jars have cooled, press the center of each lid. If it doesn’t flex up and down, the seal is good. If it pops, refrigerate the jar and use it within a week. This simple test saves you from a future jam‑filled disappointment.
Creative Twists and Variations
This recipe is a playground. Here are some of my favorite ways to switch things up:
Spiced Autumn
Swap half the rosemary for a pinch of ground cinnamon and a dash of nutmeg. The warm spices echo the pears’ natural sweetness, making the jam perfect for holiday cheese boards.
Savory Boost
Add a tablespoon of balsamic reduction during the high‑heat finish. The acidity deepens the flavor profile, turning the jam into a brilliant glaze for pork tenderloin or roasted carrots.
Citrus Zing
Replace lemon juice with orange zest and a splash of fresh orange juice. The citrus brightens the jam, giving it a sunny, spring‑time vibe that pairs wonderfully with ricotta on crostini.
Herb Medley
Combine rosemary with a teaspoon of finely chopped thyme for an earthy, herbaceous twist. The thyme adds a subtle, lemony undertone that complements the pears without overwhelming the rosemary.
Spicy Kick
Stir in a finely minced red chili or a pinch of cayenne during the simmer. The heat creates a tantalizing contrast to the jam’s sweetness, ideal for adventurous palates and great on grilled chicken.
Nutty Crunch
Fold in toasted chopped walnuts or pistachios just before the jam cools. The nuts add texture and a buttery richness that elevates the spread from simple to spectacular.
Storing and Bringing It Back to Life
Fridge Storage
Keep the sealed jars in the refrigerator for up to four weeks. Use a clean spoon each time to avoid contamination. The jam may thicken slightly as it cools; let it sit at room temperature for a few minutes before spreading for easier handling.
Freezer Friendly
Transfer the jam to freezer‑safe containers or zip‑lock bags, leaving a small headspace for expansion. It will keep for up to six months. When you’re ready to use it, thaw in the refrigerator overnight.
Best Reheating Method
Place the desired amount in a small saucepan over low heat, adding a splash of water—just enough to steam the jam back to a silky consistency. Stir gently; the water prevents the jam from scorching and revives that glossy sheen.